9
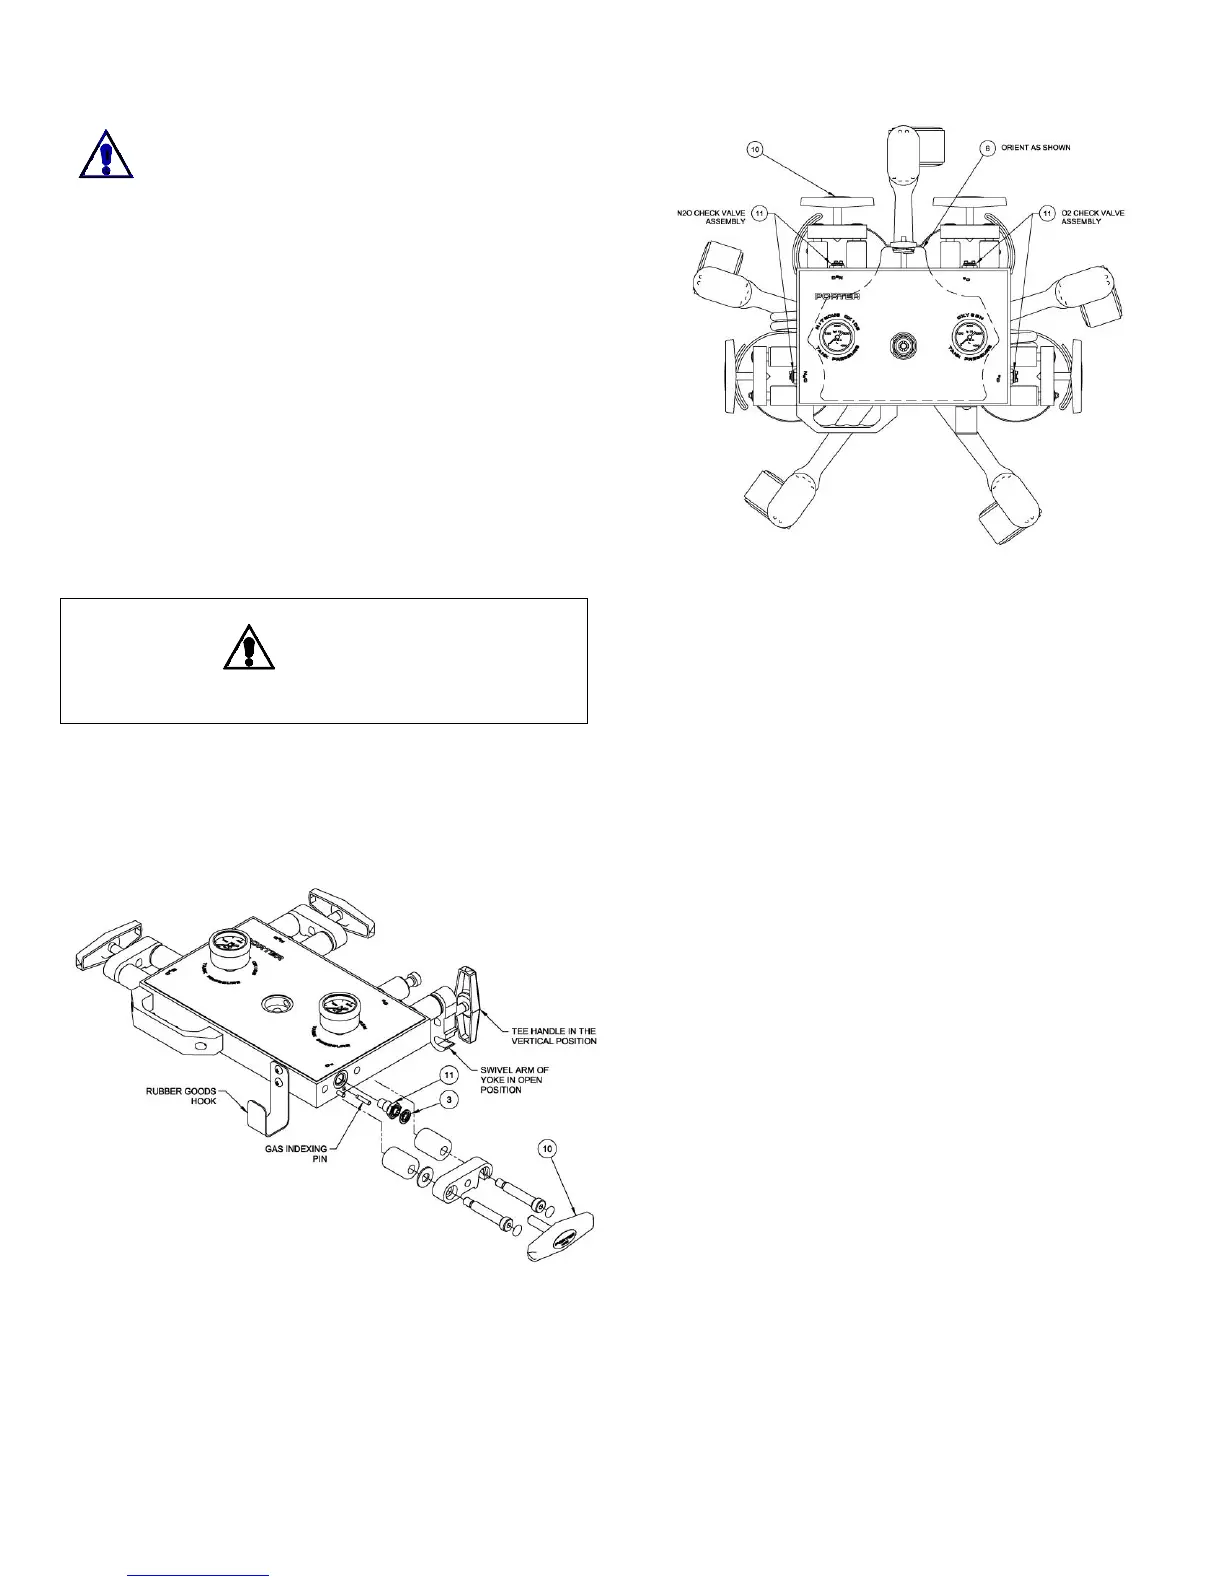
Replacing the Check Valve (Figure 9 & 10)
Warning: High pressure (up to 2400 psi).
Turn OFF all tank valves / supply pressure.
Switch flowmeter on/off switch to the “on”
position and open both valves to vent the pressure.
1. Back out Tee Handle (Item 10) until point is
even with the inside of the swivel arm.
2. Push Tee Handle “in” to open swivel.
3. Swing swivel arm open. (Figure 9)
4. Remove rubber washer (Item 3). It is
recommended that these be replaced once a
year.
5. Unscrew check valve assembly using a 5/8”
socket with ratchet.
6. Install new check valve assembly (Item 11) by
reversing above steps.
WARNING
Do not remove or alter gas indexing pins.
Figure 9 – Check Valve Replacement
Figure 10 – Check Valve Locations