EasyManua.ls Logo

Power-Pole C-MONSTER - User Manual

Power-Pole C-MONSTER
4 pages
Print Icon
To Next Page IconTo Next Page
Loading...
STEP 1: Removal
1. Disconnect the red 12V (+) wire from the battery source,
or remove the inline fuse.
2. Remove the (4) Phillips head screws that hold the cover
on the C-Monster control unit. (FIG. 1)
3. With the cover removed, disconnect the membrane
switch’s ribbon wire from the circuit board by gently
pulling on it. (FIG. 2)
4. Disconnect the red 12V (+) and black 12V (-) wires from
the circuit board.
5. Grab the sides of the circuit board, and carefully slide it
upward out of the C-Monster control unit. (FIG. 3)
6. Once the circuit board is removed from the case,
disconnect the (3) brushless motor wires.
A. Take note that the brushless motor wires are
labeled “U”, “V”, and “W.” These letters
correspond to labels on the circuit board. (FIG. 3)
STEP 2: Installation
7. Carefully follow steps 3-6 in reverse order.
A. Ensure that the brushless motor wires and the 12V
wires are connected to the proper terminals on the
new circuit board.
8. Route the white antenna wire up and over all of the other
wires in the C-Monster control unit.
A. Routing the white antenna wire according to the
photo below will help avoid signal interference.
(FIG. 4)
9. Make sure the rubber O-ring seal is installed onto pump.
(FIG. 5)
10. Re-install the cover with the (4) Phillips head screws.
11. Re-connect the red 12V (+) wire to the battery source,
or re-install the inline fuse.
C-MONSTER CIRCUIT BOARD REPLACEMENT
INSTRUCTIONS
Figure 1
Figure 2
Figure 3
Figure 4
Figure 5
Need help? Contact our Technical Support Team at 1 + 813.689.9932 Option 2
©2017 all rights reserved. Power-Pole Shallow Water Anchor U.S. Patent No. 6,041,730
Question and Answer IconNeed help?

Do you have a question about the Power-Pole C-MONSTER and is the answer not in the manual?

Summary

C-MONSTER CIRCUIT BOARD REPLACEMENT INSTRUCTIONS

STEP 1: Removal

Disconnect power, remove cover screws, detach ribbon and motor wires, then carefully slide out the circuit board.

STEP 2: Installation

Reverse removal steps, ensuring correct wire connections and O-ring seal placement before reassembling.

C-MONSTER TOP SIDE PROGRAMMING INSTRUCTIONS

Top Side Control Switch Functions - HPU

Explains functions for setting HPU speed, sensitivity, and auto features using program button and UP/DOWN buttons.

C-MONSTER TOP SIDE PROGRAMMING

Function 1: Setting HPU as Single, Port, or Starboard Units

Details on configuring the Hydraulic Pump Unit (HPU) for single, port, or starboard operation.

Pair additional C-Monster Controllers

Instructions for pairing up to 10 C-Monster controllers to a single HPU.

Overview

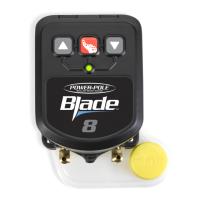
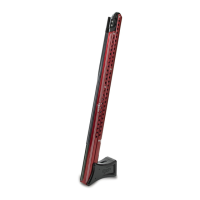
The Power-Pole C-Monster Shallow Water Anchor is a hydraulic pump unit (HPU) designed for marine applications, providing swift, silent, and secure anchoring. This device features a C-Monster control system that allows for both circuit board replacement and top-side programming, offering flexibility in maintenance and operation.

Function Description:

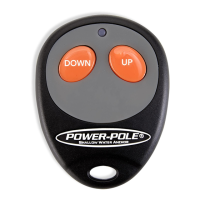
The C-Monster Shallow Water Anchor serves as an automated anchoring system for boats, allowing users to quickly and quietly deploy and retract an anchor in shallow water. The core of the system is the hydraulic pump unit (HPU), which is controlled by a C-Monster circuit board. This board processes commands from various input devices, including a membrane switch on the control unit and key fob remote controls, to operate the hydraulic pump and extend or retract the anchor. The system is designed to be user-programmable, allowing for customization of operational parameters such as speed, sensitivity, and unit configuration (single, port, or starboard).

Important Technical Specifications:

  • Power Supply: The system operates on a 12V DC power supply, indicated by the red 12V (+) and black 12V (-) wires.
  • Motor Type: It utilizes a brushless motor, connected via three wires labeled "U," "V," and "W."
  • Control Interface: The control unit features a membrane switch for direct interaction and supports wireless communication with up to 10 C-Monster controllers (key fobs).
  • Antenna: A white antenna wire is present, which needs to be routed correctly to avoid signal interference.
  • Sealing: The system incorporates a rubber O-ring seal to ensure water resistance.
  • Patent: The device is protected under U.S. Patent No. 6,041,730.

Usage Features:

Circuit Board Replacement:

The C-Monster circuit board replacement process is straightforward, involving the following steps:

  1. Disconnect Power: Ensure safety by disconnecting the red 12V (+) wire from the battery or removing the inline fuse.
  2. Access Control Unit: Remove the four Phillips head screws securing the cover of the C-Monster control unit.
  3. Disconnect Components:
    • Gently pull to disconnect the membrane switch's ribbon wire from the circuit board.
    • Disconnect the red 12V (+) and black 12V (-) wires from the circuit board.
    • Carefully slide the circuit board out of the control unit.
    • Disconnect the three brushless motor wires, noting their "U," "V," and "W" labels corresponding to the circuit board.
  4. Installation (Reverse Order): Install the new circuit board by reversing the removal steps. Ensure all wires (brushless motor and 12V) are connected to their proper terminals.
  5. Antenna Routing: Route the white antenna wire up and over all other wires in the control unit to prevent signal interference.
  6. Sealing: Verify that the rubber O-ring seal is correctly installed onto the pump.
  7. Reassemble and Reconnect: Re-install the cover with the Phillips head screws and reconnect the red 12V (+) wire or re-install the inline fuse.

Top Side Programming (HPU - Hydraulic Pump Unit):

The C-Monster control unit allows for various programming adjustments:

  1. Enter Programming Mode: Press and hold the PROGRAM button for 6 seconds until the LED flashes red, followed by two chimes and a single beep. This indicates entry into Function 1.
  2. Toggle Functions: Press the PROGRAM button to cycle through different functions, each indicated by a specific number of beeps:
    • 1 Beep (Function 1): Set HPU as single, port, or starboard side.
    • 2 Beeps: Change the speed of the standard key fob remote control.
    • 3 Beeps: Adjust Up direction sensitivity (controls Auto Up features). Increase sensitivity if the unit runs too long after retraction; decrease if it stops prematurely.
    • 4 Beeps: Adjust Down direction sensitivity (controls Auto Down features). Increase sensitivity if the unit runs too long after anchoring; decrease if it stops prematurely during deployment.
  3. Adjust Settings: Use the UP and DOWN buttons to change settings within each function. Default settings are in the middle of the range (1-10), with tone increasing with level.
  4. Save Settings: Press and release the PROGRAM button to save all changes and exit programming mode. A series of beeps and a flashing green LED will confirm saving.

Setting HPU as Single, Port, or Starboard Units (Duals):

This is Function 1 of the top-side programming:

  • Single HPU: Press and hold both UP and DOWN buttons simultaneously.
  • Starboard Side HPU: Press and release the UP button.
  • Port Side HPU: Press and release the DOWN button.
  • Important: When using only one anchor, do not program it as a port or starboard unit.

Pairing Additional C-Monster Controllers (Key Fobs):

Up to 10 controllers can be paired to a single HPU:

  1. Enter Pairing Mode: Press and hold the PROGRAM button on the HPU for 3 seconds. A solid green light and a single beep will confirm entry into pairing mode.
  2. Pair Controller: Press the UP button on the C-Monster controller for one second and release. A beep will confirm successful pairing.
  • Note: A single C-Monster Controller can be programmed to multiple anchors.

Maintenance Features:

  • Modular Design: The circuit board is designed for easy replacement, simplifying troubleshooting and repair.
  • User-Adjustable Settings: Programmable sensitivity and speed settings allow users to fine-tune the anchor's performance to their specific needs and environmental conditions, potentially reducing wear and tear from improper operation.
  • Clear Instructions: The manual provides detailed, step-by-step instructions for both hardware replacement and software programming, making maintenance and customization accessible to users.
  • Technical Support: Dedicated technical support is available via phone for assistance with any issues or questions, ensuring users can get help when needed.

Power-Pole C-MONSTER Specifications

General IconGeneral
BrandPower-Pole
ModelC-MONSTER
CategoryBoating Equipment
LanguageEnglish

Related product manuals