STEP5
Priming The HPU
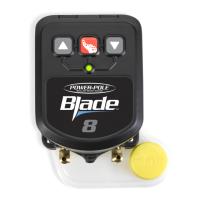
1. Connect the red fuse holder ring terminal to the main
battery cut-off switch and the black ring terminal to
negative common ground post. The HPU will make a
charge audio ID tune and the LED indicator light will begin
flashing GREEN. FIG. 18
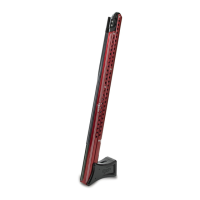
2. Manually place the Power-Pole anchor in the deployed
position.
3. Using the advanced dash switch remote control set to slow
speed, hold the down button until the RED LED on the
dash switch stops flashing and the pump stops running.
(Approximately 20 sec.) Repeat this process two more
times. See OPERATION section to change speed settings.
NOTE:
The HPU will have a high pitch whining sound while
priming until the air has dissipated from hydraulic fluid.
4. Check the fluid level in the reservoir and add if necessary.
5. Hold the up button until the RED LED on the dash switch
stops flashing and the pump stops running. (Approximately
20 sec.) Repeat this process two more times or until the Power-Pole anchor is fully retracted.
6. With the Power-Pole anchor in the retracted state, hold the down button until the RED LED on the dash
switch stops flashing and the pump stops running. Then hold the up button until the RED LED on the
dash switch stops flashing and the pump stops running. Repeat this step once.
7. Set the dash switch to medium speed.
8. Hold the down button until the RED LED on the dash switch stops flashing and the pump stops running.
Then hold the up button until the RED LED on the dash switch stops flashing and the pump stops
running. Repeat this step once.
9. With the Power-Pole anchor in the retracted state, manually apply a force to attempt to deploy the Power-
Pole anchor. If the Power-Pole anchor does not stay in the retracted state, repeat step 8 until it does.
10. Once on the water, navigate to an area that is deep enough to fully deploy your Power-Pole anchor
without it touching the bottom.
11. Using the dash switch set to medium speed, fully deploy and retract the Power-Pole anchor six times.
12. Your Power-Pole anchor should be completely primed at this point, but if you suspect it isn’t, repeat step
11 until it is or contact JL Marine System’s Inc. for Technical Support at 813-689-9932 Option 2.
Figure 18
 Loading...