13
ASSEMBLY INSTRUCTION
WARNING:
Do not use this product if any parts on the packing list are already assembled to your product
when you unpack it. Parts on this list are not assembled to the product by the manufacturer
and require customer installation. Use of a product that may have been improperly assembled
could result in serious personal injury.
WARNING:
If any parts are damaged or missing do not operate this product until the parts are replaced.
Use of this product with damaged or missing parts could result in serious personal injury.
WARNING:
Do not attempt to modify this product or create accessories not recommended for use with
this product. Any such alteration or modification is misuse and could result in a hazardous
condition leading to possible serious personal injury.
WARNING:
Do not connect to power supply until assembly is complete. Failure to comply could result in
accidental starting and possible serious personal injury.
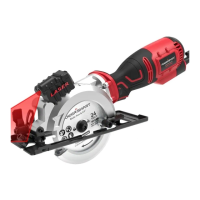
MOUNTING/REPLACING THE SAW BLADE
WARNING: Before any work on the machine itself, keep the mains plug out of the supply.
To avoid accidental starting, make sure Lock-Off button is not engaged prior to
in tool and you finger is not touching the on/off switch trigger.
For changing the cutting tool, it is best to place the machine on the face side of the motor housing.
Removal of the Saw Blade
Press the spindle lock button (19) and keep it pressed.
The spindle lock button (19) may be actuated only when the saw spindle is at a standstill. Otherwise,
the power tool can be damaged.
With the allen wrench (9), unscrew the bolt (13) turning in rotation direction.
Tilt back the retracting blade guard (2) and hold firmly.
Remove the clamping flange (13) and the saw blade (1) from the machine.
Mounting the Saw Blade
Clean the saw blade (1) and all clamping parts to be assembled.
Tilt back the retracting blade guard (2) and hold firmly.
Place the saw blade (1) on to the mounting bolt (13). The cutting direction of the teeth (direction or
arrow on saw blade) and the direction-of-rotation arrow on the blade guard (2) must correspond.
Mount the blot & screw (13) in turning in rotation direction.
Press the spindle lock button (19) and keep it pressed.
With the allen wrench (9), tighten the clamping bolt (13) turning in rotation direction.
 Loading...