Figure 5
9
Assembly (Continued)
• Save all instructions
If you need assistance or find any parts missing, CALL
TOLL FREE: 1-800-737-2112.
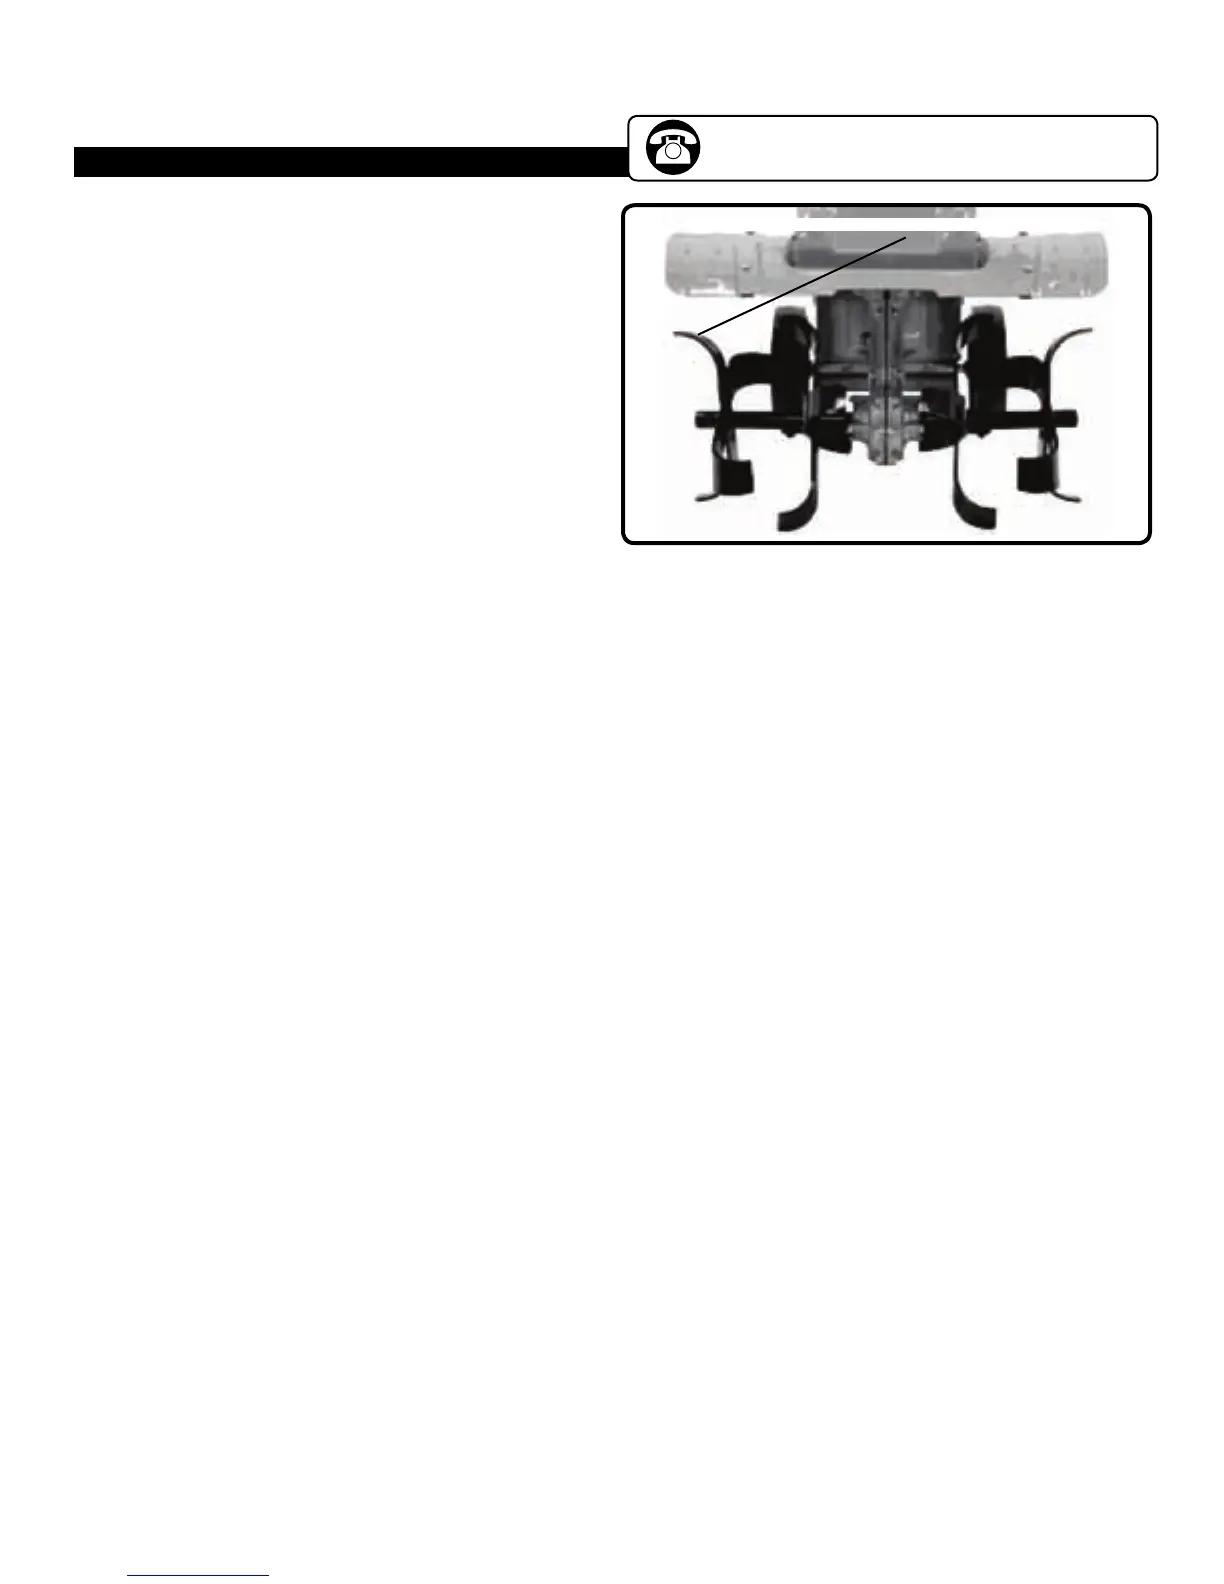
INSTALL THE TINES (See Figure 5)
1. Slide the tines onto the tine axle. Install the internal tines
first. Sharp edge of the front and top tines should face
down and forward to till the ground. Tighten the M10x50
bolt with lock nut provided to secure the inside tines.
2. For wide 21” tilling, install the outside tines in the way that
the long half of the tine pipe faces towards the inside tines.
For narrow 16” tilling, install the outside tines in a way that
the short tine pipe faces towards inside the tines.
3. Tighten the M8x50 bolt with the locknut provided to secure
the outside tines.
INSTALL THE OUTSIDE TINE SHIELDS
(See Figure 5)
1. Each outside tine shield can be installed on either side of
the main tine shield.
2. Place the outside tine shield underneath the main tine
shield and align the holes.
3. Secure the outside tine shield to the main tine shield with
(3) M6 x 16 bolts washers and lock nuts.
Sharp edge of tine should face down to the ground.
Questions? Call Toll Free at 1-800-737-2112 Copyright © 2011 MAT Engine Technologies, LLC
 Loading...