POWX07587 EN
Copyright © 2017 VARO NV P a g e | 2 www.varo.com
9 ASSEMBLY .................................................................................... 13
9.1 Table height two way set up ................................................................................. 13
9.1.1 High table set up (Fig. 17) ....................................................................................... 13
9.1.2 Low table set up ...................................................................................................... 13
9.2 Installing or removing saw blade ......................................................................... 13
9.3 Adjusting riving knife (fig 23,24 & 25) .................................................................. 14
9.4 Installing and adjusting rip fence (43)(Fig. 26) .................................................... 14
9.5 Installing and adjusting Mitre gauge (Fig. 33) ..................................................... 15
9.6 Dust bag (Fig 34, 35 & 36) ..................................................................................... 15
9.7 Securing workpiece .............................................................................................. 15
9.8 Setting up the tool in table saw mode ................................................................. 16
9.8.1 Securing the turn table (Fig. 38) .............................................................................. 16
9.8.2 Securing the tool head (Fig. 39) .............................................................................. 16
9.8.3 Releasing the lower limit stopper (Fig. 40) ............................................................... 16
9.8.4 Repositioning the riving knife (Fig. 41) .................................................................... 16
9.8.5 Removing the lower blade guard (Fig. 42) ............................................................... 16
9.8.6 Locking the tool head at fully lowered position (Fig. 43)........................................... 16
9.8.7 Turning over the tool (Fig. 45) ................................................................................. 17
9.8.8 Installing the top blade guard (Fig. 46) .................................................................... 17
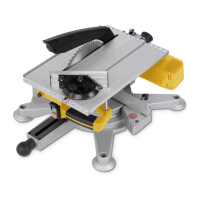
9.9 Setting up the tool in Mitre saw mode (Fig. 47) ................................................... 17
9.9.1 Removing the top blade guard ................................................................................ 17
9.9.2 Turning over the tool ............................................................................................... 17
9.9.3 Releasing the tool head from fully lowered position ................................................. 17
9.9.4 Repositioning riving knife (Fig. 48) .......................................................................... 17
9.9.5 Locking the tool head in the lowest position ............................................................ 17
9.9.6 Tilting the saw table ................................................................................................ 17
9.9.7 Installing the lower blade guard C ........................................................................... 17
9.9.8 Tilting the saw table ................................................................................................ 18
9.9.9 Unlocking the tool head in the lowest position ......................................................... 18
9.9.10 Installing or removing the sub fences R and L (Fig. 49) ...................................... 18
9.9.11 Cable holders (electric cable) ............................................................................. 18
10 OPERATION ................................................................................... 18