Do you have a question about the PowerTec WB-LTO16 and is the answer not in the manual?
Initial instructions, safety warnings, and unpacking all items before assembly begins.
Instruction to attach part No 1 to the Power Rack using specified parts and a plate.
Attaching weight horns (No 14) to the weight support tube (No 4) using parts No 29.
Placing tubes (No 3) into part No 1.
Placing parts No 6, No 21, and No 4 onto the tube.
Attaching part No 2 to part No 1 using bolts No 34 and washers No 38.
Attaching part No 7 to part No 1 and part No 22 to part No 7 using specified hardware.
Attaching part No 8 to part No 7, securing pads and caps, and inserting pin No 27.
Attaching part No 5 to the Power rack using specified hardware and a plate.
Connecting part No 10 to the cables as part of the assembly process.
Attaching the cover support frame (No 15) to the main frame using nuts and bolts.
Attaching the cover (No 16) to the cover frame (No 15) using screws No 28.
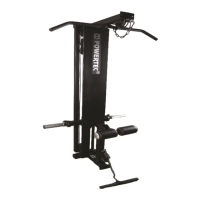
Illustrative diagram showing the path of the upper and lower cables through the lat tower.
| Brand | PowerTec |
|---|---|
| Model | WB-LTO16 |
| Category | Fitness Equipment |
| Language | English |