CHARGING
The battery charger must be connected to the battery according to the instructions above.
Starting the charging process:
1. Once you have established that the battery clamps or eyelets have been correctly connected, you can start the charging process.
To do so, insert the charger plug into the AC socket.
2. The charger will start in Standby mode, indicated by the STAND BY LED.
3. Press the mode button to sel
ect the appropriate charge mode (press and hold for three seconds to enter an enhanced charge mode)
for the voltage and chemistry of your battery. The selected charge mode LED will illuminate.
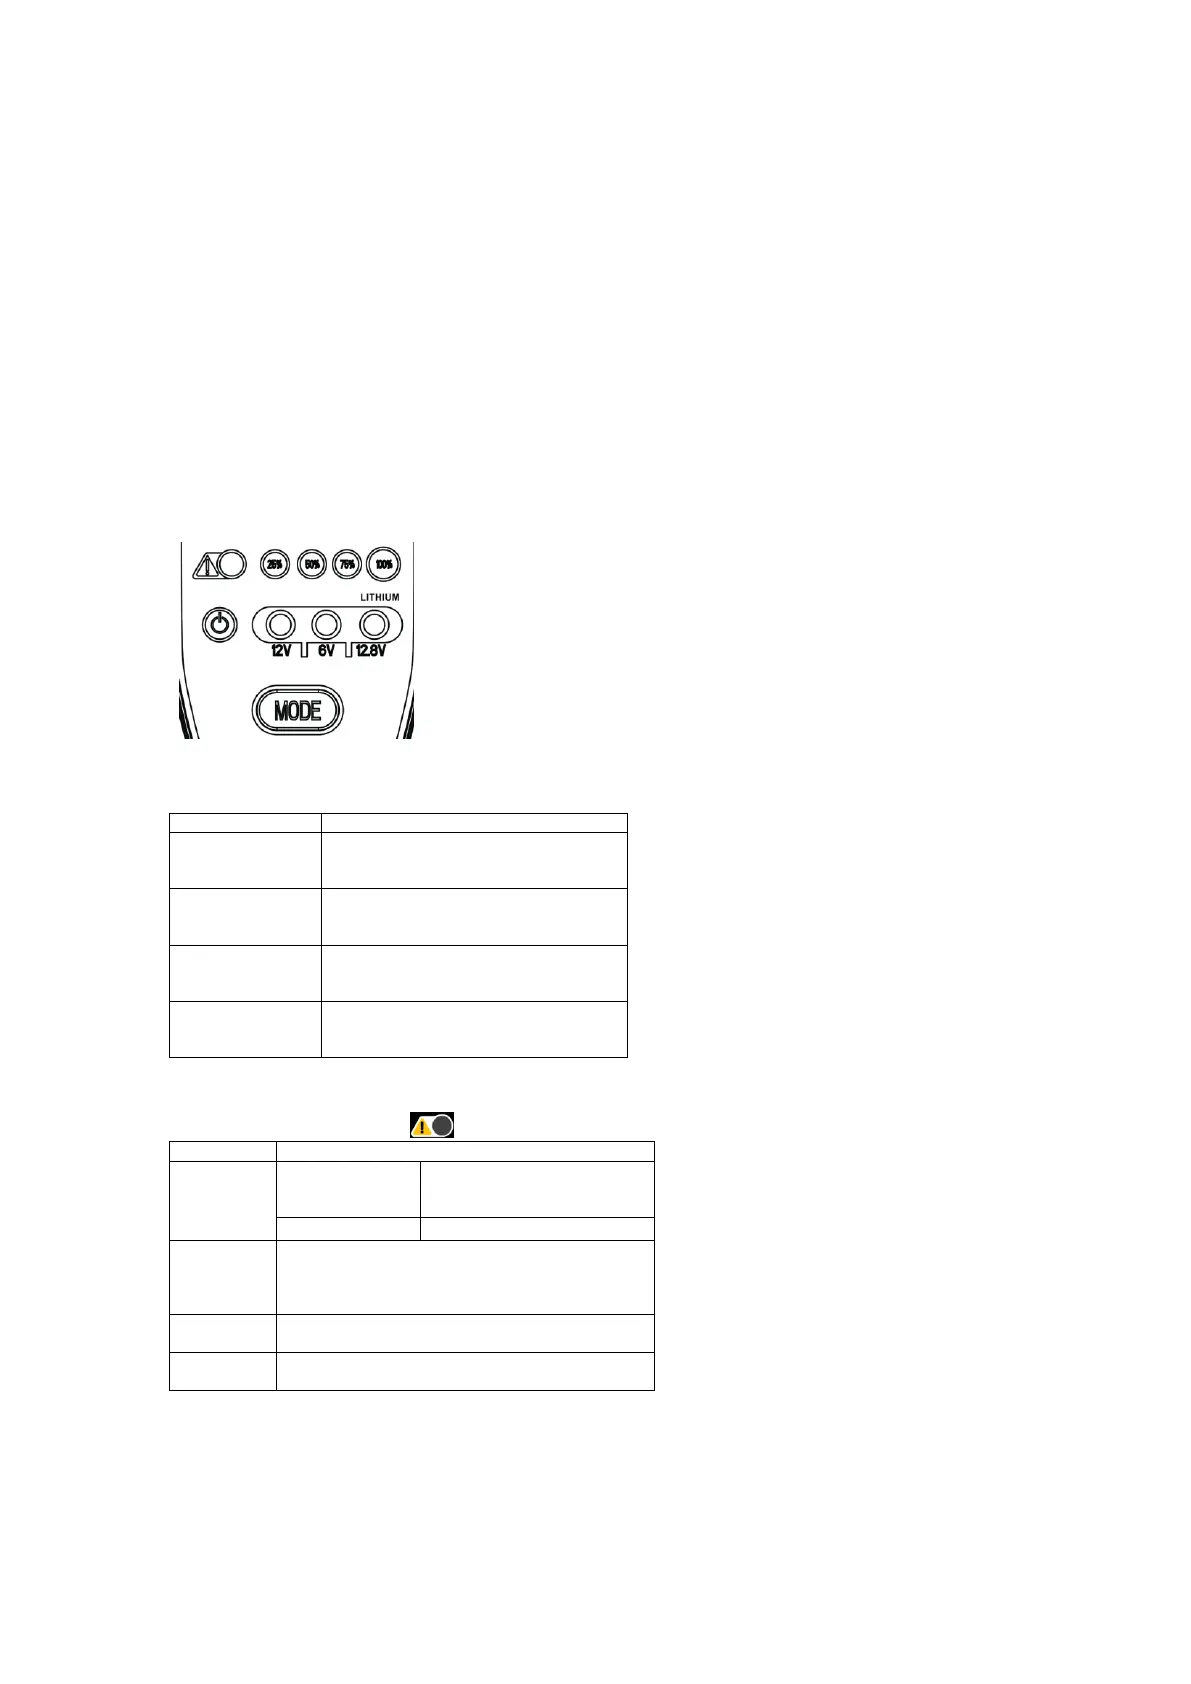
LED DISPLAY
The state-of-charge (SOC) LED display has four (4) SOC indicators.
25% Red LED
The LED will flash when the battery is less
than 25% charged. When the battery is 25%
charged, the LED will be solid.
50% Orange LED
The LED will flash when the battery is less
50% charged. When the battery is 50%
charged, the LED will be solid.
75% Yellow LED
The LED will flash when the battery is less
75% charged. When the battery is 75%
charged, the LED will be solid.
100% Green LED
The LED will flash when the battery is less
than 100% charged. When the battery is
100% charged, the LED will be solid.
ERROR DIAGNOSTICS
Error conditions are indicated in the
LED display.
Solid Red
LED
Standard Charging
Mode
The battery is not accepting a
charge. Change charge mode to
The battery cannot be recovered.
Flashing
Yellow LED
Battery capacity may be too high for the selected mode.
Verify the battery capacity and charge mode. If battery
capacity is in range, change charge mode to Recovery
Battery voltage is too high or too low for the selected
mode. Verify the battery voltage and charge mode.
Reverse polarity. Reverse the battery connections.