1/2” flat washer, and a nut on each threaded rod. The second washer is required due to the
oversize of the removal hole to make it easy to line up the rod with the seal threaded hole. Then
working back and forth, tighten each nut, pulling evenly on the seal carrier. Slide it towards the
mounting block until it
is loose on the shaft. For the composite carrier, remove the assembly bolts and insert the 1/4”
bolt or threaded roll in the bolt holes.
You will only have to pull the carrier by the length of the seal carrier. The shaft is stepped to fit
each part for only the length of that item.
The seal carrier can be removed and inspected for damage. (Shown is the Rev 1 Carrier, for Rev
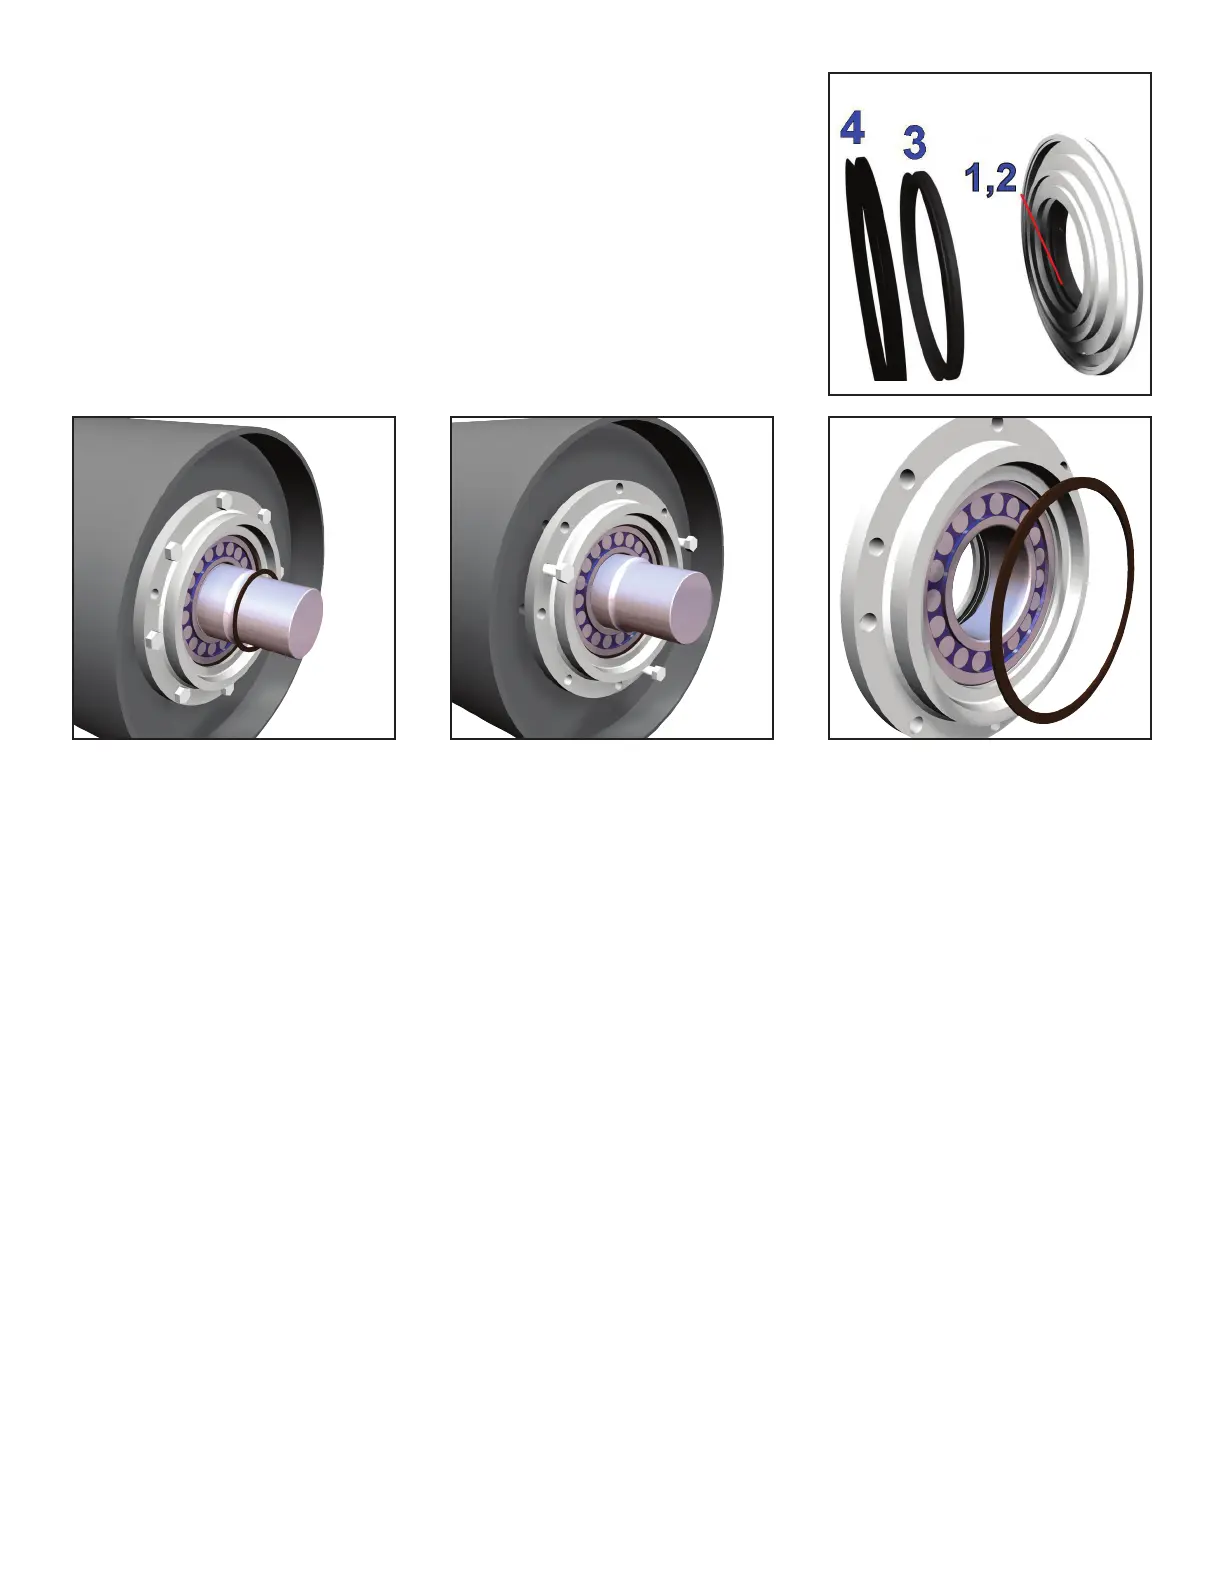
0, see Page 5) There are four contact seals in the seal carrier. Seal 4 is the taconite seal. Seal 3
is the standard contact seal. Seal 1and 2 are a set of two contact seals for the shaft (O-rings).
The first step in rebuilding the seal carrier is to replace the two O-rings on the ID of the carrier, which is Seal 1. This is made from a 1/8”
diameter O-ring cord. The cord should be slightly longer than what is needed to run around the inside O-ring groove. The slight extra length
of 1/8” fills the juncture, preventing a break in the sealing by the O-ring. To facilitate the replacement of the seal carrier, it is recommended
that caulking is placed in the grooves that the O-rings rest upon. The caulking helps hold the O-rings into place during installation ensuring
proper installation of the seals.
Next, replace the V-ring seal, Seal 3. This goes onto a machine step in the seal carrier. The V-ring lip should face the bearing, not the seal
carrier. (Check the appendix for part numbers.)
For the taconite seal, the outer V ring seal or Seal 4, will need to be replaced as in the previous step. Make sure the V-ring lip faces the
bearing as in the illustrations.
Lay the seal carrier in a protected place until needed when re-installing the SSP.
On one end of the SSP pulley there will be a retainer ring holding the bearing to the shaft. This is the fixed or held end. This retainer will
need to be removed before removal of the bearing housing from the pulley. For this procedure, use a screwdriver and wedge it between
the retainer and the shaft. The retaining ring is a spiral that wraps around the shaft twice. On the end of the retainer is a lip, which you can
get a screwdriver tip underneath. Pry up and out on the end of the retainer, pulling the end out of the groove in the shaft until you can get a
screwdriver between the start of the retainer and the rest of the retainer.
Once this has been accomplished, spiral the second screwdriver around the shaft keeping it between the spirals of the retainer and pulling
on the end of the retainer. With a couple of spirals the retainer will be free and can be removed from the shaft.
Next, remove the mounting bolts and thread them into the backout holes. Tighten these bolts evenly, pulling the bearing housing out of the
pulley.
With the bearing housing free, remove the retainer ring that holds the bearing in the housing. This retainer is very similar to the retainer that
fit on the shaft in which you can use the same procedure. Use a screwdriver to pry inward and out on the end of the retainer so that you can
spiral off the retainer.
The bearing is lightly pressed into the housing. Remove it as one would press out any bearing. Then the rear seal can be pressed out and
replaced. The seal is lightly pressed into the housing.
Clean, inspect and/or replace the bearing and parts as needed. To clean, inspect and update the grease channel, follow the steps below.


 To Next Page
 Loading...