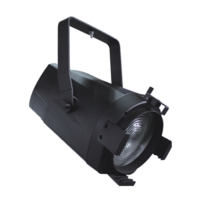
This document describes the PR Lighting StarBrite Controller (models PR-8710 and PR-8710C), a device designed to control LED StarBrite lighting units. It provides comprehensive information on safe usage, installation, operation, maintenance, and technical specifications.
Function Description
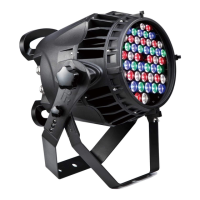
The StarBrite Controller is primarily used to manage LED StarBrite lighting units. It supports various operational modes including stand-alone, Master/Slave, and DMX control. In DMX control mode, it allows for precise manipulation of individual LED StarBrite units, offering dimming and strobe effects for red, green, blue, and white LEDs, as well as access to preset programs. The controller acts as an interface between a DMX console and the LED StarBrite units, translating DMX signals into lighting commands. In Master/Slave mode, one controller acts as the master, dictating the lighting behavior for multiple slave controllers and their connected StarBrite units. The stand-alone mode offers 12 preset programs for independent operation.
Important Technical Specifications
Voltages:
- LED StarBrite Controller: 85V~132V/170V~264V AC, 50/60Hz
- LED StarBrite: 10V~15V DC
Power Consumption:
- LED StarBrite Controller: Input: 200W, Output: 150W (Max). It can drive four pieces of LED StarBrite.
- LED StarBrite: Less than 30W
Brightness of LED StarBrite:
- More than 150cd when all LEDs emit white light.
Work Environment Temperature:
IP Protection:
Life:
Net Weight:
- LED StarBrite (15-meter signal connection cable included): 20kg
- LED StarBrite Controller: 2.3kg
Sizes:
- LED StarBrite: 6000 (length) x 4000 (width) (units not specified, but likely mm based on typical product dimensions)
- LED StarBrite Controller: 190 (length) x 87.5 (width) x 320 (height) (units not specified, but likely mm)
DMX Protocol:
The controller utilizes 26 DMX channels. Channels 1-24 are dedicated to controlling individual Red, Green, and Blue LEDs, providing dimming (000-240) and strobe (241-255) functions. Channel 25 controls White LEDs with dimming (001-240) and strobe (241-255) functions, with 000 being invalid. Channel 26 is for Preset Programs, offering 12 distinct programs (064-255) with specific DMX value ranges for each, and 000-063 being invalid.
Usage Features
Installation:
- LED StarBrite: Should be hung from eyelets on its four fringes using ropes to achieve a "clusters of stars" effect.
- LED StarBrite Controller: Can be placed on a flat surface (table, floor) or mounted in a higher place using four screws through the eyelets on its top and bottom fringes. A safety cord should be used through the prearranged hole in the middle of the top fringe as a secondary safety fixing.
- Power Connection: Connect the power cord (brown for live, yellow/green for earth, blue for neutral) to the controller, ensuring voltage and frequency match requirements. Each controller should ideally be supplied separately.
- Control Connections:
- LED StarBrite to Controller: Special 5-pin signal connection cables (up to 15 meters) connect the controller's OUT1-OUT4 ports to the 5-pin input port of the LED StarBrite driver box.
- Controller to Controller (DMX/Master-Slave): 3-pin XLR cables are used for DMX IN / DMX OUT ports. The OUT5 port (3-pin socket) provides signal output for Master/Slave mode only, without power supply.
- DMX Terminator: For the last LED StarBrite Controller in a DMX chain, a DMX terminator (120Ω resistor across pins 2 and 3 in an XLR plug) must be inserted into the DMX OUT port to prevent electrical noise.
Operation Modes:
- Stand-alone Mode: Offers 12 preset programs.
- Master/Slave Mode: Connect master controller's OUT5 port to the first slave controller's DMX IN port, then daisy-chain subsequent slave controllers via their OUT5 and DMX IN ports. Slave controllers must be set to "Slave" mode in the menu.
- DMX Control Mode: Connect the DMX console's output to the first controller's DMX IN, then daisy-chain controllers via DMX OUT to DMX IN ports. A DMX terminator is required at the end of the chain. The controller's menu must be set to "DMX CHANNEL". A yellow indicator on the panel signifies a valid DMX signal.
Setup and Configuration:
- LCD Display and Push-buttons: Configuration is done via push-buttons (FUNC, UP, DOWN, ENTER) and an LCD display.
- Unlocking Panel: Press ENTER for 5 seconds to unlock the panel.
- Menu Navigation: Use FUNC to change menus, UP/DOWN to adjust values (speed, color, address), and ENTER to save settings. A "*" appears next to saved settings.
- DMX Start Address: Each controller in a DMX setup needs a unique DMX start address. The product uses 26 channels per controller. For example, Controller 1: 001, Controller 2: 027, Controller 3: 053, etc. The address is set via the "The address is [XX]" menu option.
- Automatic Lock: The panel locks automatically after one minute of inactivity, displaying "PR Lighting" and "StarBrite" alternately.
LED Indication:
- Green LED: On for power on, Off for power off.
- Yellow LED: On for DMX signal OK, Off for no DMX signal.
Maintenance Features
General Maintenance:
- Cleaning: Regular cleaning is crucial for optimal light output, product longevity, and reliability. Daily attention to cleanliness is recommended. Accumulated dust and dirt on the LED StarBrite should be removed by flapping or wobbling the unit. A thorough cleaning of the LED StarBrite is advised every three months.
- Controller Cleaning: The LED StarBrite Controller's ventilation slots must not be blocked. It is advised to clean the controller once every three months.
- Fuse Replacement: If the LED StarBrite Controller fails to work, check the fuse on the power socket. Replace damaged fuses only with those of the same specification.
- Qualified Personnel: All maintenance work should be carried out by qualified technicians only.
Safety Precautions:
- Unpacking: Check for transportation damage before use.
- Environment: For indoor and outdoor use, but not in rainy days. Use only in dry locations. Keep away from rain, moisture, excessive heat, humidity, and dust. Avoid contact with water or other liquids.
- Mounting: Not designed for direct mounting on inflammable surfaces.
- Unauthorized Access: Only qualified personnel should install, operate, and maintain the product. Do not open, dismantle, or modify the product.
- Power Safety: Ensure power supply voltage and frequency match product requirements. Never crimp or damage the power cord. Handle the power cord by the plug, never by tugging the cord. The product must be earthed with a three-pin power plug to prevent electrical shock.
- Eye Safety: Do not look at lighted LEDs from a distance of less than 40cm for extended periods, as it can be harmful to eyes.
- Internal Parts: No user-serviceable parts inside. Ensure all housing and driving device screws are fixed before operation. Never operate with covers removed.
- Table Placement: If placed on a table, ensure stability and center the controller to prevent falling.
- Disconnection: Always disconnect from the mains when not in use, before cleaning, or before any maintenance work.
- Recycling: Recycle the product at the end of its life according to local regulations.