Attach the upright support and cables
CAUTION
DO NOT attempt to connect electrical power until all assembly procedures are complete and properly installed.
To attach the upright support and cables:
1. Retrieve the cables for the console that you plan to install on this bike and for any PVS equipment that you
plan to install on the console.
2. Remove the wire tie securing the base unit data cable inside the upright support channel. Save the tie for use
in Step 4.
If you are installing PVS equipment on the console, continue with Step 3. If you are not installing PVS
equipment, skip to Step 5.
3. Feed the television and power cables through the opening just above the front stabilizer.
4. Use the wire tie from Step 1 to bind the upper ends of the cables together.
5. Using a sh tape, place the upright support on the oor with its lower end next to the bike. Thread the cable(s)
upward through the support and secure them to the top of the support.
6. Remove the extra serial number label from the upright support channel and set it aside for attachment to the
console mount bracket during console installation.
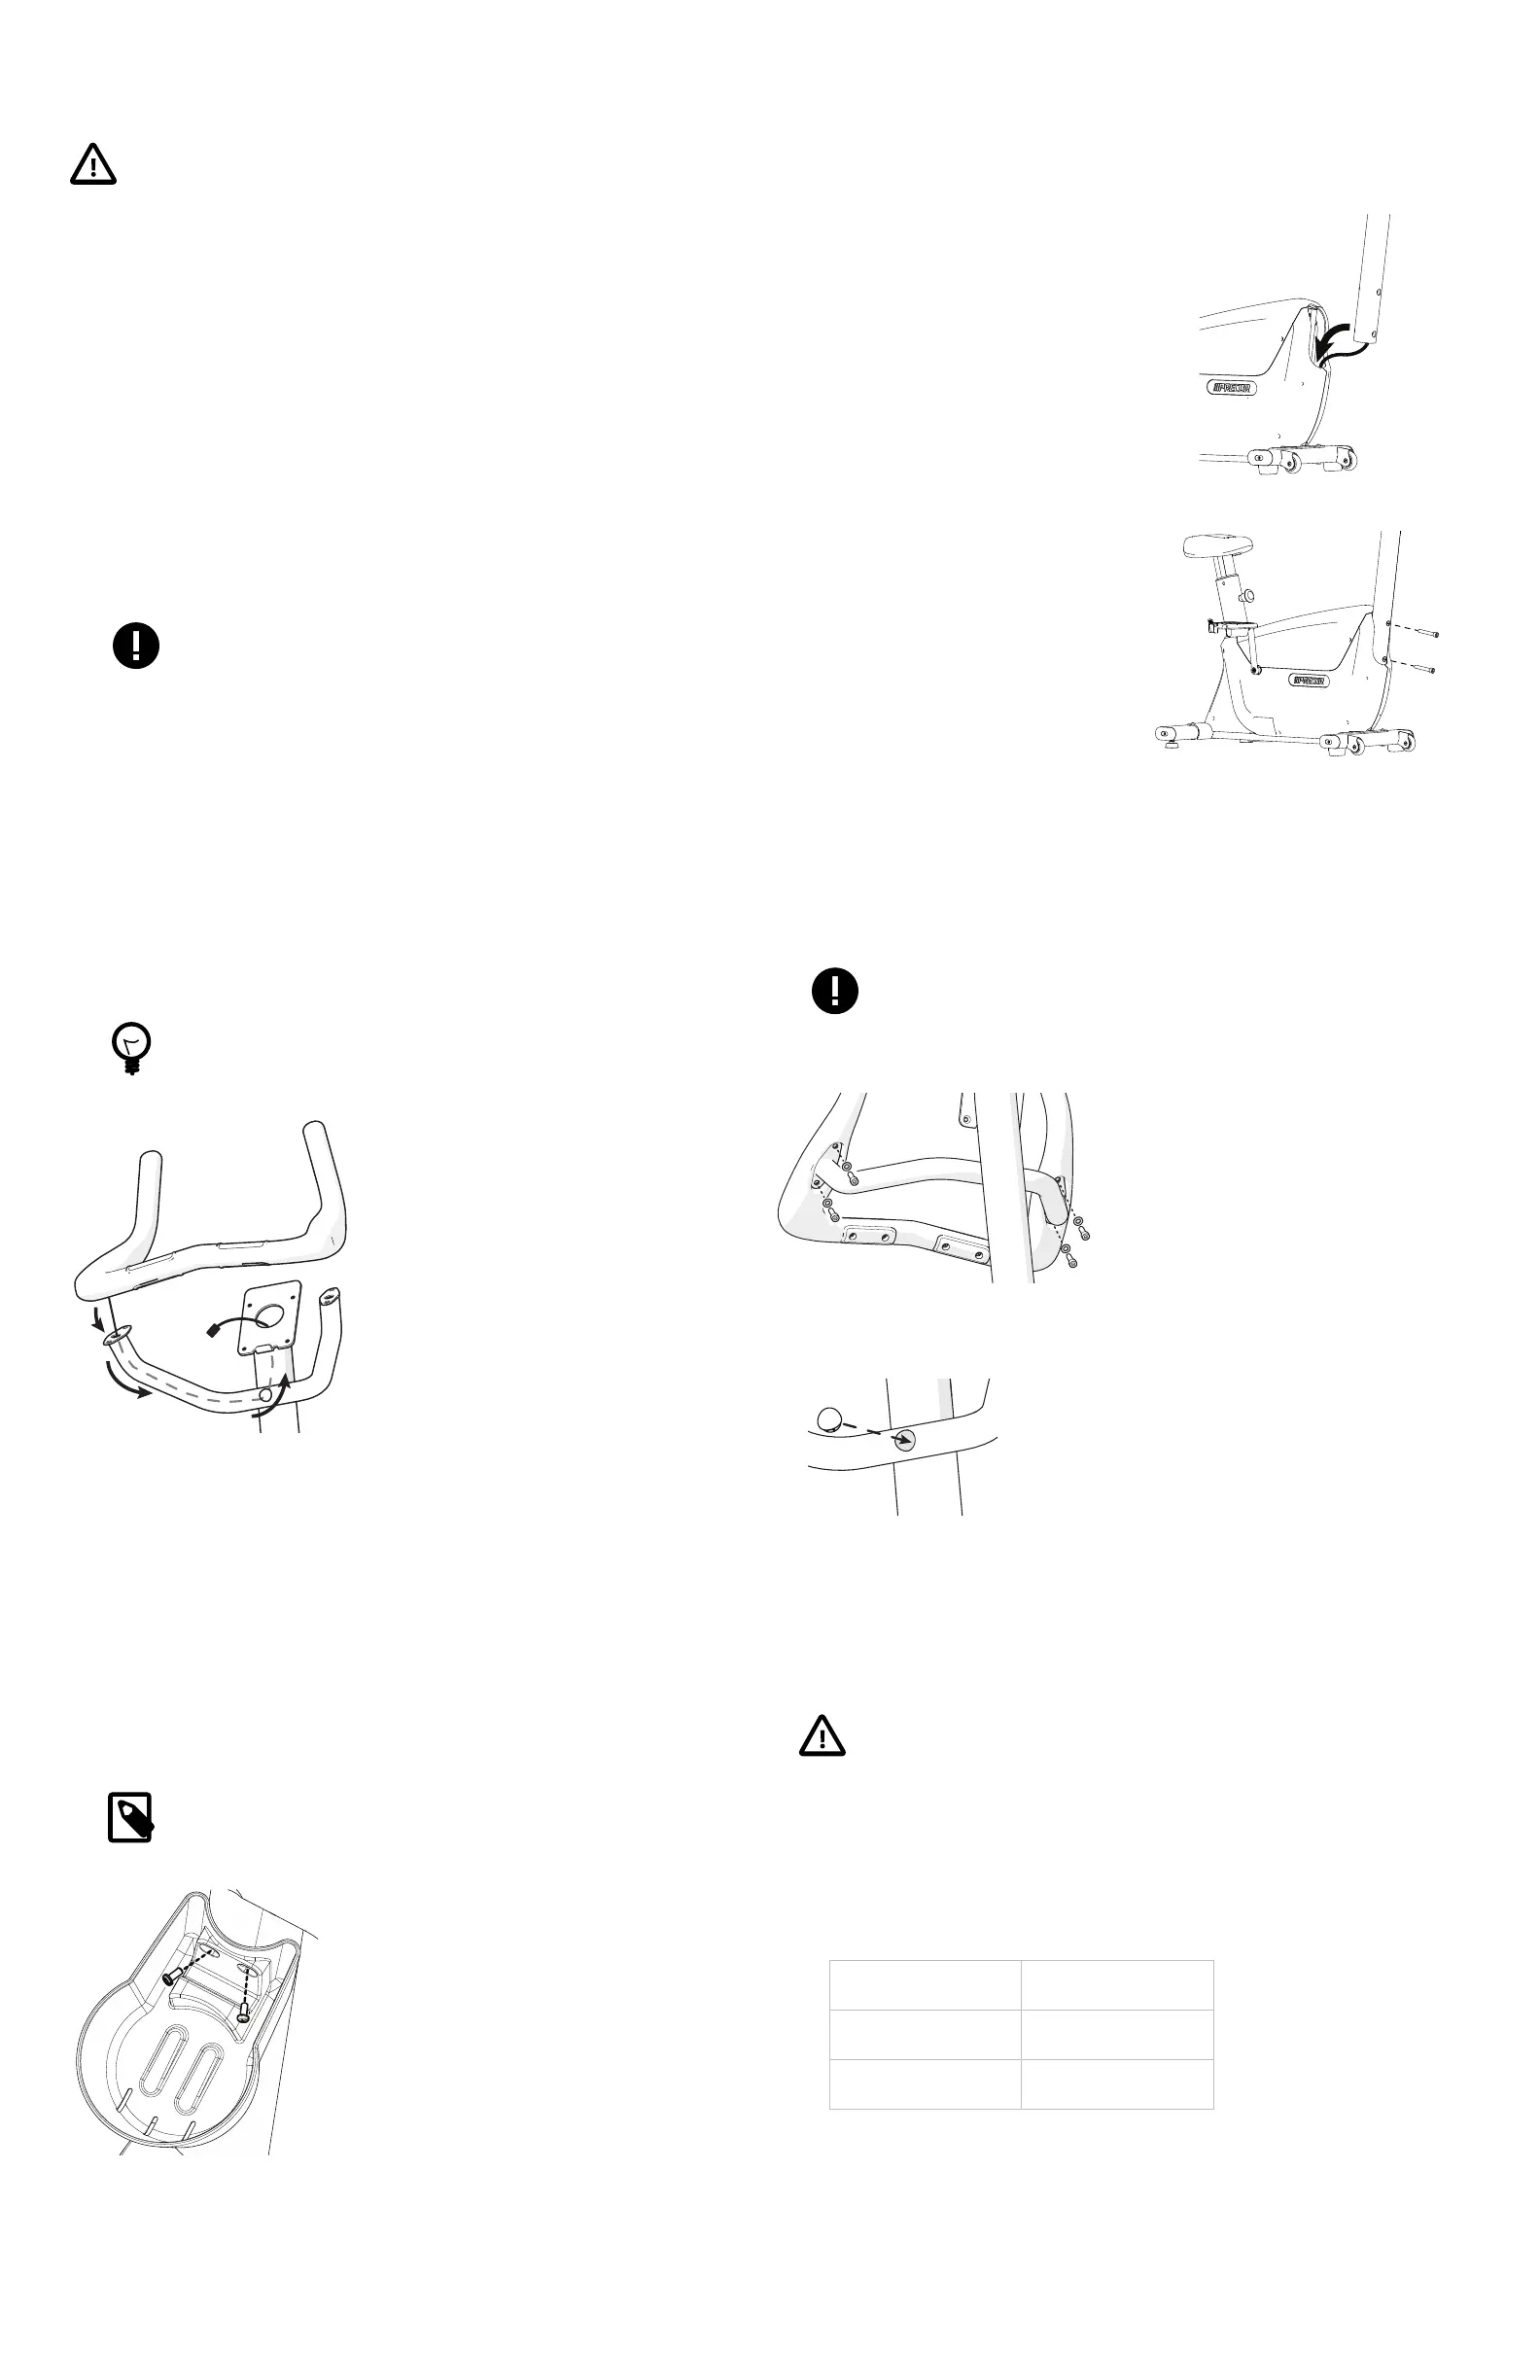
7. Lift the upright support and position its lower end over the upright support channel. Set the upright support
so that it rests on the metal tab within the upright support channel to prevent sliding (Figure 6).
IMPORTANT
DO NOT pinch the cable during this step.
8. Insert two M12 x 80 mm SHCS through the opening on the support and into the screw holes on the body
assembly (Figure 7). Fully tighten using a 10 mm hex wrench.
Figure 6
Figure 7
Attach the handlebars:
1. Place the handlebars on the arms of the upright support.
2. Thread the heart rate cable through the nearest arm of the upright
support (Figure 8), then up through the support itself and out the
opening in console mount.
TIP
Use the access hole near the top of the upright support to
guide the cable to the upper opening.
Figure 8
3. Set the handlebars on the upright support and pull the extra cable
through the upright support.
IMPORTANT
DO NOT pinch the cable during this step.
4. Attach it using four screws and washers. Fully tighten the screws using a
6 mm hex wrench.
Figure 9
5. Place the plug in to the access hole on the upright support.
Figure 10
To attach the bottle holder:
1. Position the bottle holder against the upright support so that the
screw holes in the bottle holder line up with those in the support.
2. Secure the bottle holder to the upright support using two M5 x 12
mm PHCS. Fully tighten using a #2 Phillips screwdriver.
NOTE
Due to the curvature of the upright support, insert the
screws at an angle.
Figure 11
Level the equipment
Make sure the equipment is level before allowing anyone to use it.
CAUTION
To eliminate movement, make sure the adjustable feet
are in contact with the oor. Rotating the adjustable feet
cannot compensate for extremely uneven surfaces.
To level the equipment:
1. Try to shake the equipment. If there is any movement, tip the
equipment to one side to locate the adjustable foot.
2. Correct the height of each adjustable foot as follows:
If you want to ... Then turn the
adjustable feet …
Raise the
equipment
Counterclockwise
Lower the
equipment
Clockwise
3. When you are nished adjusting the equipment, recheck for
movement and readjust as necessary.
600 Line UBK Assembly Guide | P/N 305380-101, ENU
© 2019 Precor Incorporated | 1 January 2019

 Loading...