TRM 400 Series Assembly Guide 12
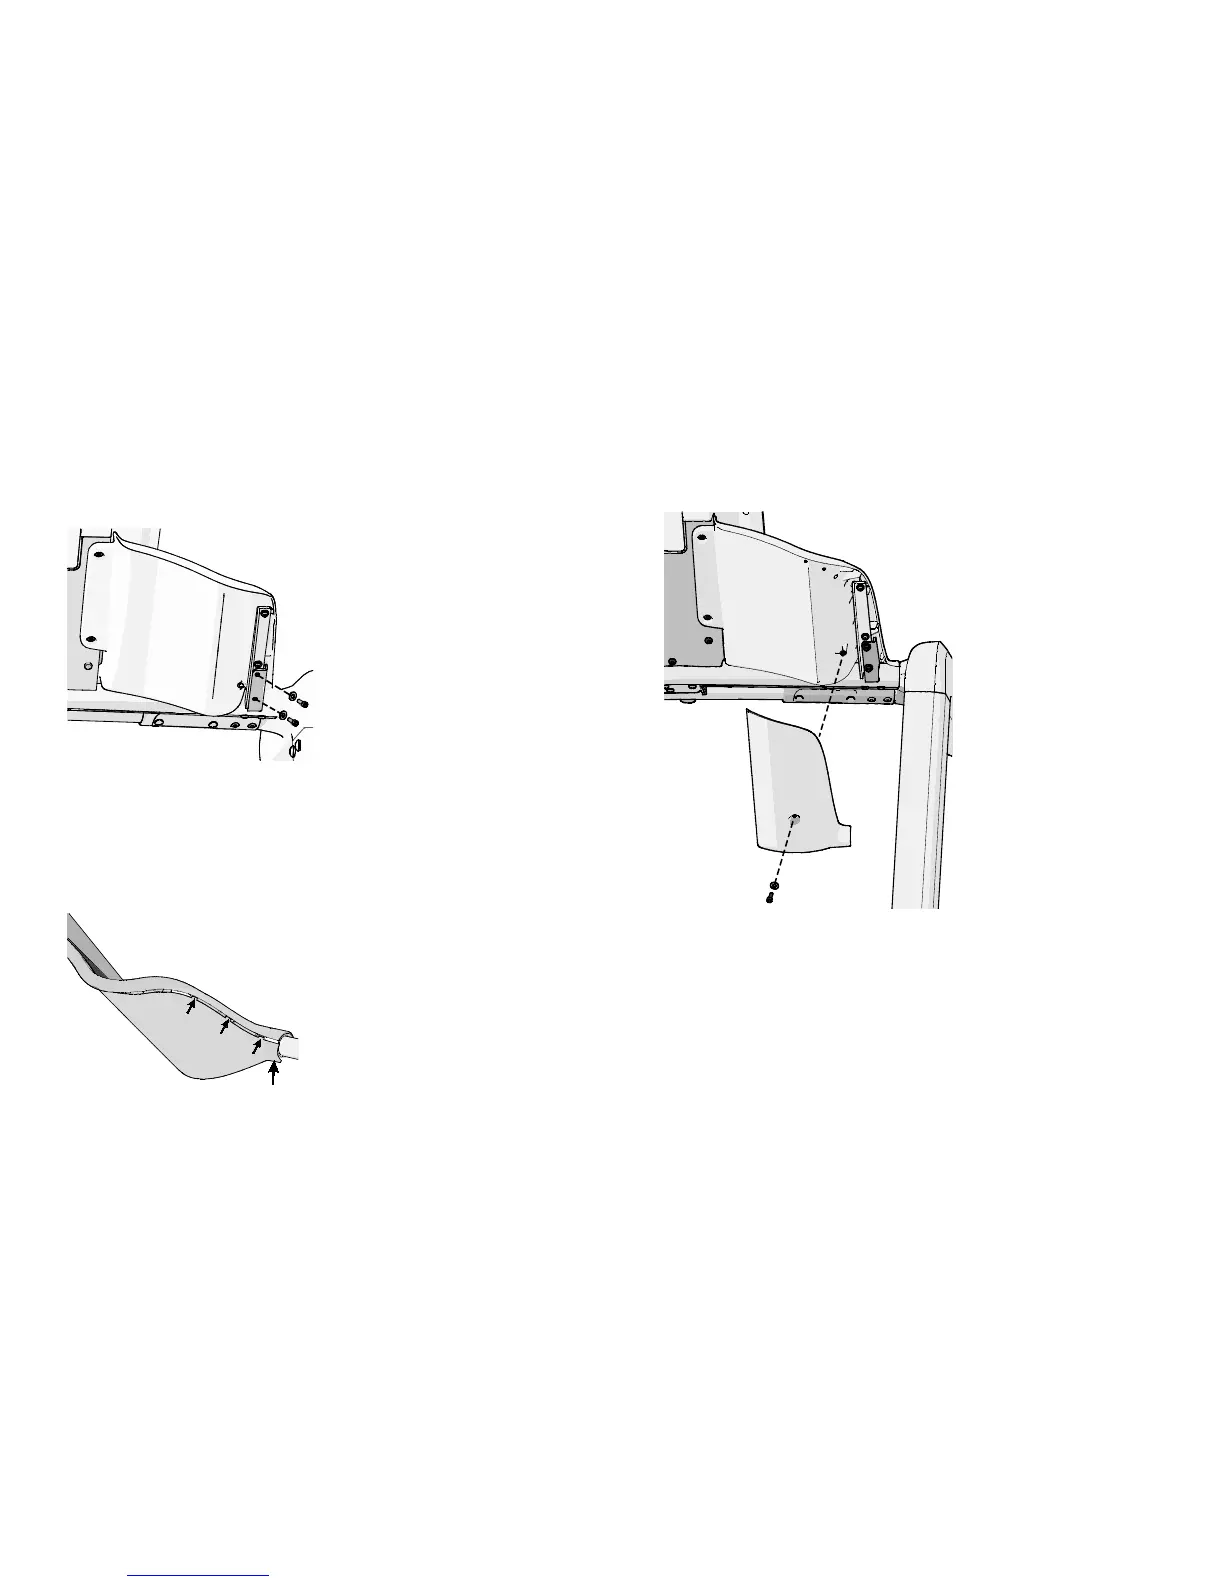
3. Secure the dash bucket to the welded bracket using two #10 x ¹₂-inch socket
head screws and two flat washers. Fully tighten the screws.
Note: Make sure the dash bucket is securely attached to the console bracket
(step 2) before performing this step.
Figure 17: Dash bucket attachment to welded bracket
4. Repeat steps 1 through 3 to attach the left dash bucket.
5. Locate the three tabs on the right bucket cover and align them with the three
slots along the edge of the right dash bucket.
Note: It is easier to attach the cover if you fit the lower edge into the dash
bucket first.
Figure 18: Location of tab and lower edge
6. Attach the right dash bucket using one #10 socket head screw and one flat
washer. Gently tighten the screw.
Important: Do not overtighten the #10 screw while attaching the bucket covers.
Figure 19: Attach the dash bucket cover
7. Repeat steps 5 and 6 to attach the left dash bucket.

 Loading...