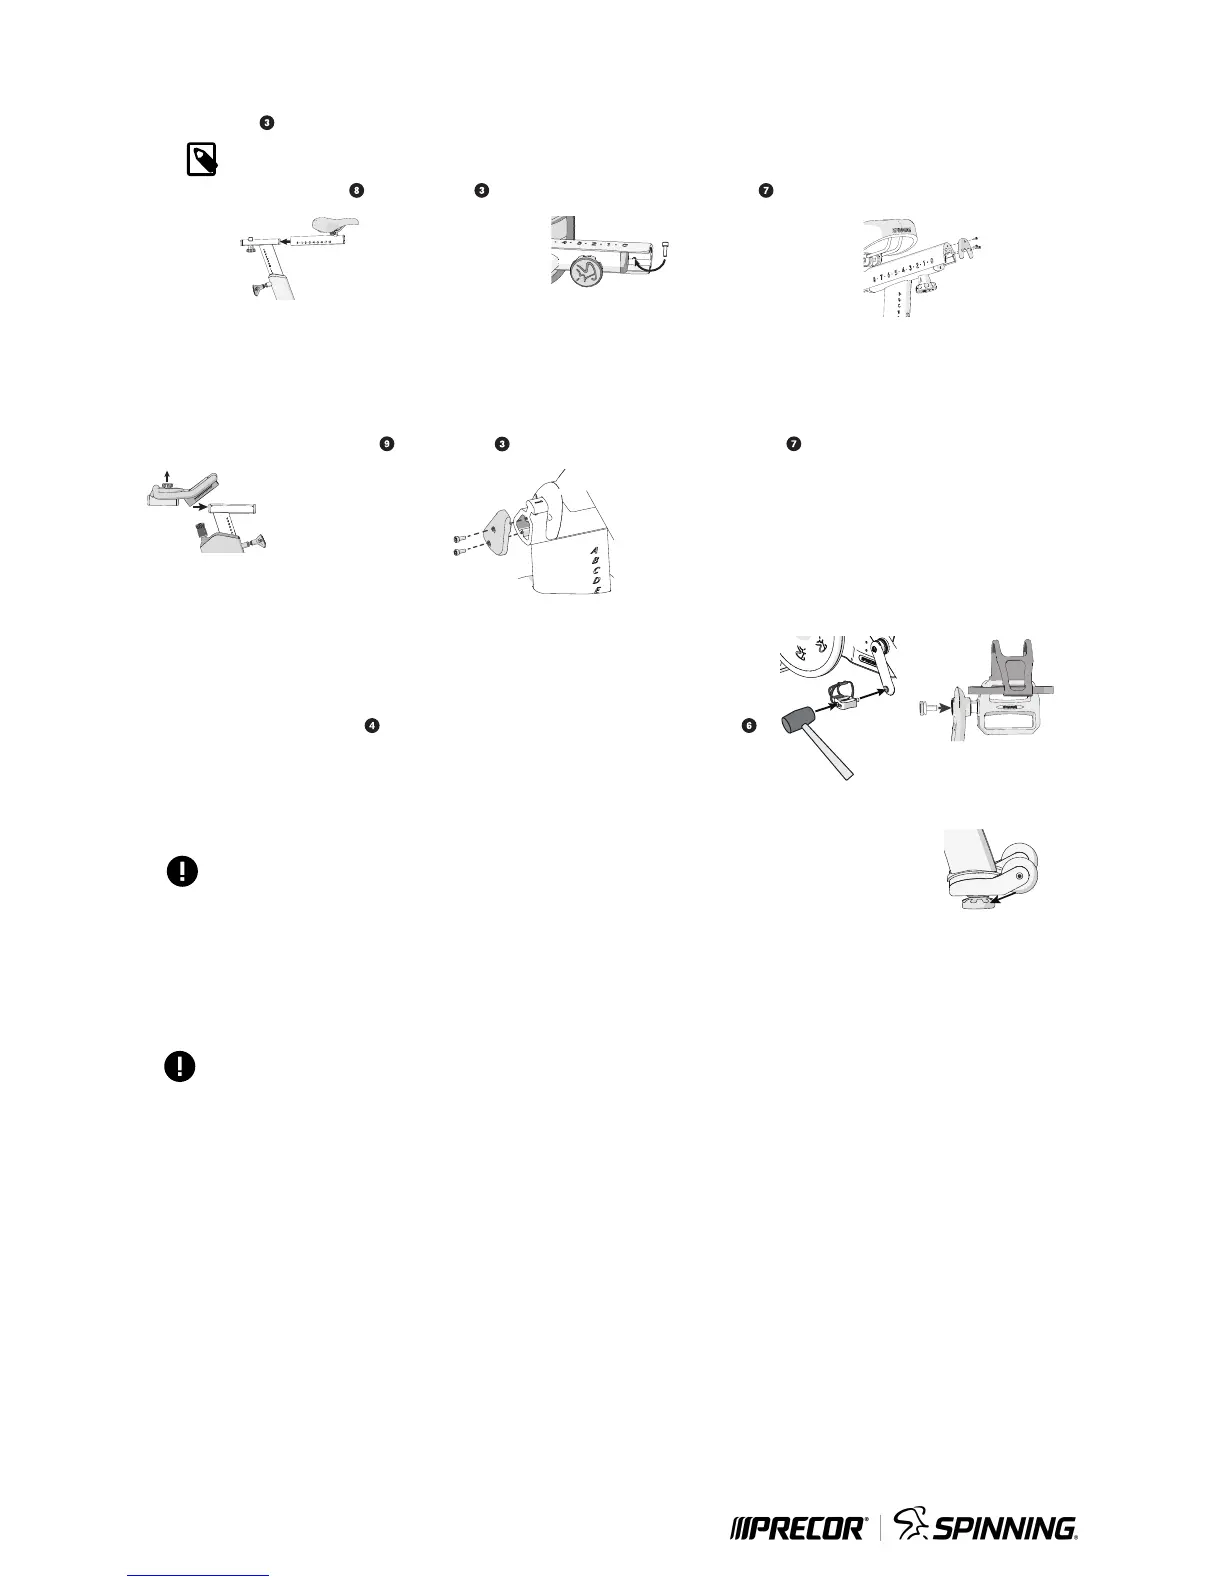
To attach the seat assembly:
1. Slide the seat assembly onto the seat post (Figur
e 6).
2. Insert one bolt
into the underside of the seat slider and fully tighten it to set the travel limit (Figure 7).
NOTE
DO NOT for
get to insert this bolt and set the travel limit.
3. Attach the seat slider end cap
using three bolts (Figure 8) and fully tighten with the hex key .
Figure 6 Figure 7 Figure 8
To attach the handlebar assembly:
1. Slide the handlebar assembly onto the handlebar post (Figur
e 9) by loosening the fore/aft handlebar knob and pulling it up to align with the grooves
in the handlebar post.
2. Attach the handlebar post end cap
using two bolts (Figure 10) and fully tighten with the hex key .
Figure 9 Figure 10
To attach the pedals:
1. Hold the pedals with the toe str
aps facing forward.
2. Insert a pedal into its corresponding crank arm (Figure 12).
3. Use a rubber mallet to lightly tap the center of the pedal into the crank arm to seat it (Figure 11).
4. Secure the pedal using one bolt
(Figure 12) and torque to 33 ft-lb (45 N-m) with the hex key .
5. Repeat Steps 1-3 to attach the other pedal.
Figure 11
Figure 12
Level the bike
IMPORTANT
Place the equipment on a at surface. Rotating the adjustable feet does not compensate for extremely uneven surfaces.
Make sur
e the bike is level before allowing anyone to use it.
To level the bike:
1. Try to rock the bike. If there is any movement, tip the bike to one side to locate the adjustable feet (see accompanying graphic).
2. Correct the height of each adjustable foot by turning it clockwise (+) to lower the bike, or counterclockwise (-) to raise the bike.
3. When you are nished leveling the bike, place it on the oor. Recheck for movement and readjust as necessary.
Figure 13
Bike assembly checklist
IMPORTANT
Your new Spinner bike comes with an innovative Kevlar® timing belt. This belt may require a break-in period of 8 to 16 hours of normal use. During
this time, you may experience more noise and vibration than normal operation. After the period, your bike should operate smoothly. If you experience
any issues after the period, please contact Precor Customer Service.
Use this checklist to make sure your bike is assembled properly.
▪ Check that all bolts are tightened to proper torque specication and no parts are missing.
▪ Check that the handlebar and seat posts move freely and lock in different positions.
▪ Check that the seat is level and does not rotate or tilt. Tighten and adjust as needed.
▪ Test the seat for movement front to rear.
▪ Brake tension is adjustable by turning the resistance knob in front of the seat. Pressing down on the knob will apply the brake if you need to stop
quickly.
▪ Pedal the bike at a moderate pace and test the resistance knob for smooth resistance changes.
▪ Press down on the knob to ensure the bike stops quickly.
Once testing is complete, tip the bike forward using the handlebars and roll it on a smooth surface to its nal use location. Turn the adjustable feet to level
the bike.
Spinner Chrono and Climb Assembly Guide | P/N 304562-102 rev C, ENU
© 2018 Precor Incorporated | May 2018

 Loading...