Page 3For technical questions, please call 1-888-866-5797.Item 57322
Assembly Instructions
Read the ENTIRE IMPORTANT SAFETY INFORMATION section at the beginning of this
manual including all text under subheadings therein before set up or use of this product.
TO PREVENT SERIOUS INJURY FROM ACCIDENTAL OPERATION:
Turn the Power Switch of the water pump off before assembly.
Installing the Wheels
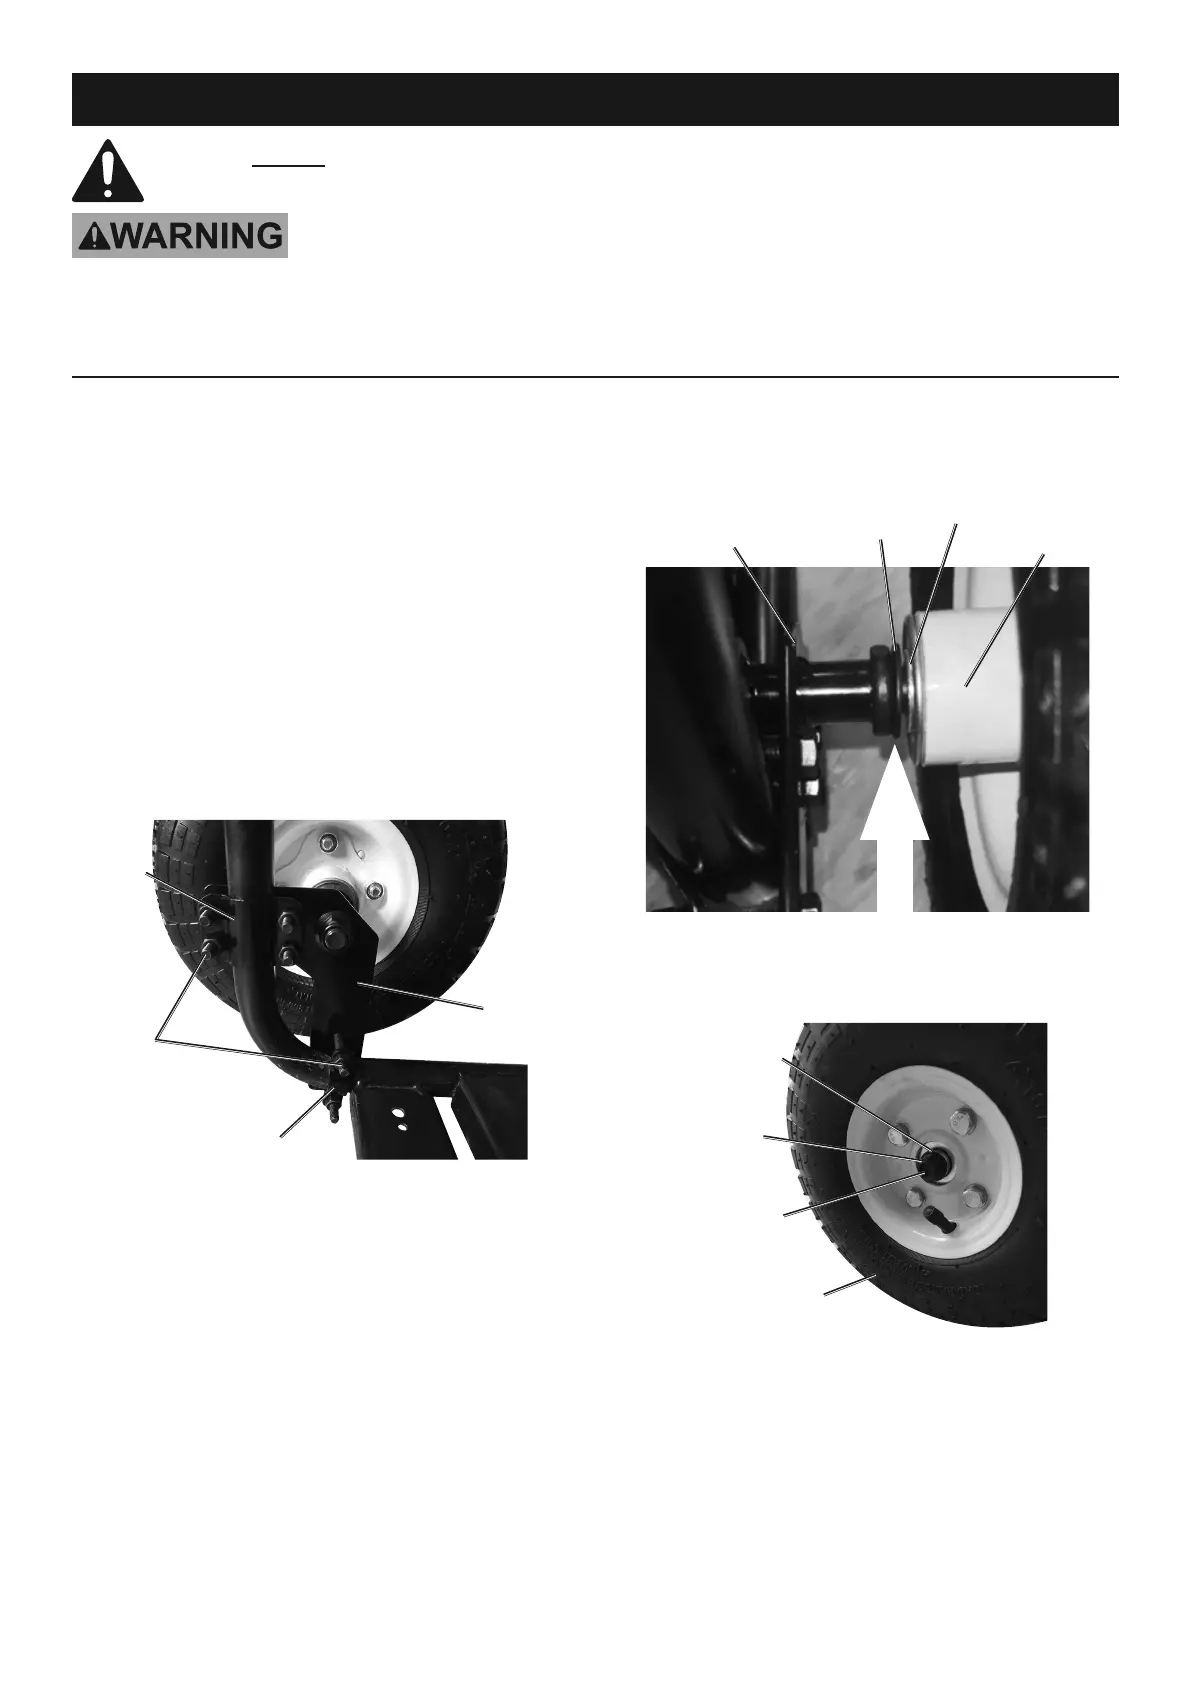
1. Place the Axle Support (12) outside the pump frame
so that the end with two holes is on the bottom
and the Axle extends away from the frame.
2. Make sure that the Axle Support is aligned
as shown, with the four holes near the top
and the two holes near the bottom.
3. Place the Lower Bracket (15), that has two
holes, around the frame’s tube near the
bottom of the Support. Secure it with two
Wheel Bracket Bolts (19), Spring Washers (21),
Washers (20), and M6 Nuts (17).
4. Place the Upper Bracket (16), that has
four holes, around the frame’s tube near
the top of the Support. Secure it with four
Wheel Bracket Bolts (19), Spring Washers (21),
Washers (20), and M6 Nuts (17).
Wheel
Bracket
Bolt (19)
Axle
Support
(12)
Lower
Bracket (15)
Upper
Bracket
(16)
5. Tighten all Bolts and Nuts securely and evenly.
Each Bracket should be centered across
the frame tube after tightening.
6. Install the other Axle Support on the other side
of the pump’s frame. Make sure it is aligned as
a mirrored image of what is shown so that the
Lower Bracket is on the bottom and the Axle
extends out away from the pump frame.
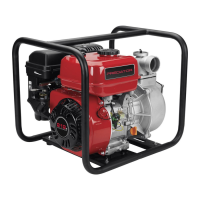
7. Before installing Wheel (3), install Steel
Spacer Washer (24) on Axle (5) as indicated
by arrow. Repeat on other side.
Lower Bracket
Axle Flange
Steel Spacer
Washer (24)
Wheel Hub
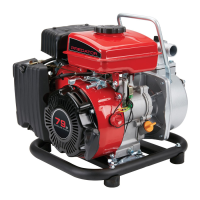
8. Install a Wheel on each Axle, securing
each in place with an Axle Washer (2) and
Axle Nut (1). Repeat on other side.
Axle (5)
Wheel (3)
Axle
Washer (2)
Axle
Nut (1)