Page 11For technical questions, please call 1-888-866-5797.ITEM 61725
SAFETYOPERATIONMAINTENANCE SETUP
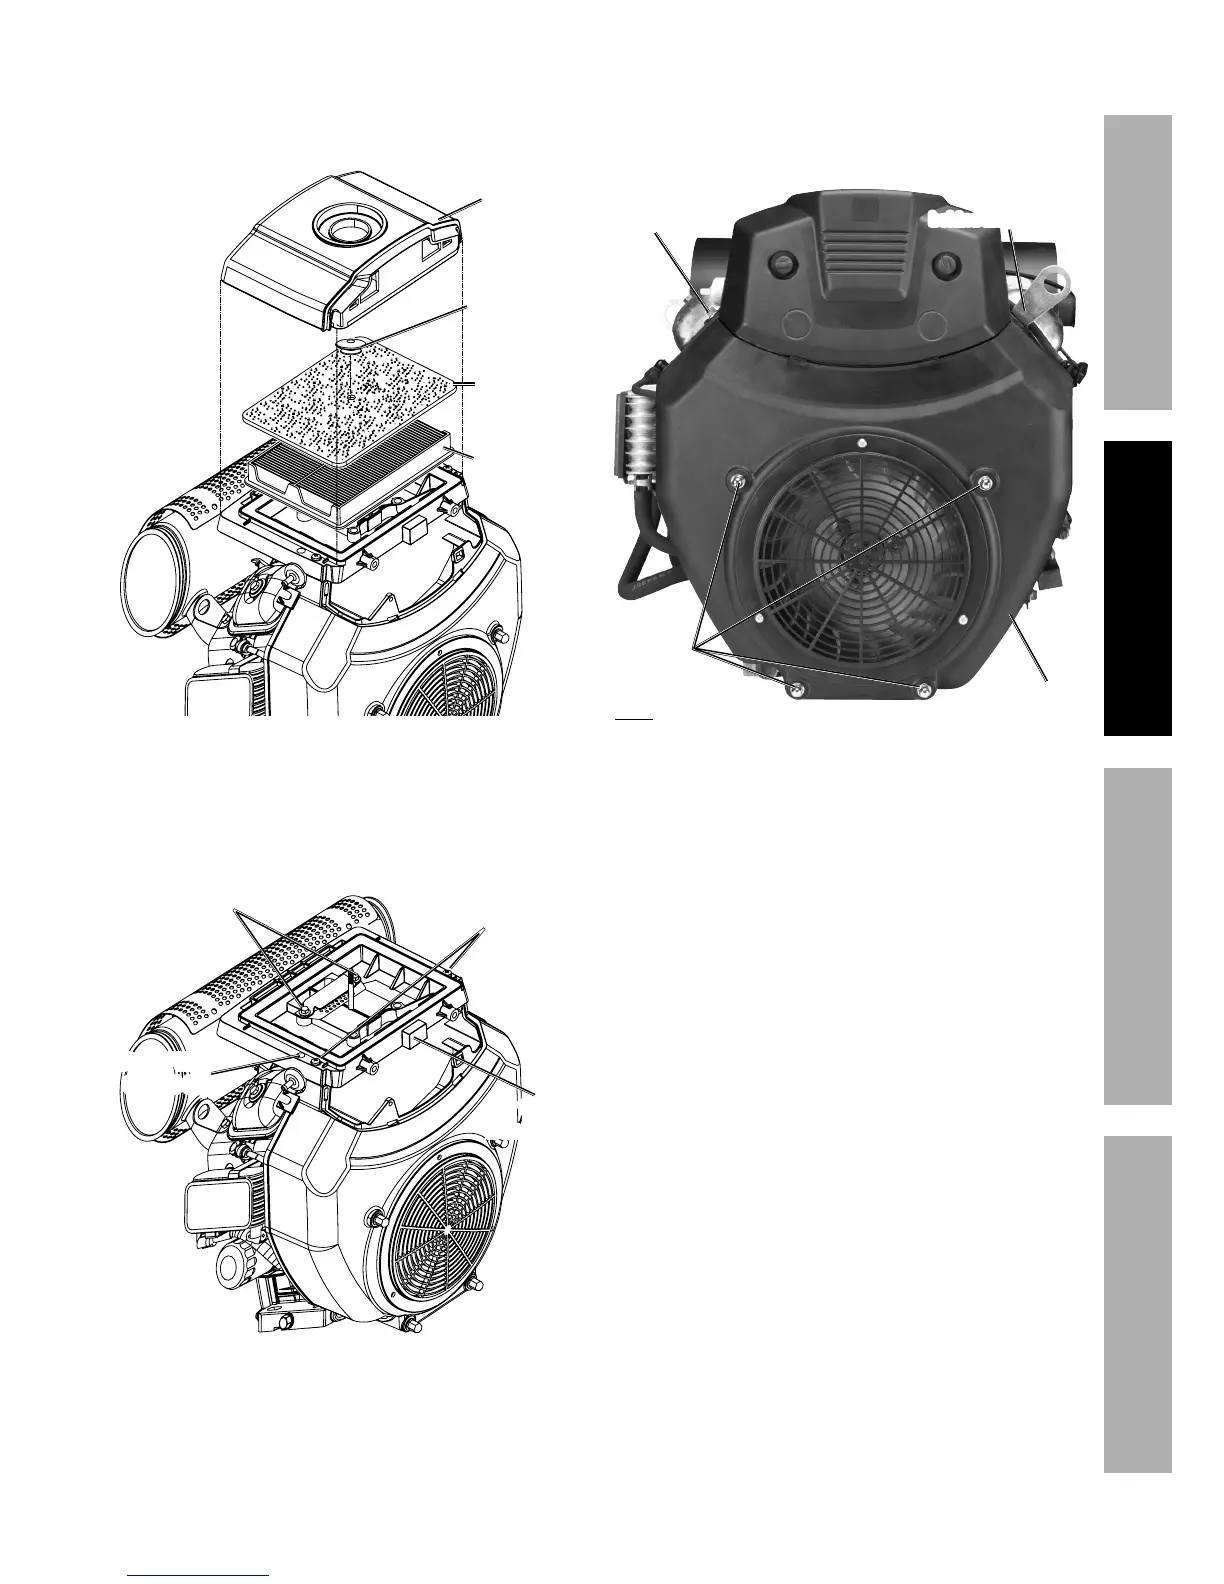
5. Remove the Air Cleaner Top Cover (142b) and
internal Air Cleaner components
(Spacer, Foam and Paper Filters (142c-142e)).
See Figure F.
Air Cleaner
Top Cover
(142b)
Air Cleaner
Spacer (142c)
Foam Air
Filter (142d)
Paper Air
Filter (142e)
Figure F: Remove Air Cleaner
Top Cover and components
6. Remove the two Intake Cover Bolts (143) and the
two Air Cleaner Base Bolts (146). See Figure G.
7. Detach the top of the Fuel Filter Clip (147)
from the Air Cleaner Base (142g).
Intake Cover
Bolts (143)
Air Cleaner
Base Bolts
(146)
Fuel Filter
Clip (147)
Air Cleaner
Base (142g)
Figure G: Remove Bolts and Clip
from Air Cleaner Base
8. Remove the Air Cleaner Base.
9. Remove the four Shroud Nuts (99) and the two
Flange Shoulder Bolts (112) from the Shroud (100).
The Flange Shoulder Bolt on the right holds the
Lifting Bracket (111) in place. See Figure H.
Shroud
Nuts (99)
Flange
Shoulder
Bolt (112)
Flange Shoulder
Bolt (112)
behind Lifting Bracket
Shroud (100)
Note: Air Cleaner Front Cover is still shown,
although it should have been removed in step 4.
Figure H: Remove Shroud
10. Remove the Shroud.