7
6. Remove food from cooker. For best results, use heat-resistant plastic or wooden utensils. Do not use metal utensils as they may scratch
the nonstick surface.
7. When cooking/keep warm are complete, unplug power cord from wall outlet and then from pressure cooker. Allow cooker to cool
completely before cleaning.
Cleaning
After every use
1. Unplug power cord from wall outlet and then from pressure cooker. Allow cooker to cool completely before cleaning.
2. After each use, remove the quick pressure release valve from the cover. Then detach the sealing ring plate from the cover by pulling
the grip pin (Fig. C, page 3). Remove the sealing ring from the plate. Do not remove the center grommet on the sealing ring plate.
If the vent filter appears dirty or contains debris, remove it from the underside of the cover, following the instructions on page 3.
3. Clean the cooker cover with a damp, soapy cloth and then dry completely. Do NOT immerse the cooker cover in water.
Wash the sealing ring, sealing ring plate, and vent filter in warm, soapy water. Do NOT wash these parts in the dishwasher. Dry all
cover parts thoroughly after cleaning.
4. To be sure the vent pipe is clear, hold the cover up to the light and look through the vent pipe. Clean it with a small brush or pipe
cleaner if it is blocked or partially blocked. If necessary, clean the vent filter with a small brush to remove any food particles from
the slots and holes. Rinse and dry all parts thoroughly and reassemble.
5. Wash the cooking rack in warm, soapy water. Do NOT wash in the dishwasher.
6. Remove the cooking pot from the cooker body. Wash the pot in warm water and a mild detergent. The cooking pot may also be
washed in the dishwasher.
The nonstick surface may be cleaned with a non-metal cleaning pad, such as Scotch-Brite* Multi-Purpose Scrub Sponge or Scotch-
Brite* Dobie* Cleaning Pad. Do not use steel wool or abrasive cleaners on the cooking pot or the cooker body.
Soaking the cooking pot to loosen food residue is not necessary. If, however, soaking the pot is desired, do not soak for more than 2
hours. Soaking the pot for more than 2 hours may damage the nonstick finish.
CAUTION! Never pour water into the cooker body or immerse it or the power cord in water. Always be sure the pot is COMPLETELY
DRY before placing it back in the cooker body.
7. Clean the plastic rim of the cooker body with a damp cloth. Avoid getting water inside of the cooker body.
Occasionally
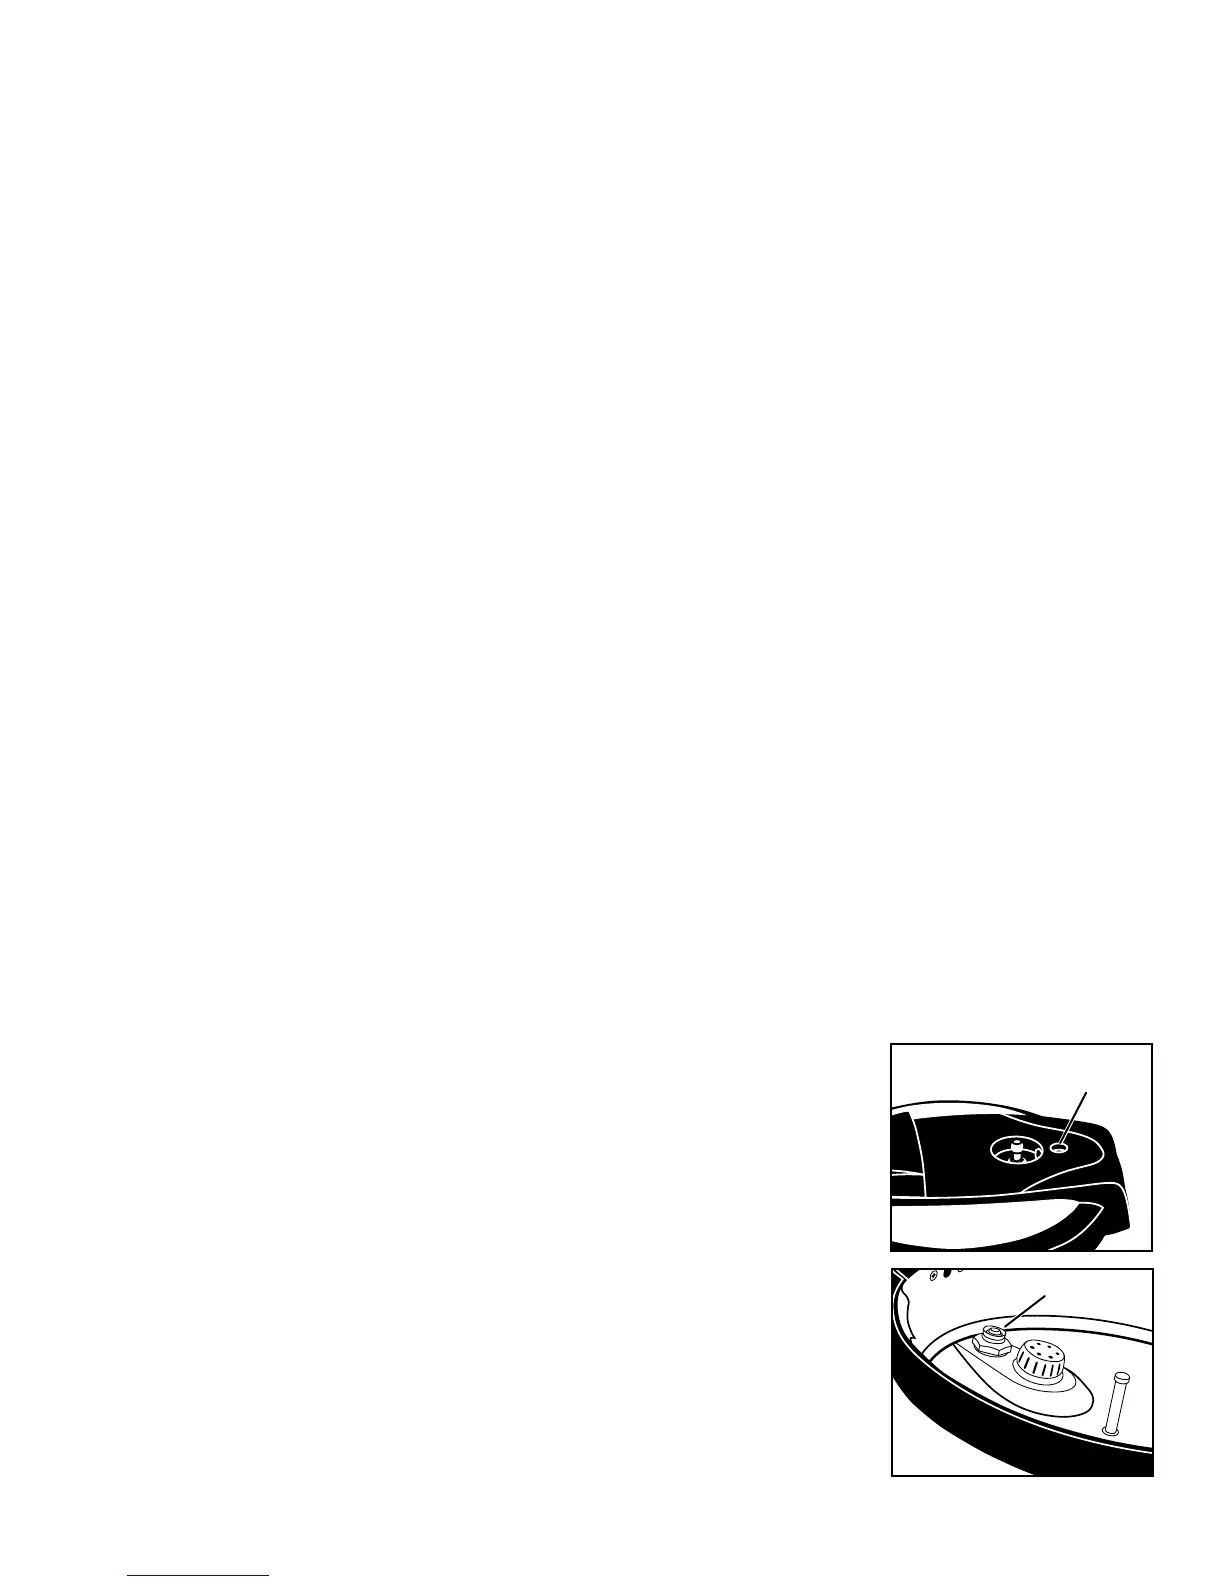
1. Remove the air vent/cover lock for cleaning. Place your finger over the air vent/cover lock hole in the top of the cover (Fig. M) and
remove the gasket from the underside of the cover (Fig. N). Push the air vent/cover lock through the top of the cover. Wash both the
air vent/cover lock and the gasket in warm, soapy water.
The metal shaft may be cleaned with a nylon mesh pad. Clean the cover hole with a small brush. After cleaning, reinsert the metal
shaft from the top side of the cover down through the cover hole. Place a finger over the hole and push the gasket onto the end of the
metal shaft until it snaps into the groove.
2. Wipe the outside of the cooker body with a damp cloth.
Care and Maintenance
• When not in use, store your pressure cooker in a dry place. To prevent unpleasant odors from
lingering, store the unit with the cover inverted on the cooker body.
• As is the case with all cookware, avoid chopping or cutting food inside the cooking pot with a
knife or other sharp utensil. Do not use metal utensils as they may scratch the nonstick surface.
• Do not strike the rim of the cooking pot with any cooking utensil. This could cause nicks in the
rim which may allow steam to escape and prevent the pressure cooker from sealing.
• The sealing ring and gasket for the air vent/cover lock may shrink, become hard, deformed,
cracked, or torn with normal use. When this happens, replace the sealing ring and/or the air vent/
cover lock gasket. Leakage between the cover and cooker body is usually caused by deterioration
of the sealing ring after prolonged use.
• Periodicallychecktheventpipenutforlooseness.Ifnecessary,retightenwitha½˝wrench.
*Scotch-Brite and Dobie are registered trademarks of 3M Company. Presto is not affiliated with 3M Company.
Fig. M
Air vent/cover
lock hole
Fig. N
Gasket