HANDLE INSTALLATION
Tools Required: Phillips type screwdriver
NOTE: The pressure cooker handles can be found inside the
pressure cooker body in individual plastic bags.
To Attach Helper Handle to Cooker Body
(Does not apply to 4-quart pressure cooker, stock number 01241.)
1. Place pressure cooker body upside down on table or counter
(Fig. A).
2. Locate bag containing short helper handle. Take out handle
and remove tape on handle which is holding screw in place.
Remove screw from handle and set aside.
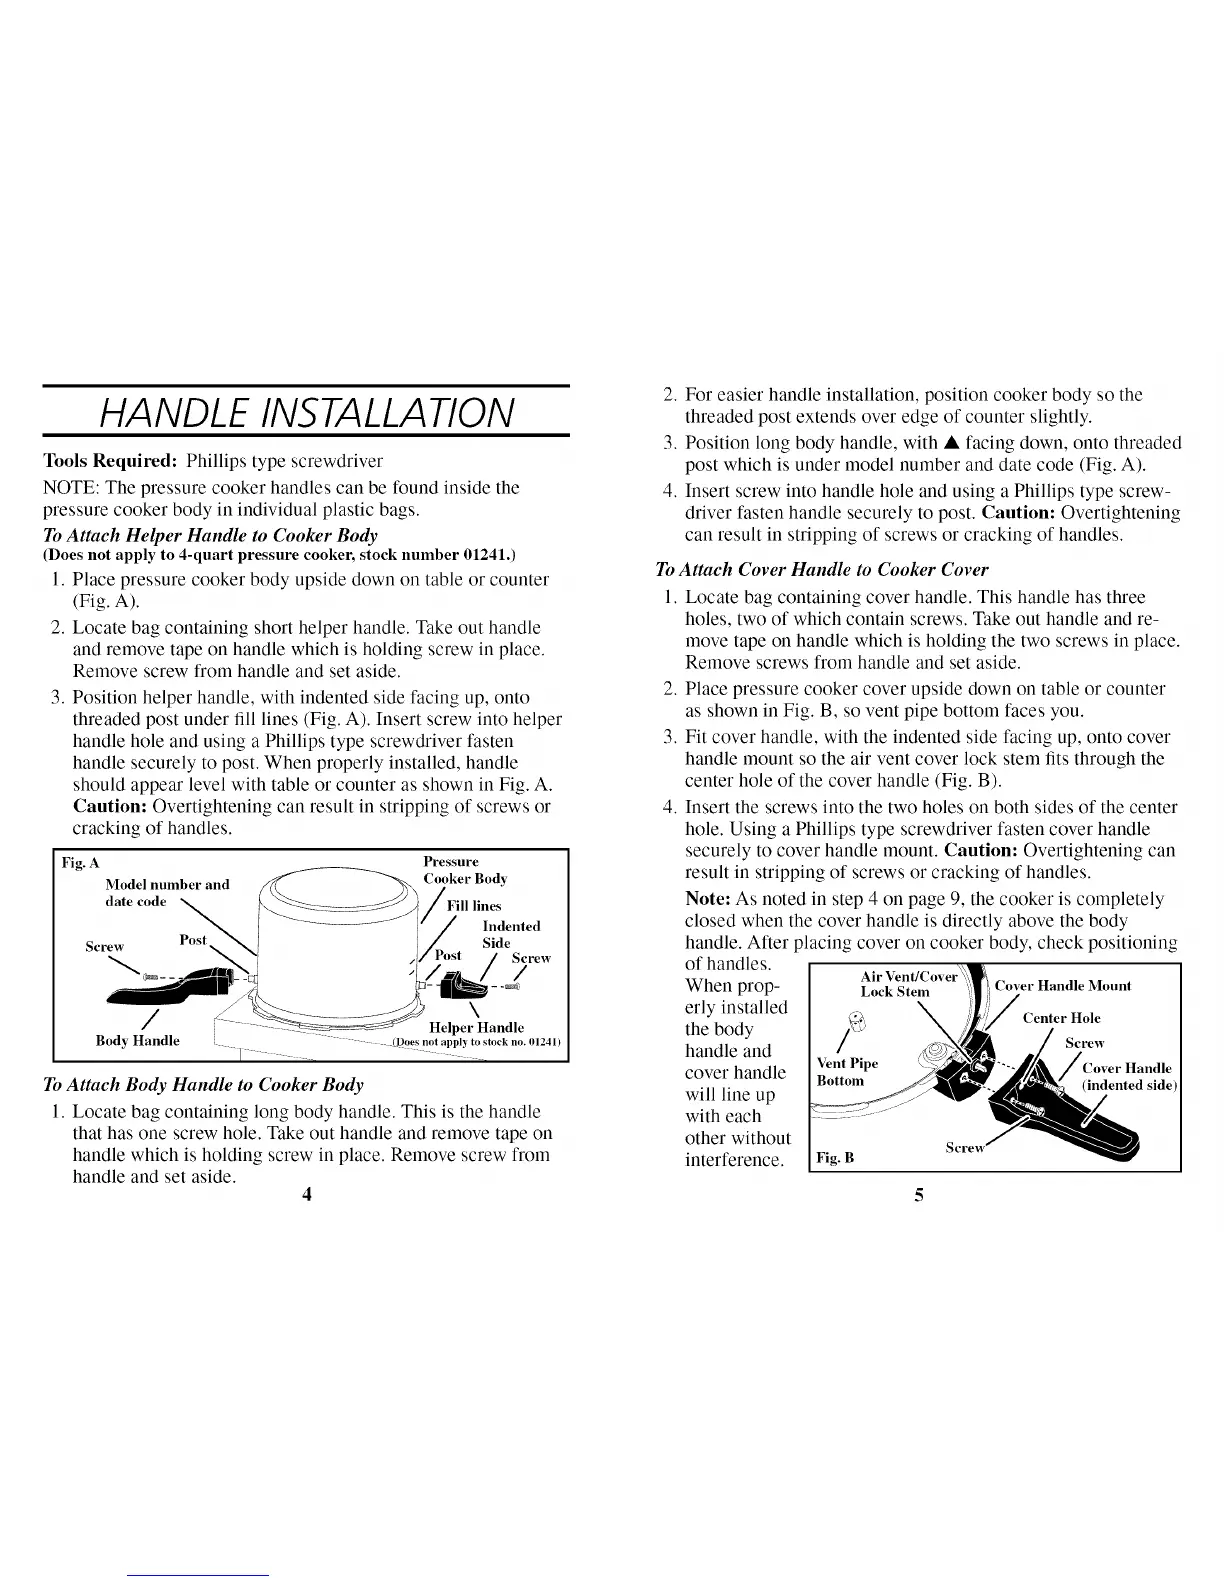
3. Position helper handle, with indented side facing up, onto
threaded post under fill lines (Fig. A). Insert screw into helper
handle hole and using a Phillips type screwdriver fasten
handle securely to post. When properly installed, handle
should appear level with table or counter as shown in Fig. A.
Caution: Overtightening can result in stripping of screws or
cracking of handles.
Fig. A
Model number and
date code
Screw Post
/
Body Handle
]
ToAttach Body Handle to Cooker Body
Pressure
Cooker Body
lines
Indented
Side
/ _rew
\
Helper Handle
(Dpes not appl 3 to stock no. 01241)
1. Locate bag containing long body handle. This is the handle
that has one screw hole. Take out handle and remove tape on
handle which is holding screw in place. Remove screw from
handle and set aside.
4
2. For easier handle installation, position cooker body so the
threaded post extends over edge of counter slightly.
3. Position long body handle, with • facing down, onto threaded
post which is under model number and date code (Fig. A).
4. Insert screw into handle hole and using a Phillips type screw-
driver fasten handle securely to post. Caution: Overtightening
can result in stripping of screws or cracking of handles.
To Attach Cover Handle to Cooker Cover
1. Locate bag containing cover handle. This handle has three
holes, two of which contain screws. Take out handle and re-
move tape on handle which is holding the two screws in place.
Remove screws from handle and set aside.
2. Place pressure cooker cover upside down on table or counter
as shown in Fig. B, so vent pipe bottom faces you.
3. Fit cover handle, with the indented side facing up, onto cover
handle mount so the air vent cover lock stein fits through the
center hole of the cover handle (Fig. B).
4. Insert the screws into the two holes on both sides of the center
hole. Using a Phillips type screwdriver fasten cover handle
securely to cover handle mount. Caution: Overtightening can
result in stripping of screws or cracking of handles.
Note: As noted in step 4 on page 9, the cooker is completely
closed when the cover handle is directly above the body
handle. After placing cover on cooker body, check positioning
of handles.
When prop- Cover Handle Mount
erly installed Center Hole
the body
handle and Screw
cover handle
will line up (indented side
with each
other without
Sere'_
interference. Fig. B