4. Can I use puréed fruit like applesauce in place of oil in the batter recipes?
Yes, wafes can be made successfully using puréed fruit as a substitute for oil. Because there is no oil in the recipe, it is suggested
that the wafe grids be brushed lightly with vegetable oil to prevent sticking.
5. Where can I nd more recipes?
Please scan the QR code found on page 5 periodically for more recipes and lling suggestions.
6. Can I use gluten free or keto wafe batter in the stuffed wafe maker?
Yes, gluten free our and nut ours can be used to make batters to use in the wafe maker.
Care, Cleaning, and Storage
1. Unplug the wafe maker and allow to cool completely before cleaning.
2. To clean the wafe maker, brush any loose crumbs from the wafe grids. Then wipe the grids with a paper towel or cloth. Clean
the outside of the wafe maker with a damp cloth.
Should any batter become baked onto the grids or the outside of the unit, apply a small amount of vegetable oil to the baked-on
batter. Allow it to sit for a few minutes to soften and wipe off with a paper towel or cloth. Do not use steel wool scouring pads or
abrasive kitchen cleaners on the unit. Never immerse the wafe maker base in water or other liquid.
3. If lling oozes out of the stuffed wafe during baking, it may be necessary to perform a more thorough cleaning of the wafe
grids. Unplug the wafe maker and add 1 tablespoon of water to the bottom grid. Close the unit and without ipping, allow it to
cool to a comfortable temperature. Then, using the dampness remaining on the grids, wipe away the residue.
4. Wash the wafe tongs in hot, soapy water, and rinse thoroughly. Do not wash the tongs or wafe
maker in the dishwasher.
5. Place the wafe tongs in the wafe maker and close the unit.
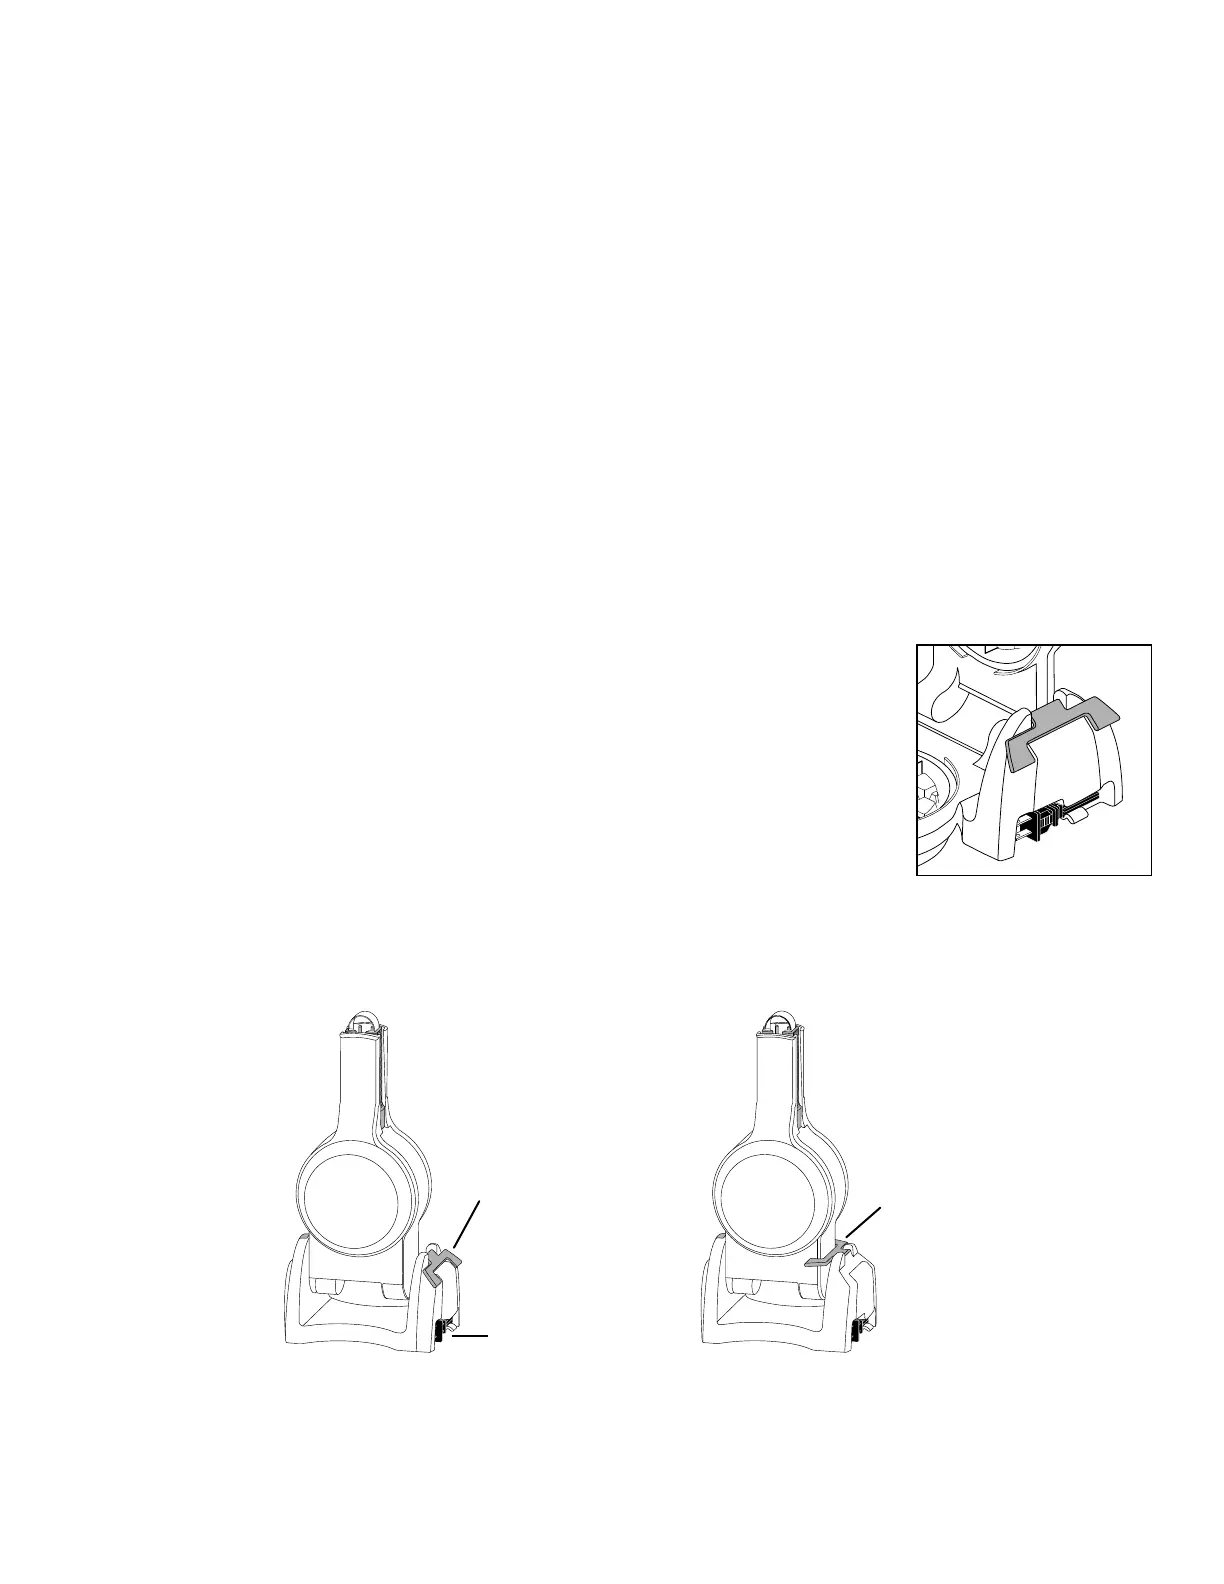
6. Push the cord into the cord storage port and secure the plug end in the clip (Fig. H).
7. For compact storage, grasp the wafe maker handles and rotate the wafe maker to the vertical
position. While holding the handles together, rotate the red locking lever until it secures the unit
in the upright position (Fig. I and Fig. J).
Before the next use, remember to unlock from the storage position (Fig. J). Hold the handles
together and rotate the red locking lever towards the cord storage (Fig. I).
7
Cord storage
Fig. H
Red locking
lever in
UNLOCKED
position
Fig. I
Red locking
lever in
LOCKED
position
Fig. J
Cord storage