EasyManua.ls Logo

Prevue Hendryx Hampton Deluxe F070 User Manual

Prevue Hendryx Hampton Deluxe F070
6 pages
To Next Page IconTo Next Page
Page #1 background imageLoading...
Page #1 background image
F070—03/23—A4A Made in China for Prevue Pet Products, Inc., 224 N Maplewood Ave, Chicago IL 60612 USA • www.prevuepet.com • 1 [312] 243-3624 • customerservice @ prevuepet.com
]C
7
]C
6
]C
5
]B
2
]B
1
]F
1
]F
2
]L
1
]L
2
]R
2
]R
1
]C
4
]C
3
]C
2
]C
1
]T
]G
]T
]G
]D
Hex Screw
26 pcs +1
Corner Bracket
4 pcs
Endcap
4 pcs
Allen wrench
1 pcs
Plastic Connector
4 pcs
Rolling Caster
2 pcs
Locking Caster
2 pcs
HARDWARE
INCLUDED:
KEY:
B
= BACK Panel
R=RIGHT Side Panel
C=CORE Center Parts
F=FRONT Panel
L=LEFT Side Panel
G=GRILLE
T=TRAY
D=DIVIDER
CUSTOMER SUPPORT
For assistance or replacement parts,
p
lease contact Prevue Pet Products:
PHONE
1 (312) 243-3624
ONLINE
www.prevuepet.com
EMAIL
customerservice@prevuepet.com
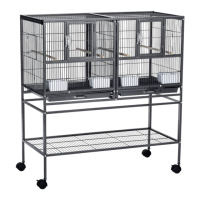
Hampton Deluxe
Divided Breeding Cage w/Stand
PARTSLIST
Instructions online at www.prevuepet.com
F070
M
ODEL #
These parts are
interchangeable:
F
1 =
B
1
L
1 =
R
1
L
2 =
R
2
C
2 =
C
3
C
4 =
C
5 =
C
6
G
s are the same
T
s are the same
C
UP
S
P
E
R
C
HE
S
PE
RC
HE
S
C
UP
S
Question and Answer IconNeed help?

Do you have a question about the Prevue Hendryx Hampton Deluxe F070 and is the answer not in the manual?

Prevue Hendryx Hampton Deluxe F070 Specifications

General IconGeneral
BrandPrevue Hendryx
ModelHampton Deluxe F070
CategoryFarm Equipment
LanguageEnglish

Summary

Hampton Deluxe Divided Breeding Cage w/Stand F070 PARTS LIST

Hardware Included

Lists all hardware components provided with the cage kit for assembly and maintenance.

Parts Identification Key

Defines the labels (letters and numbers) used to identify specific parts in the assembly diagrams.

Cage Assembly - Stand Construction

Stand Frame Assembly

Assembling the base stand by connecting frame sides, front, and back panels with screws and connectors.

Storage Shelf Installation

Inserting the storage shelf into the lower rails of the stand frame and securing it with screws.

Caster Installation

Attaching the casters to the base of the stand legs, including locking casters for stability.

Cage Body Assembly (Upside Down)

Attaching Side Panels

Connecting front, right, back, and left side panels using hex screws while the cage is upside down.

Tray Channel Rails Installation

Installing tray channel rails onto the upside-down cage body and securing them with screws.

Final Cage Assembly and Accessories

Square Rail Installation

Attaching square rails to the cage body after tray channels are installed, securing with hex screws.

Perch and Cup Installation

Inserting perches and sliding food/water cups into place, securing them with doors.

Grille and Tray Insertion

Sliding the grille into top channels and the tray into bottom channels for each cage side.

Dividing the Cage and Roof Installation

Center Divider Grille Placement

Placing the center divider grille to separate the cage interior into two spaces or leaving it out.

Roof Panel Installation

Setting the roof panel in place and securing it to the corners using brackets and screws.

Finishing Touches

Tapping end caps into each corner of the cage to complete the assembly.

Stacking Assembled Units

Preparation for Stacking

Removing endcaps and specific hex screws from top and bottom units before stacking.

Connecting Units

Inserting plastic connector posts and replacing screws to securely stack multiple cage units.

Related product manuals