24 www.pridemobility.com Jazzy Select Series
V. COMFORT ADJUSTMENTS
COMFORT ADJUSTMENTS
After becoming familiar with your power chair’s operation, you may find the need to make some adjustments to increase
your comfort, such as seat height, armrest angle, foot platform height and angle, and joystick module position. Refer to the
following information before making comfort adjustments.
NOTE: If your power chair is equipped with an optional seating system, please refer to the information pro-
vided in separate manuals.
WARNING! If your power chair was configured by your authorised Pride Provider, please consult
your healthcare professional before changing the seat position or making any other adjustment.
Some adjustments may degrade your power chair’s performance and safety by changing its centre
of gravity.
WARNING! Some power chair components are heavy. You may need assistance to lift or carry
them. Please refer to the specifications table for specific component weights before you
disassemble the power chair.
WARNING! Remove the occupant from the power chair before making any adjustments.
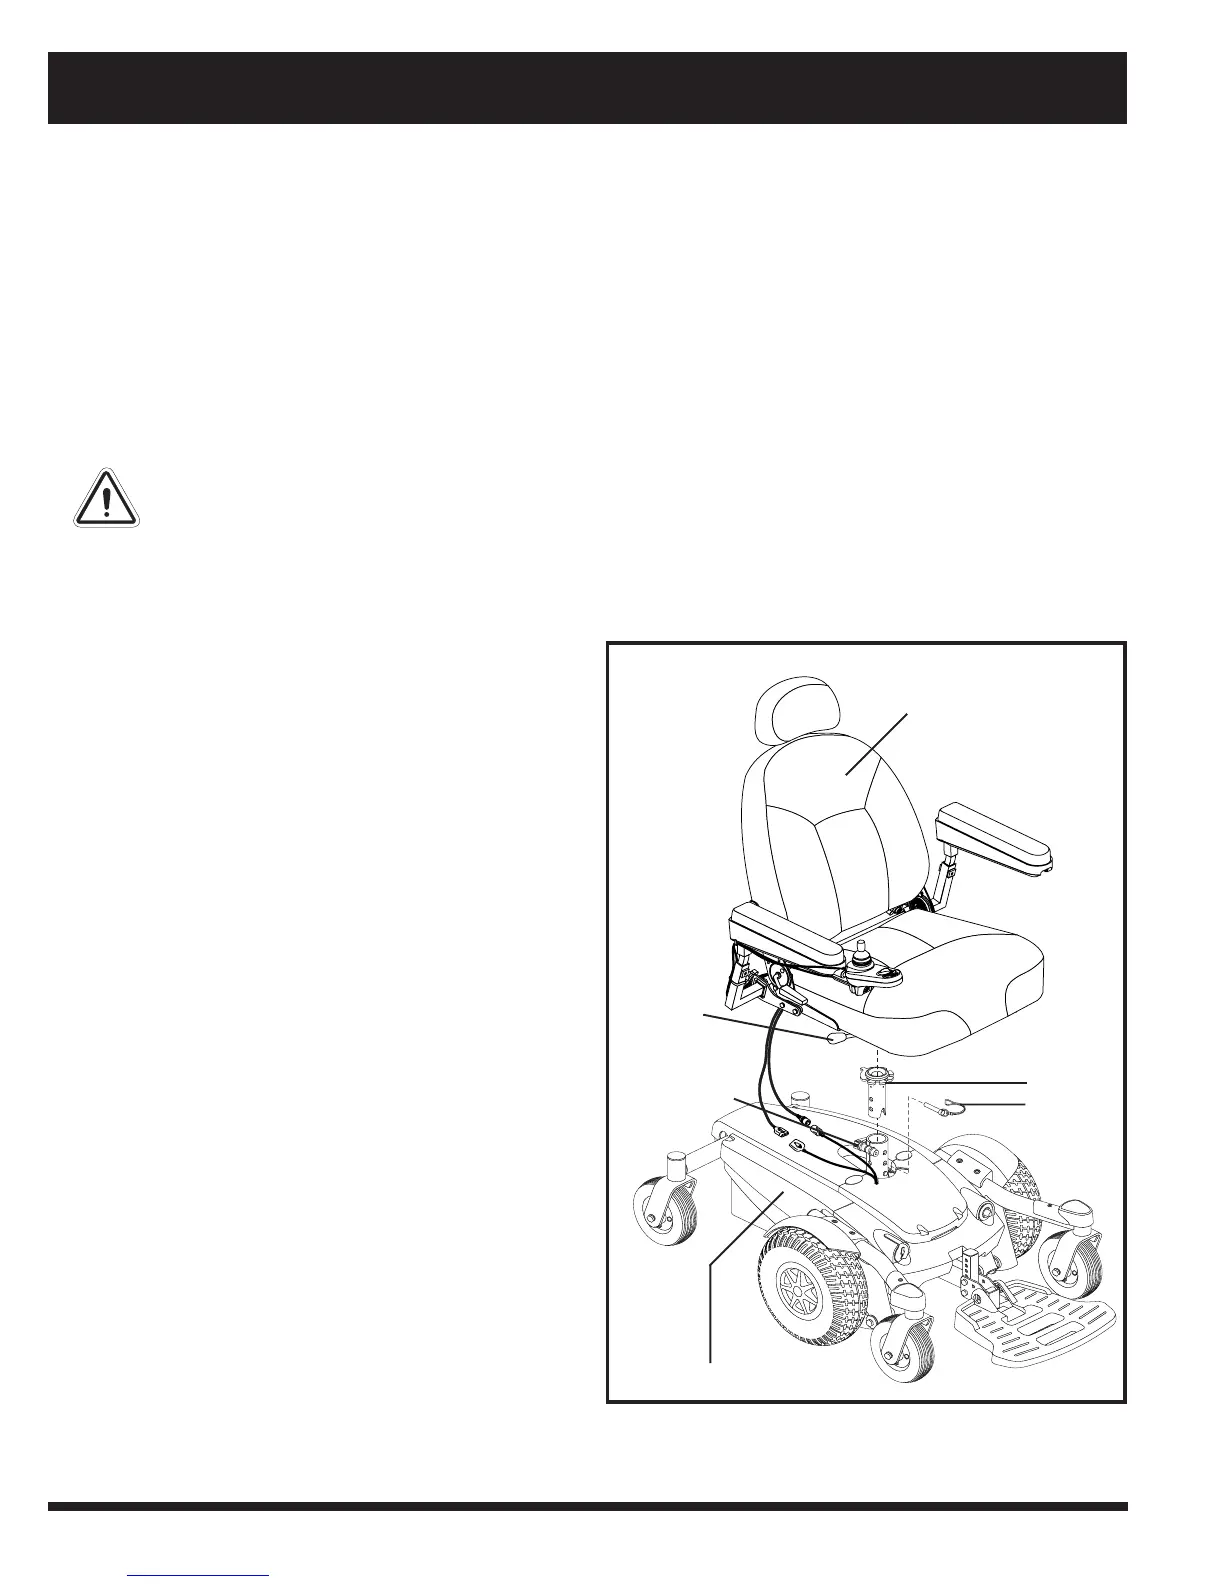
Figure 13. Seat Height Adjustment
SEAT
CLEVIS PIN
POWER BASE
QUICK
RELEASE
FASTENER
SEAT POST
SEAT
RELEASE
LEVER
Seat Height Adjustment
You can change the seat height to one of three positions in
2.5 cm (1-in.) increments.
To change the seat height:
1. Turn off the power to the controller.
2. Make sure that the power chair is in drive mode. See
figure 9.
3. Loosen the quick-release fastener. See figure 13.
4. Remove the seat. See figure 13.
5. To set the seat to the lowest position, remove the
clevis pin (if equipped) from the seat post and reinstall
the seat post and then the seat.
NOTE: The bottom hole on the seat post is equipped
with an internal welded pin, which sets the seat height
in the lowest position. The clevis pin is not necessary
for this adjustment.
6. To set the seat to one of two higher positions, install the
clevis pin into either the middle hole for the middle height
or the top hole for the highest height, then reinstall the
seat post, and then the seat.
7. Tighten and clamp the quick-release fastener. See
figure 12.
NOTE: To rotate the seat use the seat release lever
located under the seat.