SC7132 25
EN
V. COMFORT ADJUSTMENTS
SEAT ROTATION ADJUSTMENT
The seat rotation lever will secure the seat into several
positions.
1. Pull upward on the seat rotation lever to disengage the
seat. See fi gure 14.
2. Rotate the seat to the desired position.
3. Release the lever to secure the seat into place.
ARMREST ANGLE ADJUSTMENT
Armrest angle of your scooter can be adjusted upward or
downward by turning the adjustment dial. See fi gure 14.
NOTE: The armrests also pivot upward to make getting on
and off of your scooter easier.
FRONT-TO-BACK SEAT ADJUSTMENT
You can reposition the seat forward or rearward to adjust the
distance between the seat and the tiller.
1. Move the seat sliding lever located at the lower left side
of the seat outward. See fi gure 14.
2. While holding the lever out, slide the seat forward or
rearward.
3. Release the seat sliding lever once the seat is in the desired
position.
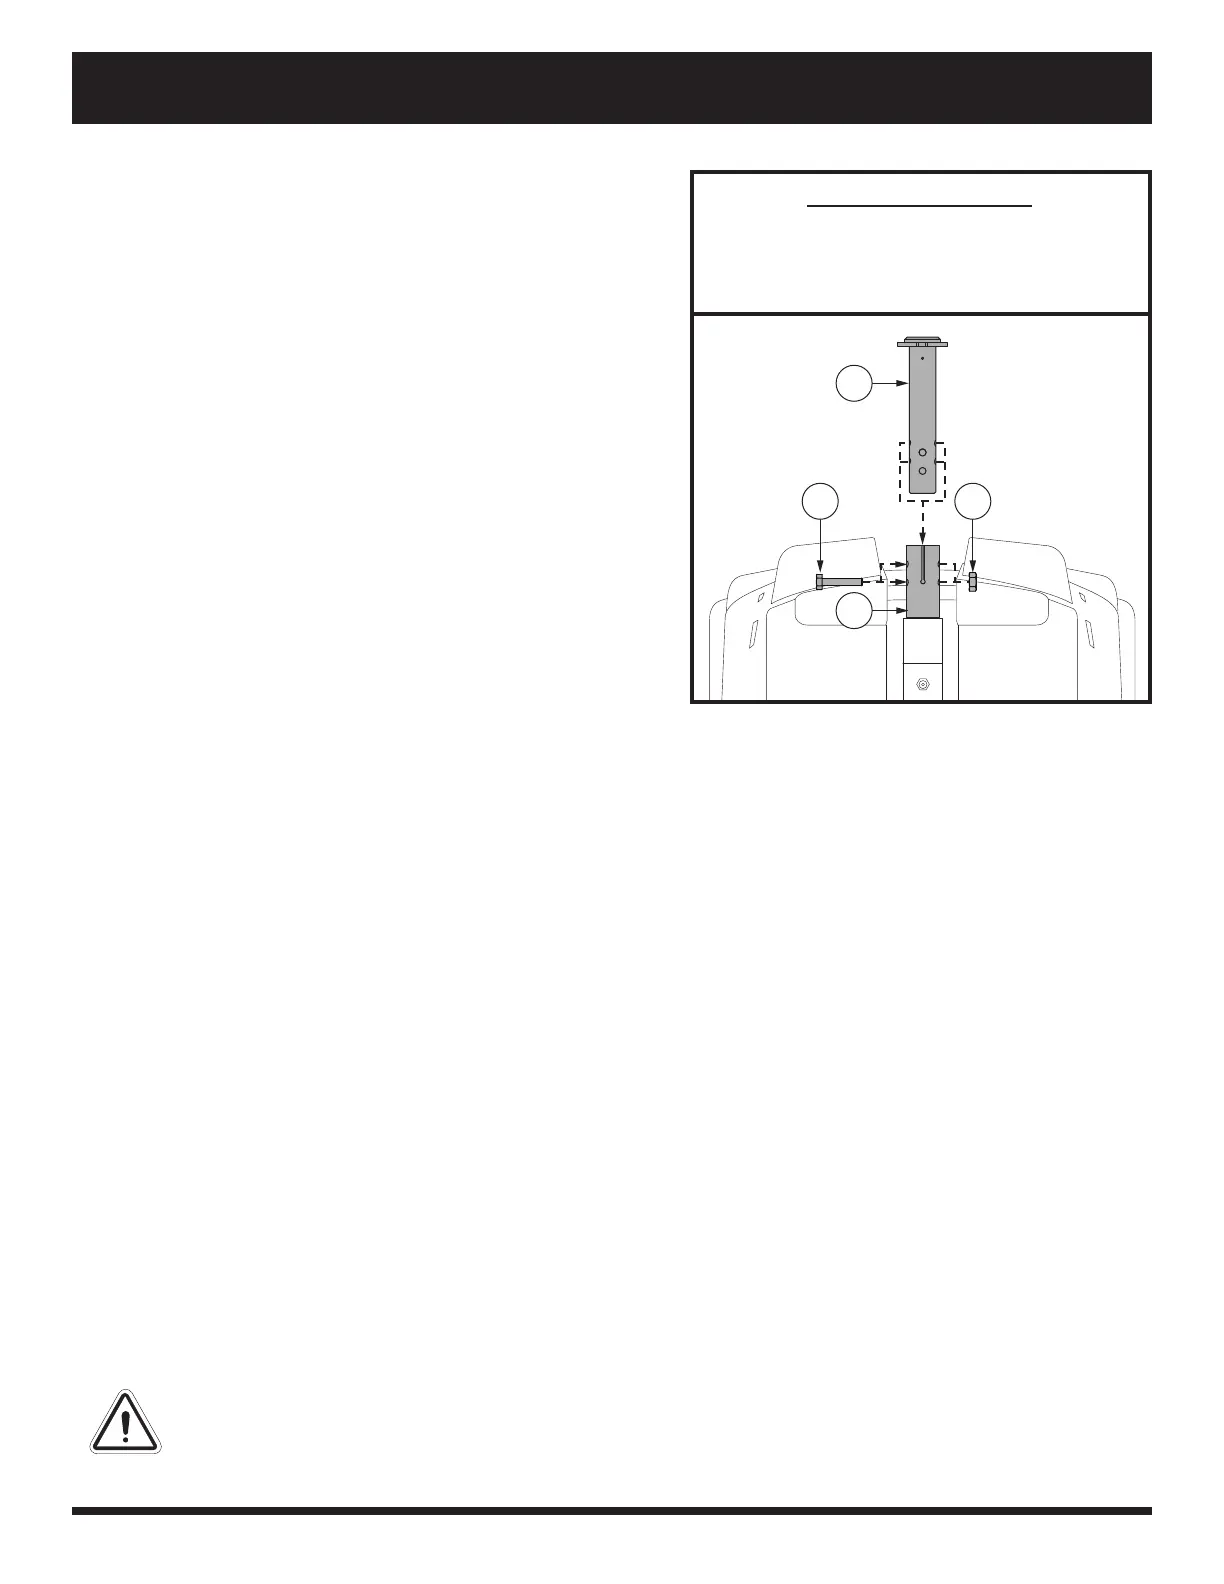
1
23
4
1. UPPER SEAT POST
2. NUT
3. SEAT HEIGHT ADJUSTMENT BOLT
4. LOWER SEAT POST
IDENTIFICATION KEY
Figure 15. Seat Height Adjustment
ACCESSORY BRACKET
The rear-mounted accessory bracket allows you to attach a personal accessory such as a basket, walker holder,
or oxygen tank to the back of your scooter. Utilize the detent pin to securely mount your item to the accessory
bracket. See fi gure 14. See your authorized Provider for details.
SEAT HEIGHT ADJUSTMENT
The seat can be repositioned to several diff erent heights. See fi gure 15.
1. Remove the seat and rear shrouds from your scooter.
2. Remove the seat height adjustment bolt.
3. Raise or lower the upper seat post to the desired seat height.
4. While holding the upper seat post at that height, align the adjustment holes of the upper and lower seat posts.
5. Insert the seat height adjustment bolt through the locating holes of both the upper and lower seat posts.
6. Reinstall the nut onto the seat height adjustment bolt and tighten.
7. Reinstall the rear shrouds and the seat.
POSITIONING BELT (OPTIONAL)
Your scooter seat may be equipped with an auto-type positioning belt that can be adjusted for operator comfort.
The positioning belt is designed to help support the operator so that he or she does not slide down or forward in
the seat. The positioning belt is not designed for use as a restraining device.
WARNING! The positioning belt is not designed for use as a seat belt in a motor vehicle. Nor is
your scooter suitable for use as a seat in any vehicle. Anyone traveling in a vehicle should be
properly belted into seats approved by the vehicle manufacturer.
WARNING! The positioning belt should be secured at all times. Never allow the positioning belt
to hang or drag on the fl oor as it may become entangled.