6 !!!!!!! www.pridemobility.com Victory 9/10 Technical Troubleshooting Guide
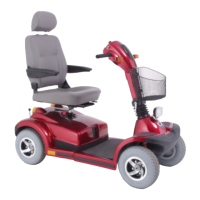
Figure 5. Battery Terminal Measurement
SECTION 1 - KEY INSERTED INTO
KEY SWITCH AND TURNED ON - NO
SIGNS OF POWER
Symptoms:
"#0!52((0*+!')18$($)1!O0(0*!$18$'2(0%!1)!:)B0*<
"#0!#)*1!218!3$6#(%!8)!1)(!B)*X<
"#0!%'))(0*!8)0%!1)(!8*$90<
Diagnosis:
"#0!:)B0*!#2%!5001!$1(0**4:(08!$1!%)O0!:2*(!);!(#0!%+%(0O<!
Solution:
U%0!(#0! ;)33)B$16!:*)'084*0!()! 80(0*O$10! B#0*0! (#0! :)B0*! #2%
5001!$1(0**4:(08=
NOTE: Ensure that the key is inserted all the way into the key
switch and the key switch is turned completely clockwise. Also
check the key fuse in the fuse block on the tiller. If the fuse does
not appear to be blown, test the fuse with a multimeter. (The
resistance should be 1 ohm.) Be sure to reinstall the fuse before
testing.
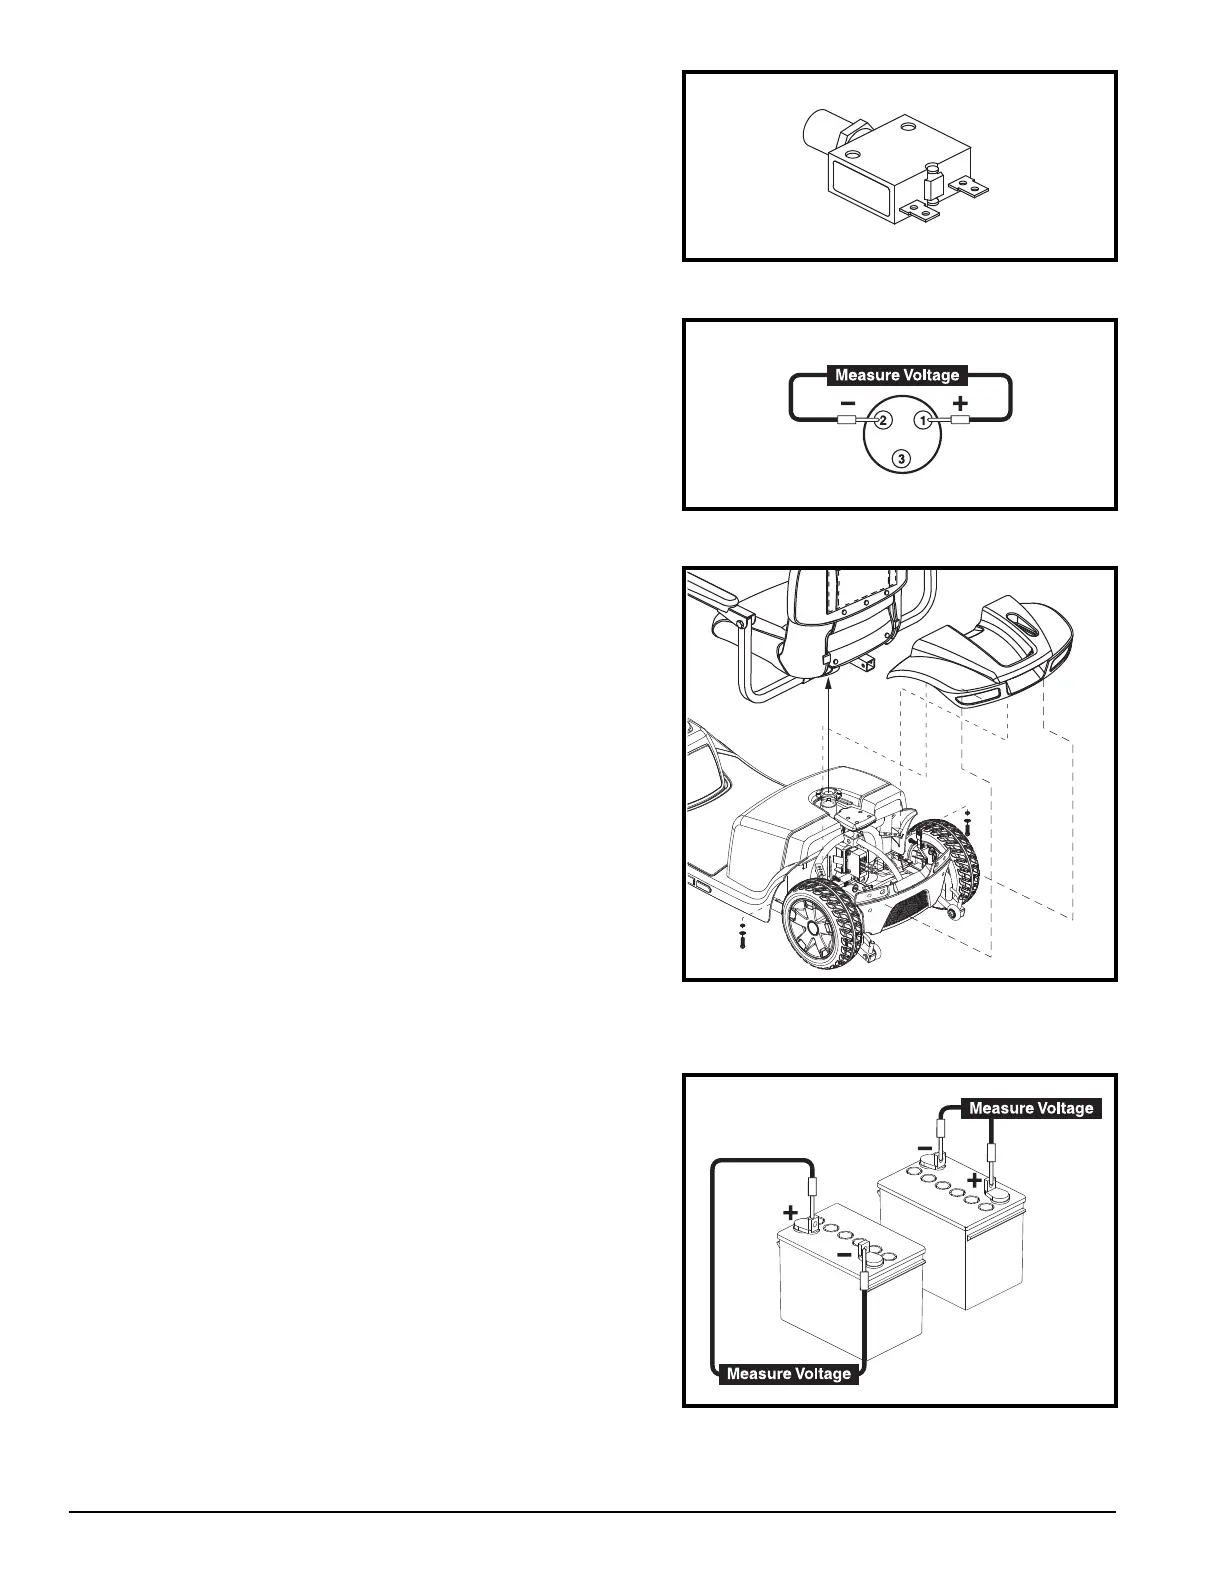
.< M#0'X!(#0!'$*'4$(!5*02X0*!RYS<!See figure 2<
!If the circuit breaker (4) is not tripped,
(#01!6)!()!(#0!10T(!%(0:<
!If the circuit breaker (4) is tripped, (#01!*0%0(!$(!218!*0(0%(!(#0
%+%(0O<
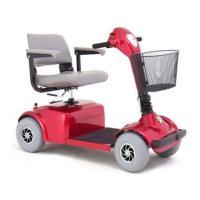
H< N02%4*0!9)3(260!2'*)%%!:$1!.!218!:$1!H!);!')110'()*!.H2<!See
figure 3 and diagram 2<
!If your multimeter indicates 0VDC, (#01!6)!()!(#0!10T(!%(0:<
!If your multimeter indicates less than 18VDC but more than
0VDC, (#01!*0'#2*60!(#0!52((0*$0%!218!*0(0%(!(#0!%+%(0O<
!If your multimeter indicates more than 18VDCP! (#01! 6)! ()
step 18<
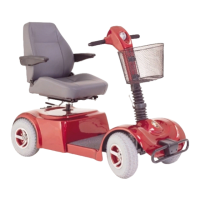
L< W0O)90!(#0!%02(!218!*02*!%#*)48<!See figure 4<
Y< N02%4*0!9)3(260!2'*)%%!(#0!1062($90!218!:)%$($90!(0*O$123%!);
)10! 52((0*+P! (#01! O02%4*0! 9)3(260! 2'*)%%! (#0! 1062($90! 218
:)%$($90!(0*O$123%!);!(#0!%0')18!52((0*+<
!If your multimeter indicates greater than 9VDC for both
batteries, (#01!6)!()!(#0!10T(!%(0:<
!If your multimeter indicates less than 9VDC on both batteries,
(#01!*0'#2*60!(#0!52((0*$0%!218!*0(0%(!(#0!%+%(0O<
Figure 3. Connector 12a
Figure 2. Circuit Breaker (4)
Figure 4. Victory 10 Seat and Rear Shroud
Removal (Victory 9 May Differ Slightly in
Appearance)