3-1/2" Band Saw
7
For technical questions call: 1-800-665-8685
8354789 V 1.01
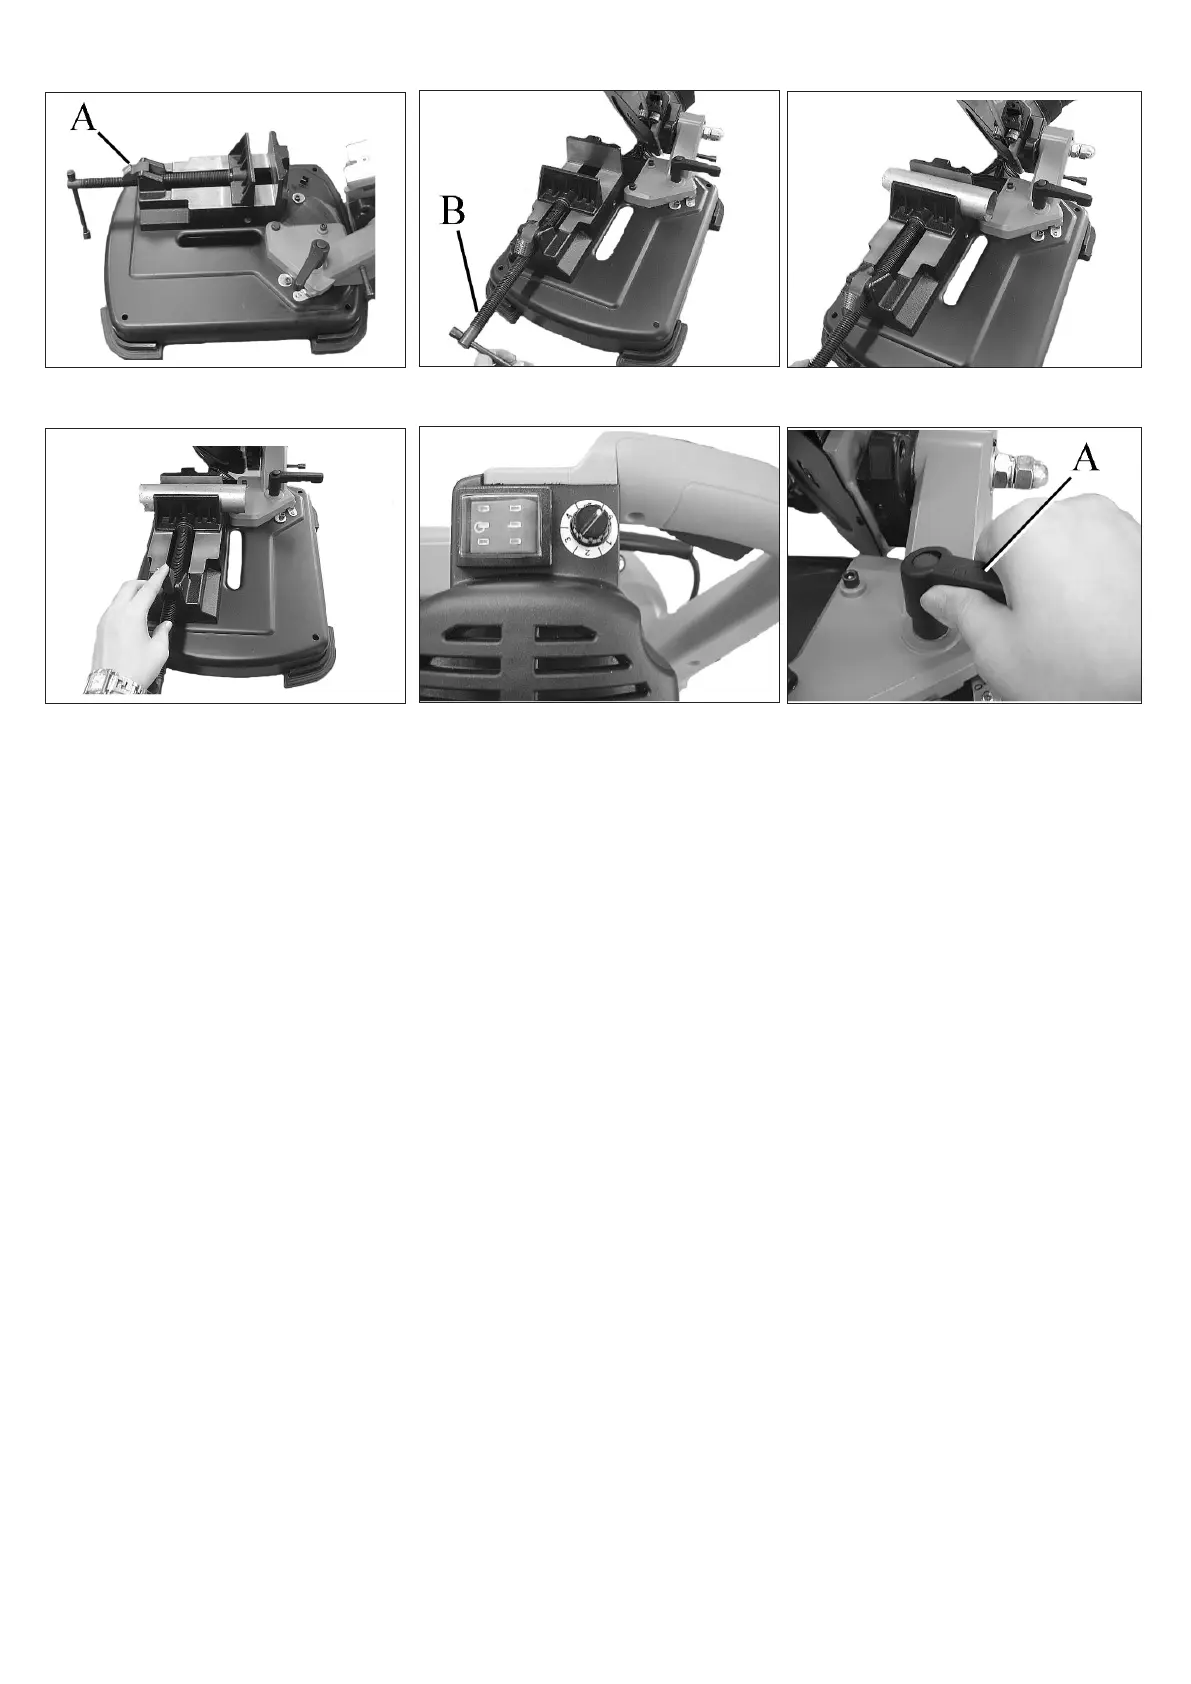
Figure 9
Figure 7
Figure 8
Figure 12
Figure 10
Figure 11
IMPORTANT: When the machine is not in use, the switch should be locked in the “OFF” position to prevent
unauthorized use.
3. VISE in USE Clamping the work-piece can be accomplished quickly and easily as follows:
4. Lift half-nut A (Fig. 7) off the screw thread.
5. Pull out screw handle B (Fig. 8) far enough to allow the work-piece to be placed in the jaws of the
vise as shown.
6. Push in the screw handle, until the front vice Jaw contacts work-piece. (Fig. 9)
7. Flip the half-nut over to engage the screw thread and turn the screw handle clockwise to securely clamp the
work-piece. (Fig. 10)
BLADE SPEED
1. The Mini Band Saw has variable speed adjustment.
2. Speed indicators numbered 1 to 6 (low to high) (Fig.11) are provided as a reference.
MITRE CUTS
1. The Mini Band Saw can be swiveled to achieve cuts from (0° to 45°).
2. Lift the handle A (Fig 12).
3. Rotate it anti-clockwise to loosen (Fig. 13).
4. Pivot the miter base to the desired angle on the scale B (Fig. 14) and lock the position by returning the handle
in a clockwise direction. Positive stops C (Fig. 14) provide for quick setup at 0° and 45° angles