55728/K3099B/
K3101B
Created
7.25.15
5
1. Position your vehicle on a smooth, flat, hard
surface (i.e. concrete or asphalt). Block the
rear tires and set the emergency brake.
2. Measure and record the distance from the
center of each wheel to the top of its fender
opening. Record below.
3. Place the vehicle in neutral. Place your floor
jack under the front axle and raise the vehicle.
Place jack stands under the frame rails and
lower the frame onto the stands. Remove the
jack and place the vehicle back in gear, set
the emergency brake, and place blocks both
in front and behind the rear wheels.
4. Unbolt and remove the transmission skid
plate from the vehicle.
5. Unbolt the front sway bar frame mounts
from the vehicle. Save the hardware for re-
use.
6. Remove the shocks on both sides of the vehi-
cle. It may be necessary that you slightly
raise the axle to unload the shocks for re-
moval.
7. Unbolt the front track bar from the front axle
mount and secure up and out of the work
area. Save the hardware for reinstallation.
8. Unbolt the all the ABS mounting clips from
the vehicle.
9. Unbolt the front brake line brackets from the
frame.
10. Lower the front axle enough to remove the
coil springs from the front spring pockets.
Save the factory isolators for re-use.
NOTE: Be sure to support the axle while
the springs and shocks are removed.
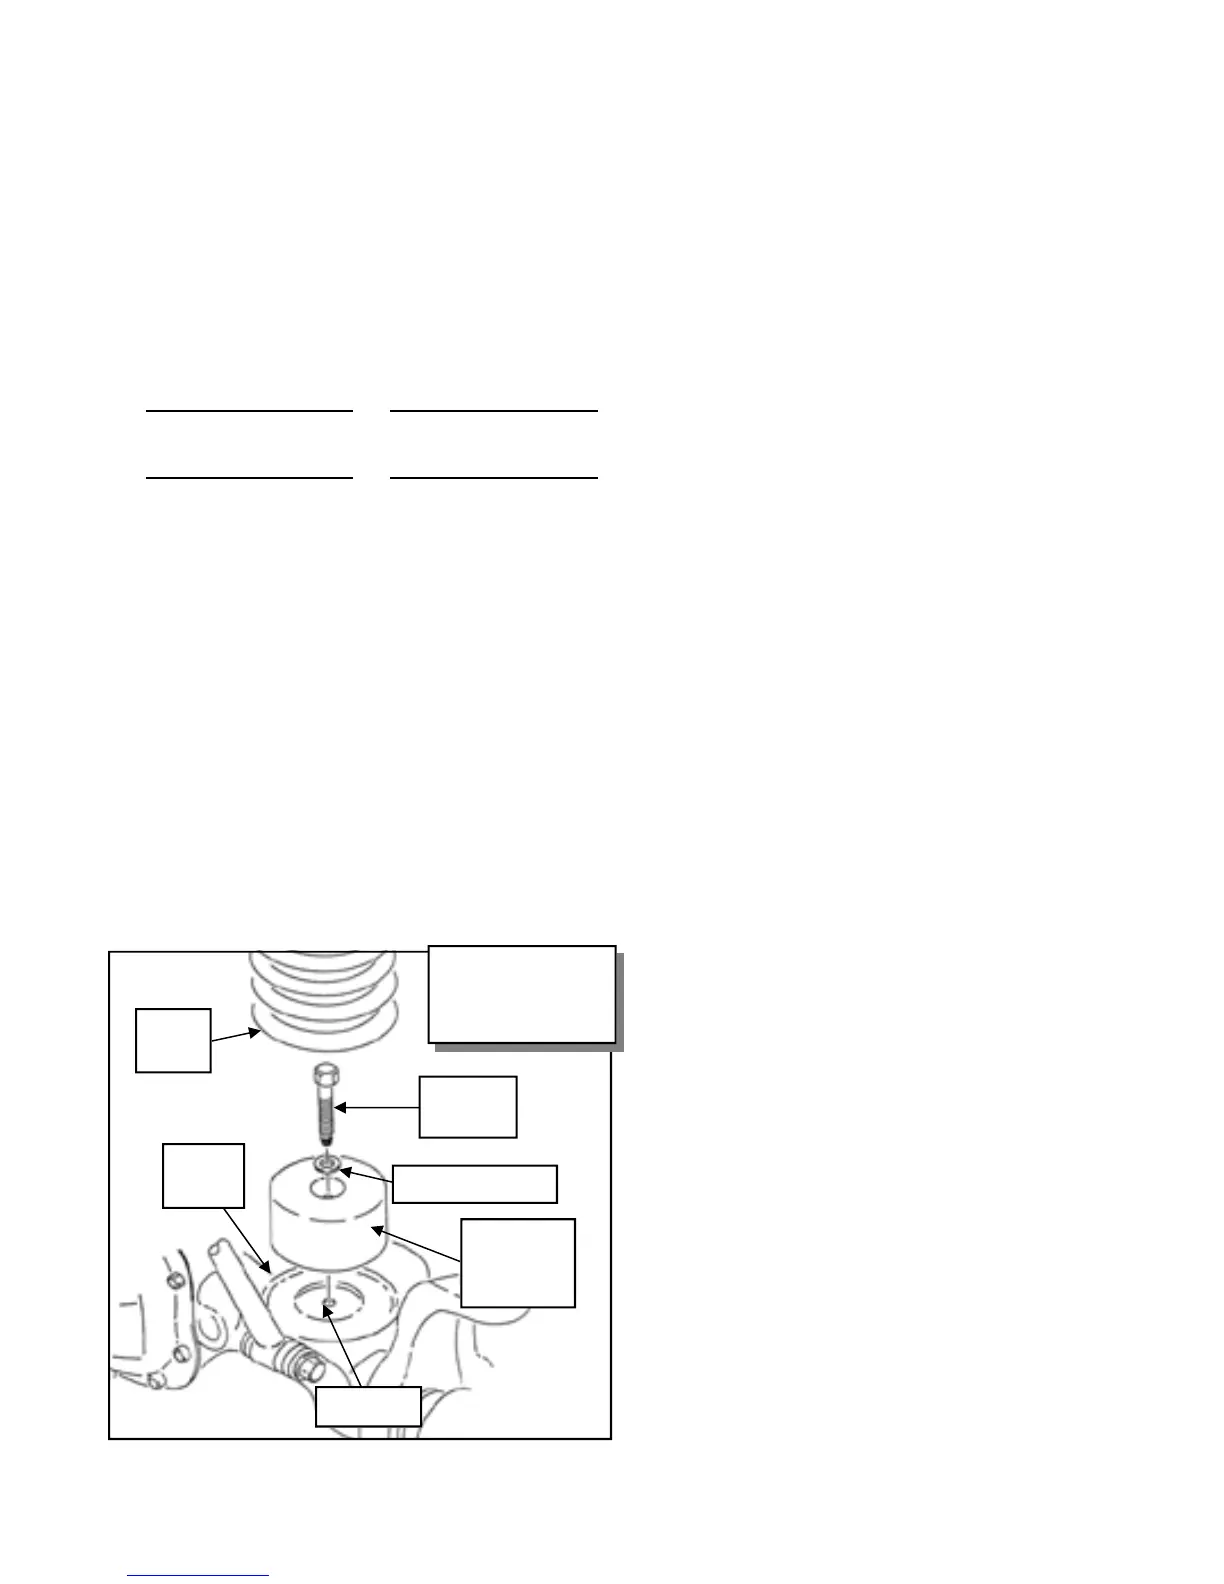
11. Drill out the center of the front axle pad to
3/8”. See ILLUSTRATION 1.
12. Install the aluminum bump stop (90-4002)
into the previously drilled 3/8” hole using the
supplied 3/8” X 2” bolt and hardware. See
ILLUSTRATION 1.
13. Carefully lower the front axle to ease in the
new front coil spring installation. Using the
factory isolators install the Pro Comp coil
springs (55399) into the spring buckets and
raise the front axle into place. Make sure the
front coil spring seats properly on the lower
spring perch.
14. Install the sway bar drop brackets (91-5182)
using the previously removed OE hardware.
15. Reattach the sway bar frame mounts to the
sway bar drop brackets (91-5182) using the
supplied 7/16”” X 1 1/4” hardware.
16. Torque the sway bar hardware to 35 ft./lbs.
17. Reinstall the transmission skid plate using the
previously removed OE hardware.
18. Install your new Pro Comp front shocks
(MX6024 w/body end up or 924510 w/shaft
end up) using the OE hardware. Torque the
upper mounting hardware to 17 ft./lbs. and
FRONT INSTALLATION:
LR: RR:
RF: LF:
Drill 3/8”
3/8” X 2”
Bolt
Aluminum
Bump Stop
90-4002
3/8” Flat Washer
Coil
Spring
Spring
Plate
Illustration 1
Aluminum Bump Stop
Install
 Loading...