8 © 2009 by Proceq SA
3.5 Entering a Roll ID manually
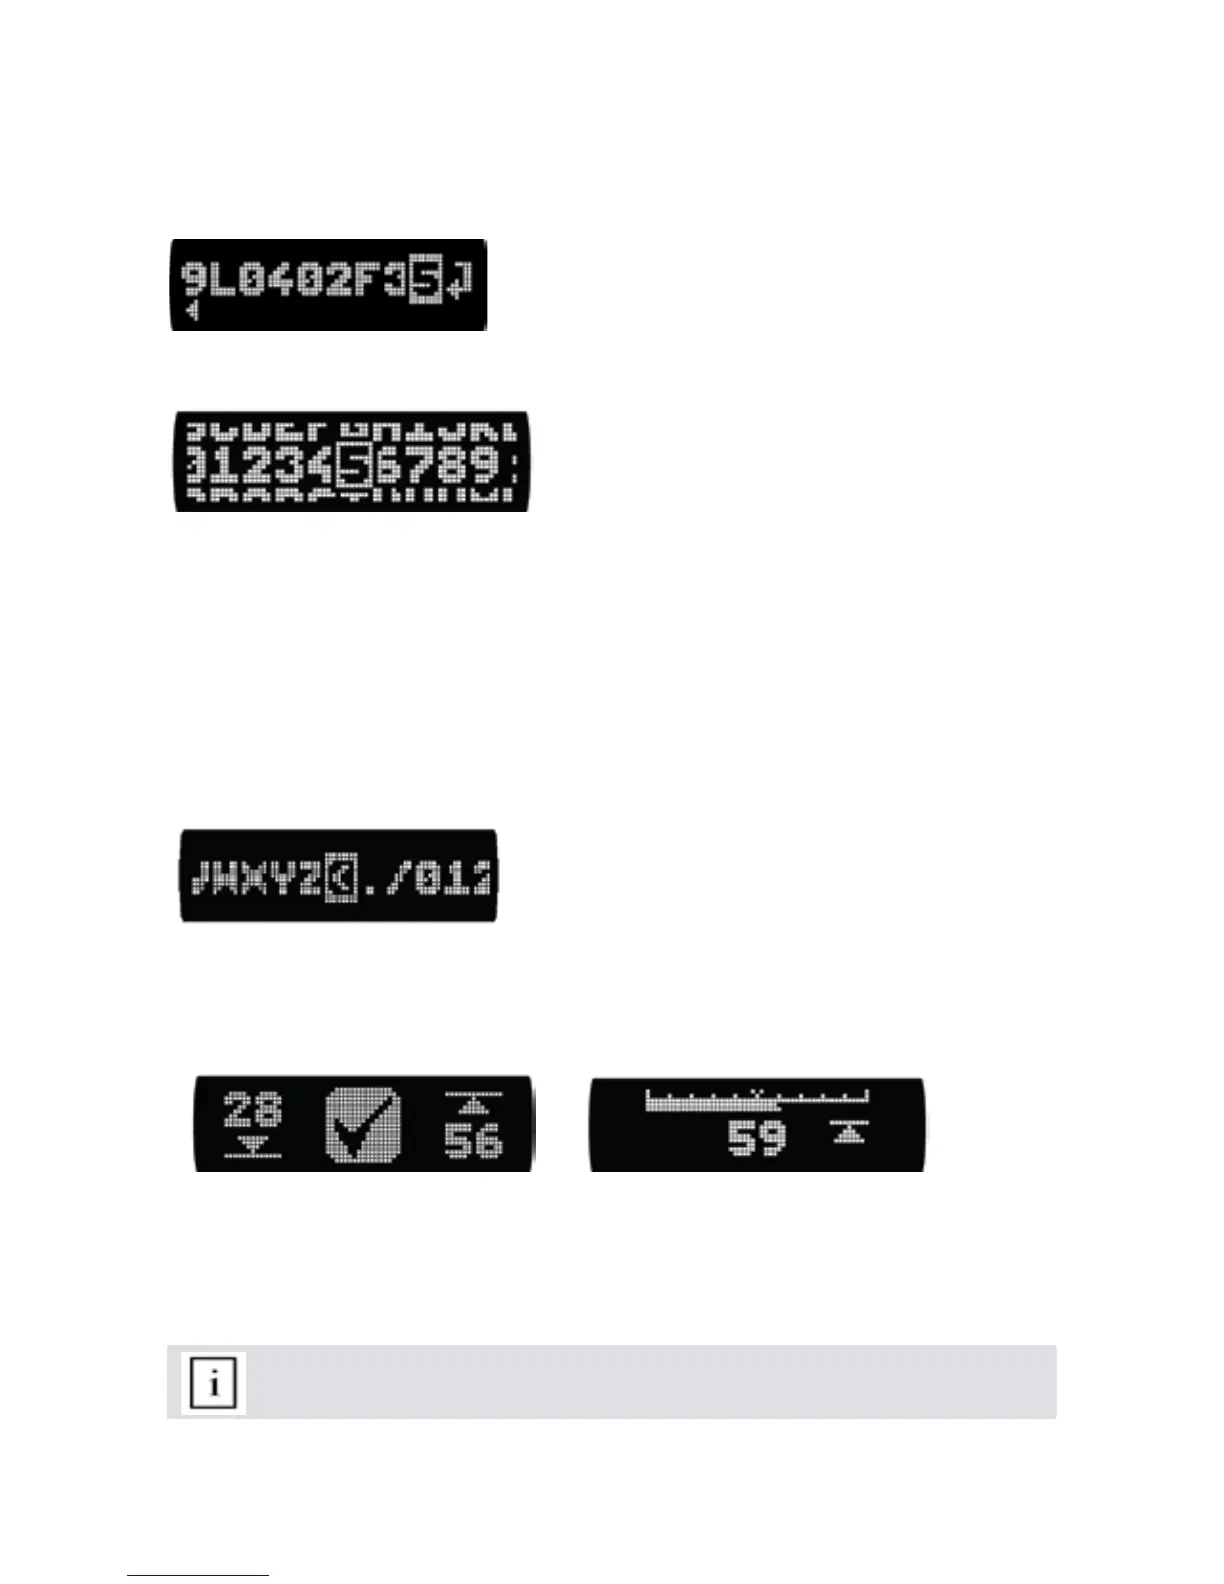
Having selected “NEW” from the data list, the user may define a Roll ID for the test series manually.
The Roll ID can be up to 12 characters long. The screen begins with the last Roll ID that was entered,
or with the impact counter value following a reset.
TILT to scroll to the character you wish to change and press the SELECT button to access the •
character select screen.
ROLL and TILT to the desired character and press the SELECT button to set it. •
Repeat this procedure to enter the complete Roll ID.•
Scroll to the “ENTER” symbol at the far right of the Roll ID and press the SELECT button.•
Deleting a character
TILT to scroll to the character you wish to delete and press the SELECT button to access the •
character select screen.
TILT to the delete symbol and press the SELECT button. (See below)•
The character is deleted. Any characters to the right of the character deleted will shift left.•
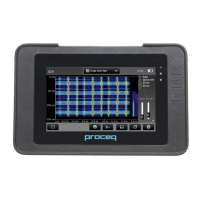
3.6 Accept or modify limits
This function is a rapid way to check if the roll hardness profile is within a pre-defined tolerance.
After selecting a pre-defined Roll ID or after entering a Roll ID manually, the actual upper and lower
limit values are displayed, e.g. 28R is the lower limit, 56R is the upper limit.
TILT to adjust the value and press SELECT.
(It may also be blank if you were previously working with no limits. To work without limits, adjust them
to 0R resp. 100R.) To accept the limits displayed press the SELECT button. To modify the limit values,
scroll the cursor to the limit you wish to change and press SELECT.
Note: If the lower limit is higher than the upper limit, they will be reversed automati-
cally
The cursor position is shown inverted.
The screen can show up to 10 characters.
Arrows at the bottom indicate if there is more to the left or
right.
The character select screen is arranged in 3 rows to
allow the user to locate the desired characters quickly.
The character select screen has a special symbol (high-
lighted), that allows the user to delete the selected charac-
ter from the Roll ID