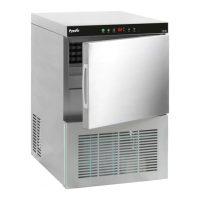
This document is a technical manual for Prodis C Series ice cube makers, covering models C25, C35, C45, C45P, C60, C60P, C80, and C135. It provides essential information for the safe installation, operation, and maintenance of these ice machines.
Function Description
The Prodis C Series ice cube makers are designed to produce ice cubes from potable water. These machines are intended for household and similar applications, including staff kitchen areas in shops, offices, and other working environments, farmhouses, hotels, motels, bed and breakfast establishments, catering, and similar non-retail settings. The ice-making process involves a sequence of operations controlled by a PCB (Printed Circuit Board).
Upon connection to power, the machine initiates a 140-second delay during which the water valve activates to fill the water tray. During this initial phase, the compressor and pump remain off. After the delay, a harvest cycle begins, followed by the ice production cycle. In the production cycle, the pump recirculates water from the water tray to upper nozzles, which spray a sheet of water over the evaporator. The water then freezes to form ice cubes.
The freezing process continues until the evaporator temperature probe reaches a set value (Tc, typically between -12°C and -8°C). Once this temperature is achieved, the machine continues the fabrication for a fixed duration, adjustable via dip-switches 1-4, to ensure proper ice cube formation under various operating conditions.
After the ice production phase, the machine transitions to the harvest phase. The pump stops, and the hot gas and water inlet valves open. Water is poured over the evaporator to help release the ice cubes from the plastic frame. The harvest phase continues until the evaporator temperature probe reaches another set value (Tg, typically between 4°C and 0°C), for a fixed duration determined by dip-switches 5-7. After the harvest cycle, the machine returns to the production cycle.
A key feature is the ice bin full detection system. At the beginning of each harvest cycle, the PCB checks the status of a thermostat tube (#4) located in the ice bin. If the ice bin is full and ice cubes cover the thermostat tube, the contact opens, signaling a full bin. In this state, the machine will stop production until the thermostat contact closes again, indicating that ice has been removed. Once the contact closes, it restarts with a harvest cycle and then resumes the production cycle.
Some models are equipped with a drain force system, allowing for flexible installation where the drain can be located up to 30 meters horizontally and 1.5 meters high from the machine's water outlet. This system manages excess water from melting ice in the storage bin and water renovation during production cycles. When the water reservoir fills and covers two electrodes, a pump activates for 5 seconds to evacuate the water. If the electrodes remain covered, the pump restarts. A ventilation tube ensures air removal from the water reservoir, and a check valve prevents backflow.
The control board features LED indicators for various statuses and alarms. Orange LEDs next to relays signal active outputs, and orange LEDs next to input terminals indicate active inputs. Four additional red LEDs signal machine status (continuous) or alarms (flashing).
Usage Features
The ice makers are designed for indoor use and should not be exposed to outdoor conditions or rain. Optimal operation occurs at room temperatures between 10°C and 43°C. Operating outside this range can lead to difficulties in ice removal or reduced compressor life and production. Air-condensed models draw air through the front grille (right side) and exhaust it from the left front side, with an additional rear air vent. It is crucial not to obstruct these vents. While the unit can be embedded, this may reduce output. If the front louver is insufficient or hot air from another device affects it, installing a water condenser is recommended.
Proper leveling of the machine is essential for efficient operation, achieved by adjusting the leveling legs. Minimum distances to obstacles (4 inches/10 cm from sides and rear, 29.5 inches/75 cm from the front) are recommended for proper air circulation and service access.
Water supply connection requires potable water within a pressure range of 0.1MPa to 0.6MPa (1 to 6 bar). A pressure regulator is needed if pressure exceeds 0.6MPa. The water connection should be dedicated to the ice machine. Water quality significantly impacts cleaning frequency and the life of water-cooled units, as well as ice appearance, hardness, and flavor. Water filter systems may be necessary depending on local water conditions.
Electrical connection requires grounding the equipment according to local and national regulations to prevent electric shock. The appliance needs an independent power supply of proper capacity, as indicated on the nameplate, to avoid electrical issues. The power cord should not be trapped or damaged, and multiple portable socket-outlets should not be located at the rear of the appliance.
Before starting the machine, users must verify that it is leveled, the voltage and frequency match the nameplate, drains are connected and operating, and ambient and water temperatures are within the specified ranges (maximum 43°C room, 30°C water). After installation, users should open the water inlet, remove protective elements from the curtain, verify free movement of the curtain, connect to power, and push the front switch. The ice cube shape should be verified, and production time switches (dip-switches 1-4) adjusted if necessary to achieve the desired cube shape.
The PCB push button offers several functions depending on the unit's status: it can finish the initial start-up delay, switch between ice production and harvest cycles, or activate a wash cycle. To activate the wash cycle, the button must be pressed while switching on the main front switch. This cycle runs the water recirculation pump for a maximum of 30 minutes and is stopped by switching off the main power.
Maintenance Features
Regular maintenance and cleaning are crucial for the proper operation, efficiency, and longevity of the Prodis C Series ice makers. The manual emphasizes that damages resulting from a lack of maintenance are not covered under warranty.
Cleaning Procedures:
- Water Distribution System: This system should be cleaned at least twice a year. The process involves setting the machine to OFF after a harvest cycle (or allowing ice to melt), removing all ice from the bin, removing the water overflow and emptying the water tray. A solution of appropriate ice machine cleaner (not hydrochloric acid) is prepared and poured into the water tray. The machine is then disconnected from power, and the wash cycle is activated by pressing SW3 while turning on the machine. After 30-40 minutes, the machine is switched off.
- Curtain and Freezing Compartment: All surfaces of the curtain and the interior surfaces of the freezing compartment (including the storage bin) should be cleaned with the cleaner solution using a brush (not wire brush) or cloth, then thoroughly rinsed with water.
- Sanitization: After cleaning, a sanitizer solution (approved sodium hypochlorite food equipment sanitizer, 100-200 ppm free chlorine yield) is applied liberally to all surfaces of the curtain and the interior of the freezing compartment/storage bin using a cloth or sponge. The machine is reconnected to power and water, the water tray is filled with sanitizer solution, and the water pump is run for 20 minutes before switching off. This rinsing process is repeated two more times with clean water. The first two harvests after sanitization should be discarded.
- Water Distributor and Injectors: The curtain, ice fall grill, collector, injectors, manifold covers, and the main suction filter of the pump should be removed and cleaned with Calklin or a non-aggressive product, rinsed, and cleaned with bleach. When reassembling, it is critical that the injectors are completely perpendicular to the manifold to prevent twisted cubes.
- Ice Bins: The ice storage bin should be sanitized as frequently as local health codes require. This involves disconnecting the machine, closing the water faucet, emptying the bin, cleaning all surfaces with cleaner/water solution using a nylon brush or cloth, rinsing, then sanitizing with sanitizer/water solution, rinsing again, drying, and finally running the machine with the water faucet open.
- Condenser (Air-cooled models): The air condenser should be cleaned regularly. This involves disconnecting the machine, closing the water faucet, and removing the front grille. The condenser should then be cleaned using a vacuum cleaner, soft brush, or low-pressure air, cleaning from top to bottom to avoid bending the fins.
- Condenser (Water-cooled models): Water condensers may require specialized cleaning due to scale build-up, which must be performed by qualified maintenance or service personnel using special pumps and cleaning solutions.
- External Cleaning: The exterior of the machine should be cleaned regularly with mild soap and water, then wiped dry with a soft cloth. A commercial-grade stainless steel cleaner/polish can be used.
Checking Procedures:
- Water Leakage Checking: This should be performed during every maintenance session. All water connections, braces, tubes, and hoses must be checked to eliminate leaks and prevent breakages and flooding.
Alarms and Troubleshooting:
The manual details various alarms indicated by flashing LEDs (LE1-4) on the control board, which detect operational malfunctions. These include:
- Safety High Pressure Switch (LE1 flashing): Triggers when pressure contact trips, stopping all outputs. Reset can be manual (power OFF-ON) or automatic (if dip-switch 10 is ON, machine checks every 30 min).
- Long Harvest (LE3 flashing): Occurs if harvest time exceeds 5 minutes. The harvest is interrupted, and the machine switches to production. If this repeats in the next harvest, the machine stops.
- Ice Production Cycle Timeout (LE2 flashing): If the evaporator temperature probe does not reach the set Tc within 60 minutes during production, the machine stops until reset.
- Faulty Temperature Probe (LE4 flashing): Indicates a broken or unconnected evaporator temperature probe, causing the machine to stop.
In case of an alarm-induced stop, resetting is typically done by switching the main switch OFF and ON. If dip-switch 11 is OFF, time alarms are not followed. The manual also provides a comprehensive troubleshooting guide for general questions and drain force issues, listing possible causes and solutions for common problems like electrical failures, poor ice quality, low production, and compressor issues.