42
NOTE:
If you nd transport damage, contact your
dealer without delay. A damaged appliance
may not be used!
4. In order to remove any production residue,
clean all accessories before initial use as de-
scribed under “Cleaning”.
Electrical Connection
Ensure that your mains power corresponds with
the specications on the type label.
Use Instruction
1. Make sure the control knob is at the “0” posi-
tion.
2. Opening the swivel arm: Press the lever
(5) in the direction of the arrow. Manually guide
the swivel arm to the top position. When the
lever jumps back to the start position, the arm
is locked.
3. Set the mixing bowl into its holder. Turn the
bowl in the direction of the arrow up to the stop
(LOCK).
4. Now attach the splash guard under the swivel
arm: Hold the splash guard with the collar
pointing upwards. The lling opening should
be in front of you on the left. Insert the guide
projections of the splash guard into the re-
cesses on the bottom of the swivel arm. Turn
the splash guard anti-clockwise until it stops.
5a. Insert the egg whisk or the mixing hook: Fit
an attachment to the drive shaft. The splint in
the attachment ts into the shaft. Gently slide
the attachment into the shaft and turn it anti-
clockwise.
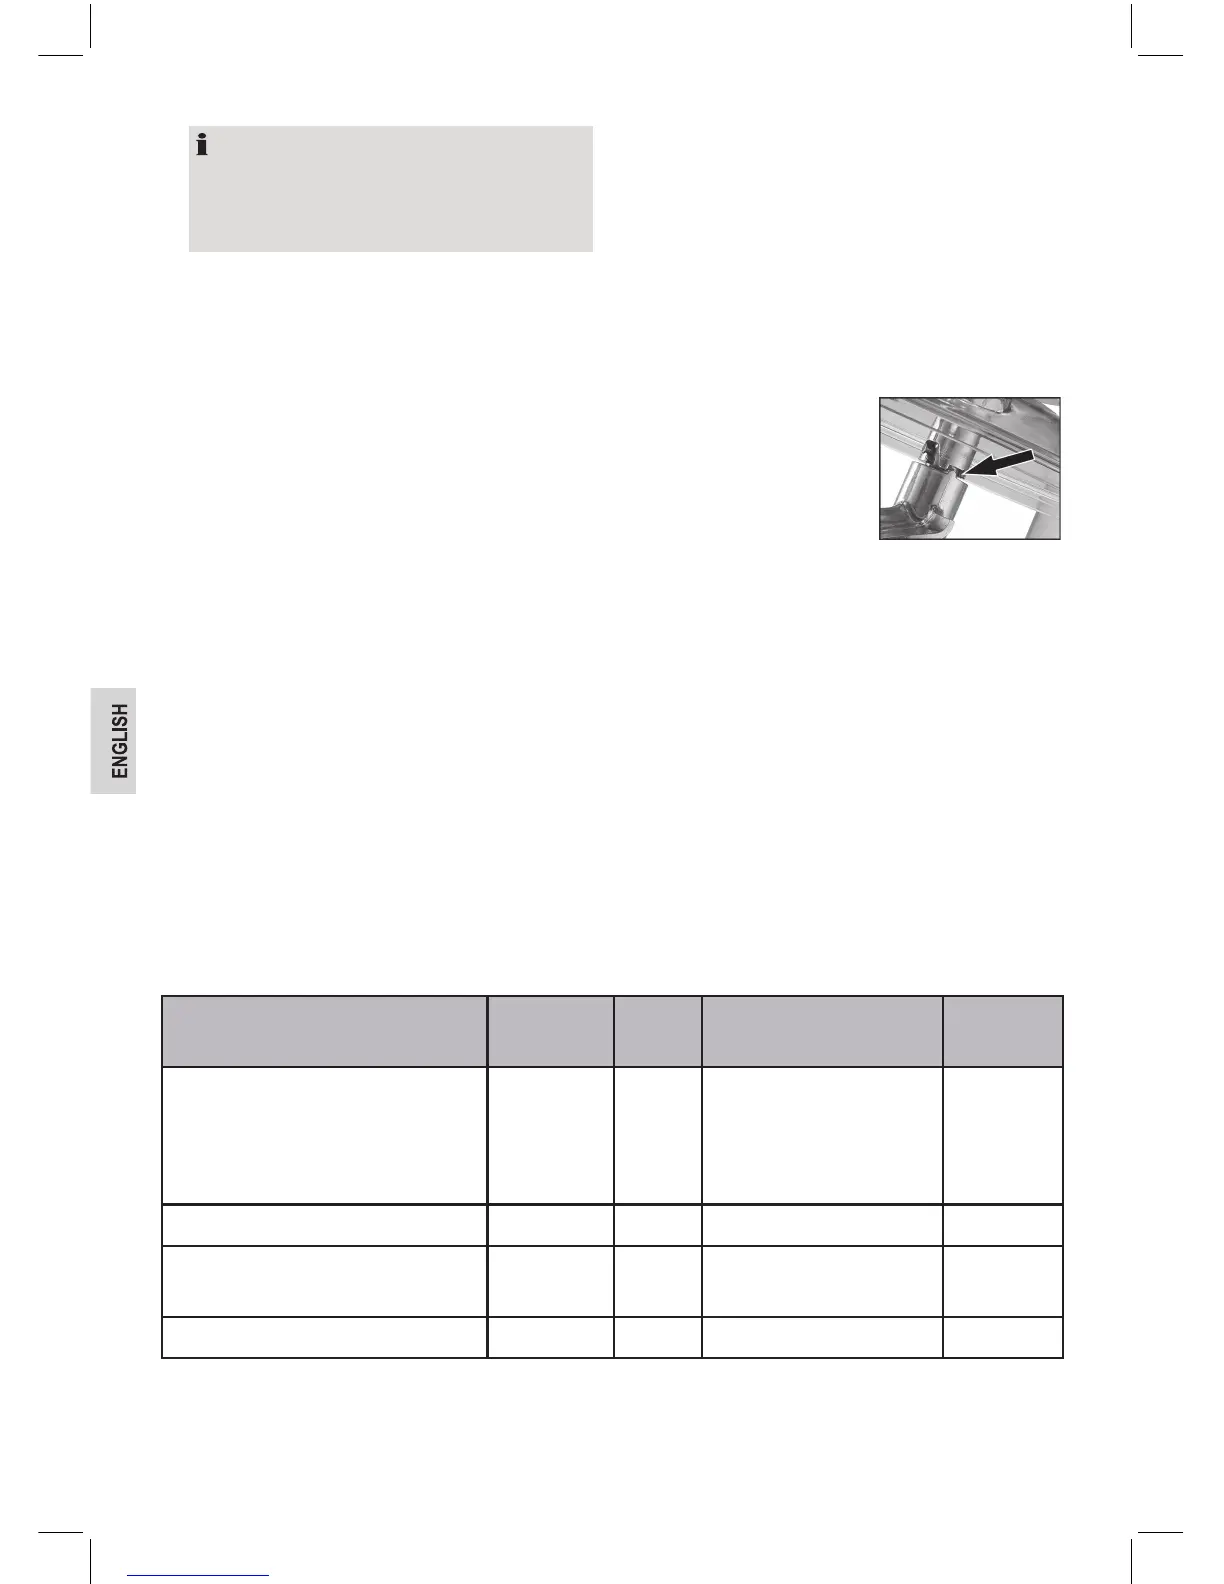
5b. Inserting the kneading
hook: Always work with
both kneading hooks.
Install the kneading
hooks in the same way
as the other attachments (item 5a). Refer to
the picture on the right. The guide projection
must engage the recess.
6. Fill your ingredients into the bowl.
7. Closing the swivel arm: Press the lever (5) in
the direction of the arrow and lower the swivel
arm at the same time. The lever jumps back to
the start position.
8. Connect the mains plug to a certied wall
socket.
9. Use the control knob to turn on the device
and then select a speed setting according to
the table below.
Table Dough Types and Tools
Dough Type Tool Setting Amount
Max. oper-
ating time
Heavy dough (e.g. bread or short-
crust)
Kneading
hook
1 - 3
max. 7,5 kg dough
max. 4750 g our
(Recommended mixing
ratio of our / water: 5 : 3)
5 min
Medium dough (e.g. cake batter) Mixing hook 1 - 3 max. 6 litres 5 min
Light dough (e.g. wafe or crepes
dough, cream, pudding)
Egg whisk 4 - 6
min. 200 ml
max. 4 litres
10 min
Egg whites Egg whisk 6 5 - 30 eggs 10 min


 To Next Page
 Loading...