Consult a licensed electrician or RV technician for installation assistance
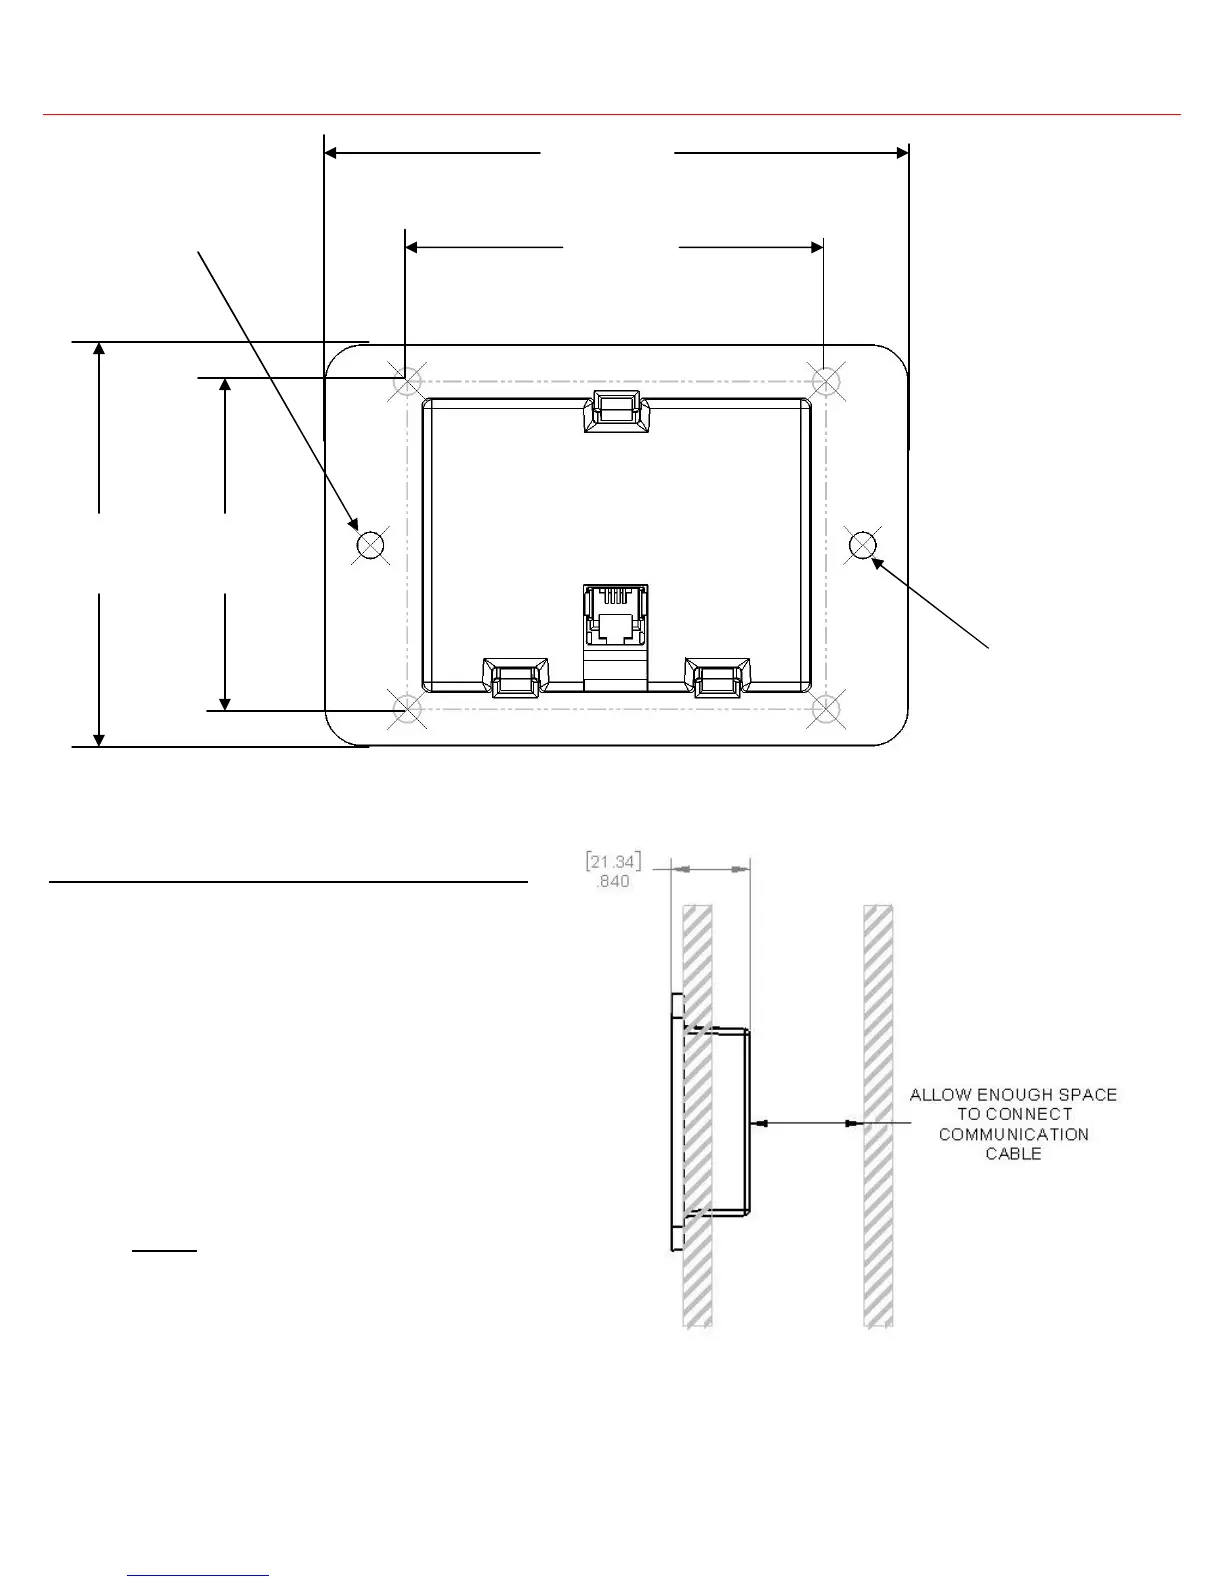
Installation Template
Installing the remote display on the wall
1. Place the template on the wall.
2. Mark the corners (or trace the dotted lines) of the recess outline
on the wall.
3. Mark the two mounting holes for the two screws on the wall.
4. Remove the template from the wall.
5. Cut along the recess outlines on the wall to make a hole for the
remote control.
6. Pre-drill the mounting holes appropriate to the mount screws
(not provided) that will be used.
7. Connect the communication cable to the RJ9 port on the inverter
and the remote control (see Figure 2).
8. Mount the remote panel unit on the wall.
Note:
Ensure that there are no
Obstructions present, such as:
- Pipes
- Insulation
- Electrical Wiring
Ensure that there is at no less than 1” (25.4 mm) of space for communication cable.
Figure 5 PD1201 Remote Display Mounting Template
Figure 6 Mounting Diagram
MOUNTING
HOLE
MOUNTING
HOLE
[73.03]
2.875
[101.64]
4.00
[57.15]
2.250
[69.89]
2.75