1010
NOTE: Before using the tool, read the
instruction book carefully.
1. CHARGING
A) BATTERY CHARGING
a) Do not use any charger other than that
specifically provided for use with the equipment.
b) If the battery pack is very hot you must remove
your battery pack from the charger and allow
time for the battery to cool down before
recharging.
c) The battery in your new tool is not charged
when it leaves the plant. Therefore, it must be
fully charged prior to the first use.
d) Please charge the battery to reach full or no less
than half charge before storage. If the tool will
not be used for long periods of time, charge the
battery every 3-6 months.
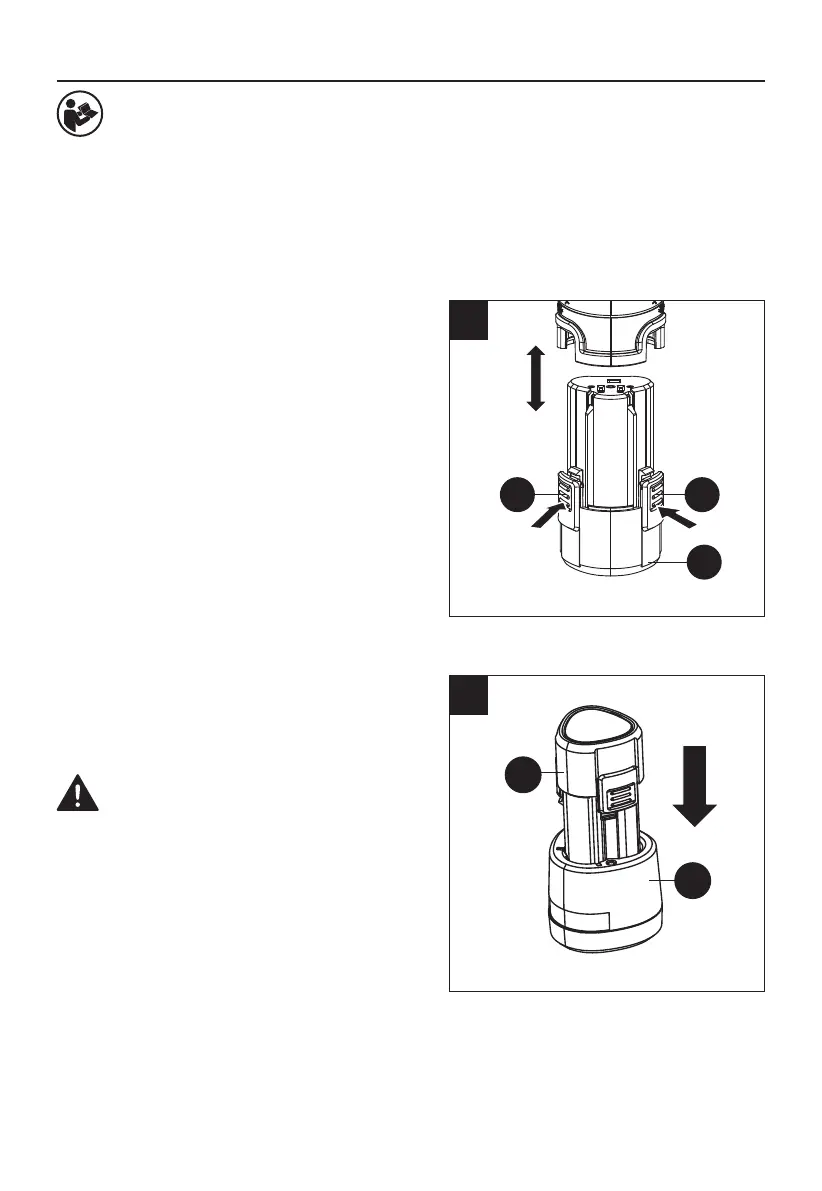
B) TO REMOVE OR INSTALL BATTERY PACK
(SEE FIG. 1)
Depress the battery pack release buttons (E) to
release and slide the battery pack (F) out from your
tool. After recharge, slide it back (F) into your tool. A
simple push and slight pressure will be sufficient.
C) CHARGING PROCEDURE (SEE FIG. 1-1)
NOTE:
1) Plug the charger (J) into an appropriate outlet.
2) Place the battery pack (F) into the charger (J).
3) When charging is completed, unplug the
charger (J) and remove the battery pack (F).
WARNING: When battery charge runs
out after continuous use or exposure
to direct sunlight or heat, allow time for the
battery to cool down before recharging to
achieve the full charge.
D) CHARGING INDICATOR
This charger is designed to detect some problems
that can arise with battery packs. Indicator lights
indicate problems (see table below). If this occurs,
insert a new battery pack to determine if the
charger is OK. If the new battery charges correctly,
then the original pack is defective and should be
returned to a service center or recycling service
center. If the new battery pack displays the same
problem as the original battery pack, have the
charger tested at an authorized service center.
OPERATING INSTRUCTIONS
EE
F
10
J
F
1
1-1