1212
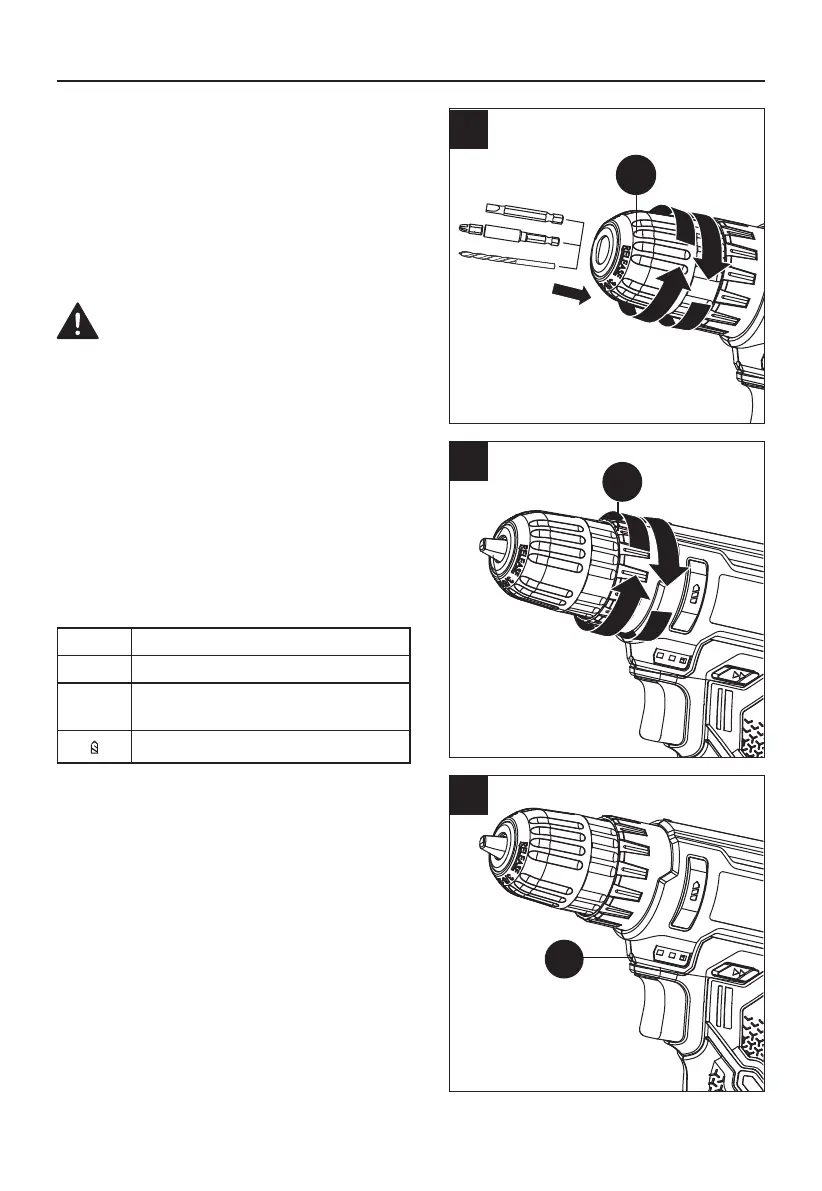
5. CHUCK ADJUSTMENT (SEE FIG. 5)
1) To open the chuck jaws rotate the front
section of the keyless chuck (A).
2) Insert the bit between the chuck jaws and
rotate the front section in the opposite
direction. Ensure the drill bit is in the center of
the chuck jaws.
3) Finally, firmly rotate the front chuck section
in the opposite directions. Your drill bit is now
clamped in the keyless chuck (A).
WARNING: Insert the magnetic bit holder at
first when you use the short driving bit.
6. TORQUE ADJUSTMENT (SEE FIG. 6)
(Screw driving force of your drill driver)
The torque is adjusted by rotating the torque
adjustment ring (B). The torque is greater when
the torque adjustment ring (B) is set on a higher
setting. The torque is less when the torque
adjustment ring (B) is set on a lower setting.
Make the setting as follows:
1 - 4 For driving small screws
5 - 9 for driving screws into soft material
10 - 18
for driving screws into soft and hard
material
for heavy drilling
7. USING THE LED LIGHT (SEE FIG. 7)
The LED light (H) allows you to keep a clear view
under less illuminated circumstances. To turn on
the light simply press the on/off switch. When you
release the on/off switch, the light will be off.
LED is also a battery capacity indicator. It will
flash when power gets low.
A
B
H
5
6
7
OPERATING INSTRUCTIONS