14
2
2
2
2
1
1
1
ASSEMBLY INSTRUCTIONS
I
E
Z
Z
I
J
7
8
9
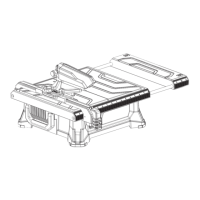
7. Loosen and remove screws (Z) with a Phillips
screwdriver (not included).
8. Place riving knife (I) onto the mounting area under-
neath the table. Reinstall screws (Z) through table and
into riving knife (I). Replace the bevel table.
9. To maximize cut quality align riving knife (I) with the
cutting wheel (J). Tighten screws (Z).
Note: Rip guide (E) can be used as alignment tool if
needed.
Z