15
2
1
ASSEMBLY INSTRUCTIONS
H
H
I
E
F
F
Y
X
I
1
2
1
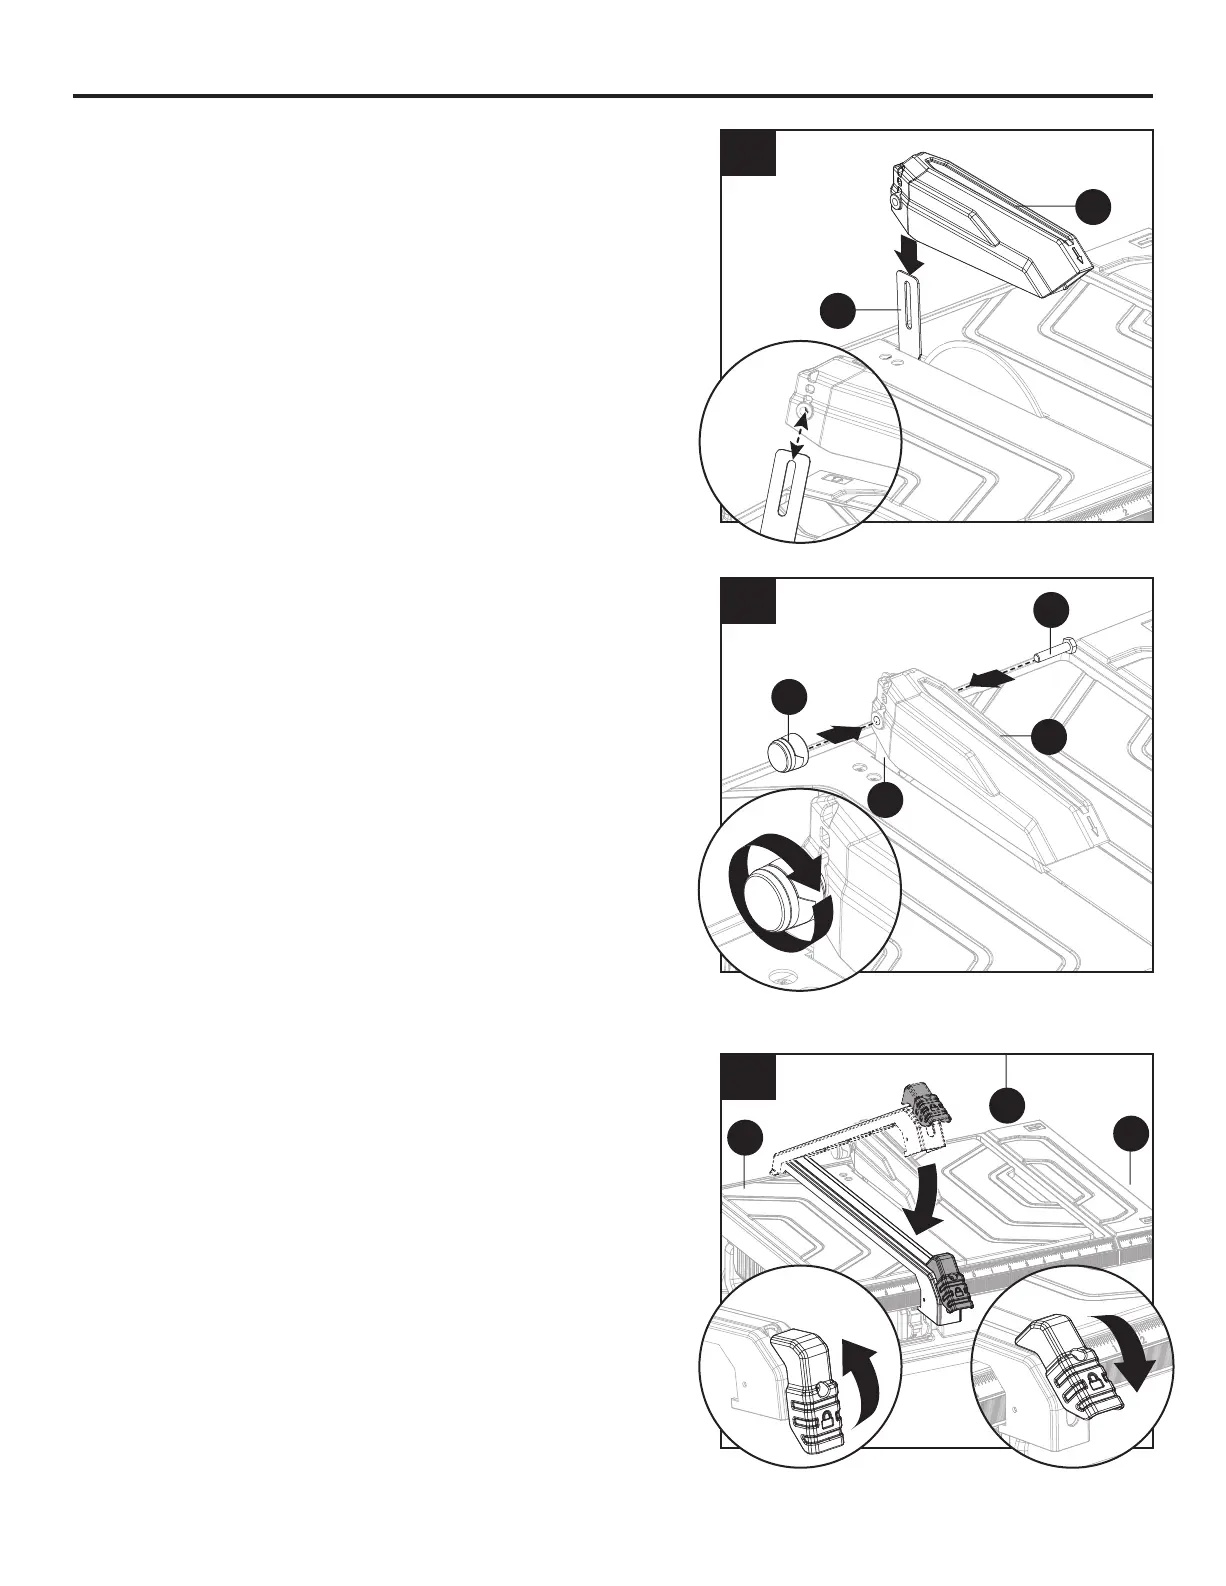
Installing the Blade Guard Assembly
1. Slide blade guard assembly (H) over riving knife (I)
and align holes in blade guard assembly (H) with slot
in the riving knife (I).
2. Insert hex bolt (Y) through blade guard assembly (H)
and riving knife (I). Thread the lock knob (X) onto hex
bolt (Y) and tighten to the desired height.
Note: ALWAYS adjust the blade guard horizontally to
the table and slightly above tile thickness. Blade guard
should not touch the tile.
Installing the Rip Guide
1. Lift locking lever on the rip guide (E) up and hook the
back of the rip guide (E) onto the back rim of the saw
table.
Lower front of the rip guide to the front of the saw table.
Use rip guide scales (C), located on front and rear of
table, to set rip guide to desired width of cut.
Push the locking lever down to secure to the saw table.
When securely locked, the locking lever should point
downward.
2
3
3
1