10
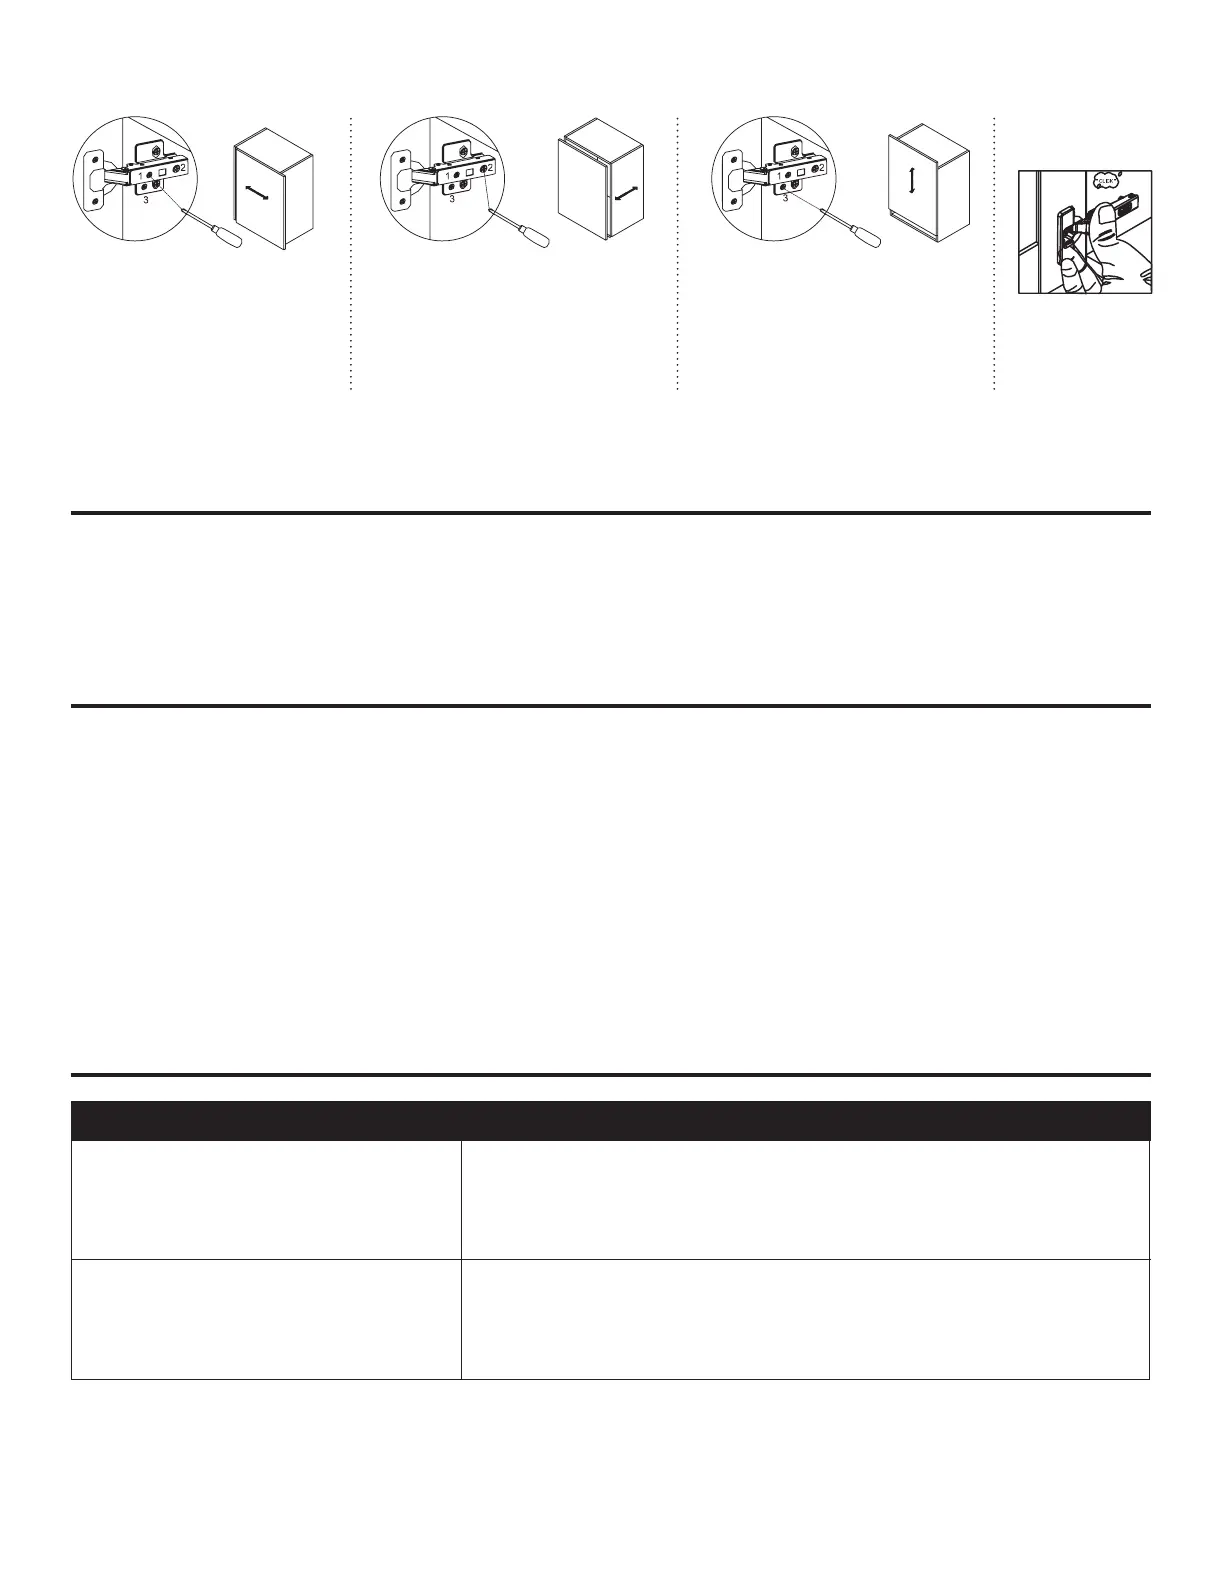
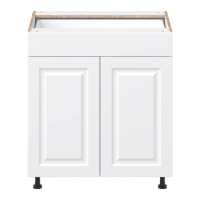
Side adjustment:
Using a Phillips screwdriver, rotate
screw (1) clockwise to move the door
left and counter-clockwise to move the
door right. Moves the door up to 2 mm.
Depth adjustment:
Using a Phillips screwdriver, rotate screw
(2) clockwise to move the door forward
and counter- clockwise to move the door
backwards. Moves the door up to 2 mm.
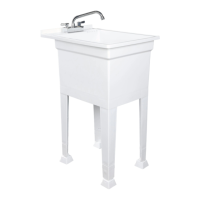
Height adjustment:
Using a Phillips screwdriver, rotate
screw (3) clockwise to move the door
upward and counter-clockwise to
move the door downward. Moves
the door up to 2 mm.
Door Assembly
Hinge Adjustment:
TROUBLESHOOTING
MAINTENANCE
• To maintain the beauty of your nish, try to avoid direct sunlight on the cabinetry for extended periods
Of time. Use a window treatment to block direct sunlight if necessary.
• Avoid exposing the cabinet to extreme temperatures.
CARE AND CLEANING
• Periodically, remove dust from the cabinet surface with a clean, soft, and dry cloth. Cloth may be
Slightly dampened if necessary.
• Wood and laminate cabinets may be polished quarterly or as needed with an oil-free, non-silicon
Furniture polish. Wax-based polishes are not suitable as the build-up they create can be dicult to
remove and can attract dust.
• Clean any spills immediately with a clean, soft, and dry cloth.
• For regular cleaning, use a mild soap and water mixture on a clean, soft cloth. Remove as much of
The water mixture from the cloth as possible prior to use.
PROBLEM SOLUTION
Doors do not line up
1. Check the cabinet is installed, level and plum
2. Adjust the hinge as required
Drawers do close correctly
1. Check the cabinet is installed, level and plum
2. Adjust the drawer front as required