(push to theleft) and complete the assembly (as shown in figure 1).
1.2
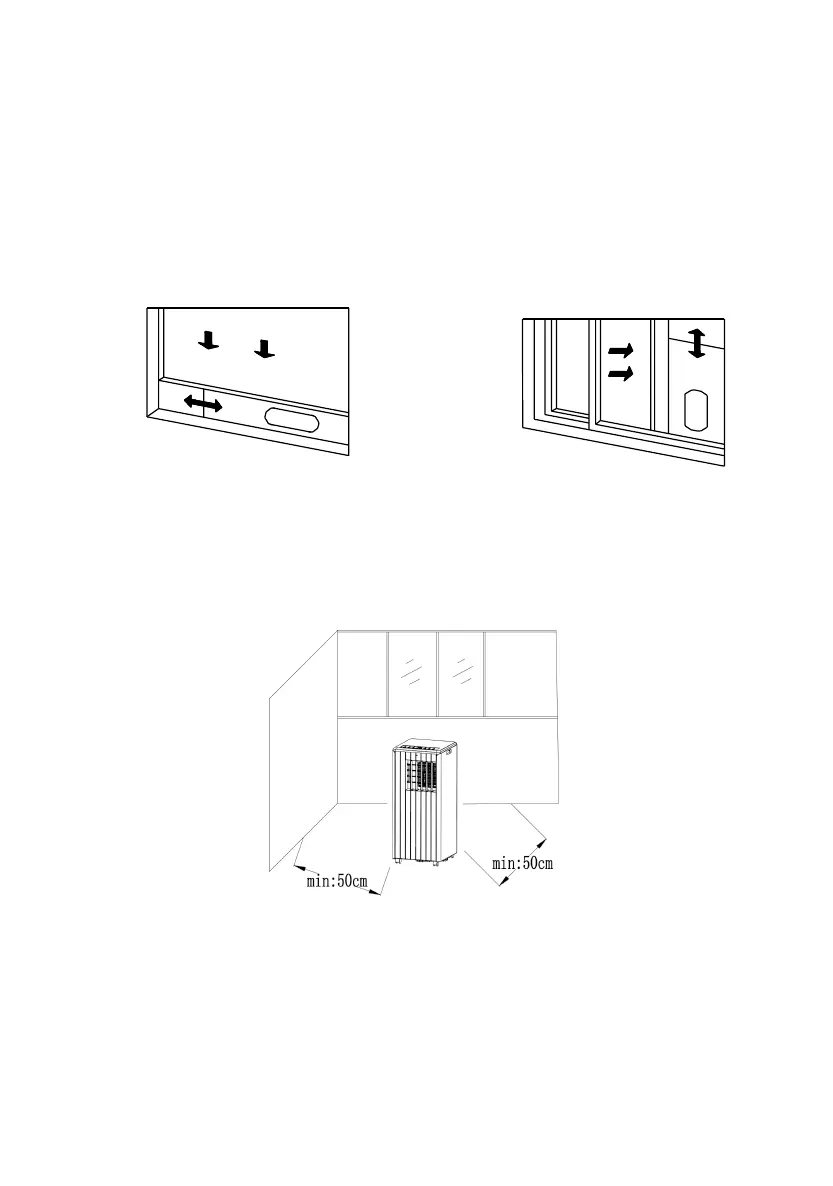
Installation of window sealing plate components
Half open the window
,
and mount the window sealing plate assembly to the window (as shown in
Fig.2 and Fig.3).Components can be placed in horizontal and vertical direction.
Pull various components of the window sealing plate assembly open, adjust their opening distance to
bring both ends of the assembly into contact with the window frame, and fix various components of
the assembly.1.2 Install the window sealing plate assembly
Notes:1)the flat end of the exhaust pipe joints must be snapped into place.
2)The pipe cannot be distorted nor has substantial turning (greater than 45
°
).
Keep the ventilation of the exhaust pipe not blocked.
Figure 2 Figure 3
1.3
Install the body
1
)
Move the machine with installed heat pipe and fittings before the window, and the distance
between the body and walls or other objects shall be least 50cm (as shown in Fig.4).
Figure4
Elongate the exhaust pipe and snap the flat end of the exhaust pipe joints into the hole of the
window sealing plate assembly (as shown in Fig.5 and Fig.6) .
Notes
:
1.the flat end of the exhaust pipe joints must be snapped into place.
2.The pipe cannot be distorted nor has substantial turning (greater than 45
°
).
Keep the ventilation of the exhaust pipe not blocked.