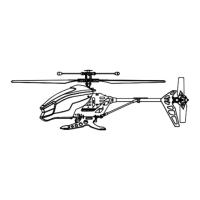
HELICOPTER DIAGRAM
Below is a basic list of features and parts on the helicopter.
REMOTE DIAGRAM
Below is a basic list of features on the infrared wireless remote control.
NOTE: When flying your
Execuheli II
™
with other infrared helicopters, make sure that each helicopter is set to
operate on a different infrared channel to avoid interference when flying. See back panel for additional precautions.
Landing Gear
Charging Socket
Power Switch
Main Rotor Blade
Power ON/OFF
Channel Selector
Charging Light
Power Indicator
Infrared Transmitter
Charging Cord Inside
Throttle Control
Direction Control
Trim Controls
TRIM
CHARGE
L R
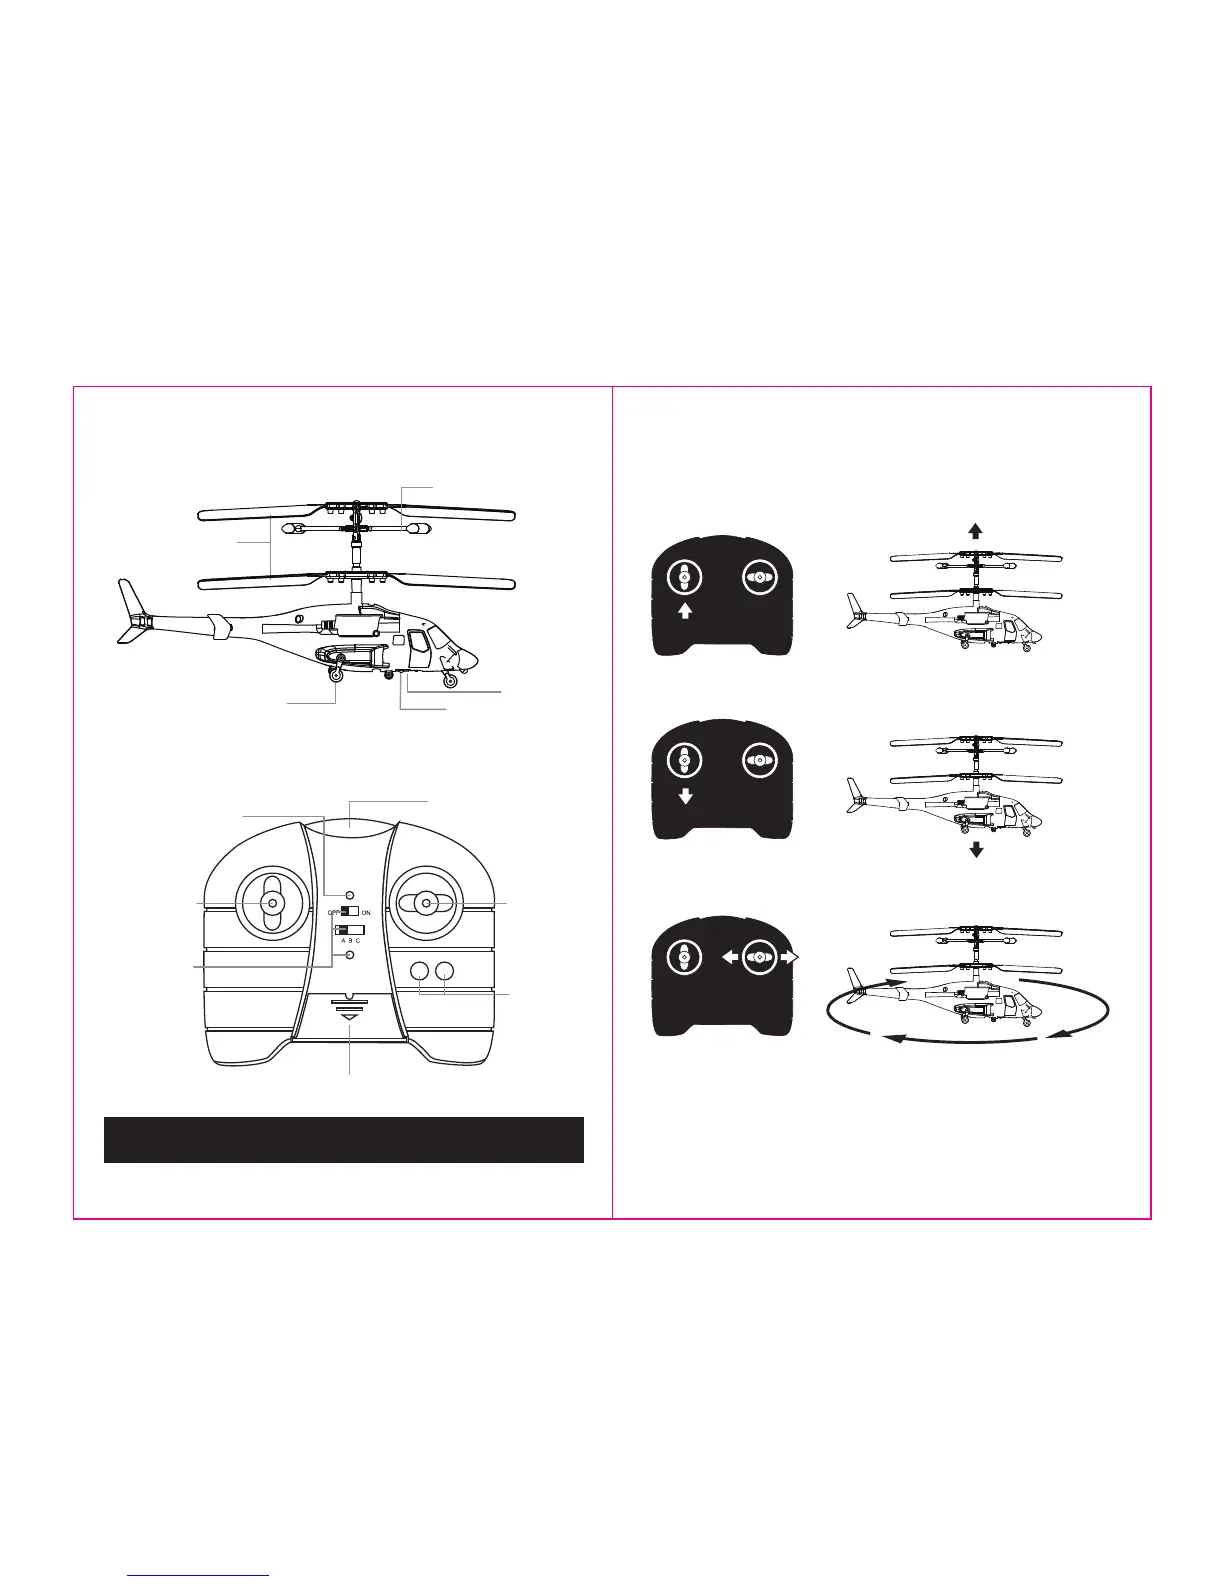
FLIGHT AND CONTROLS
Below is a list of basic flight functions for your wireless infrared remote control and how they will affect your helicopter.
While learning to fly your helicopter, it is best to start with a large room until you get used to the basic controls. As you
master flying the helicopter you can move to more advanced maneuvering through your home.
Move the throttle control up to increase the speed of the main rotor and the helicopter will rise.
Move the throttle control down to decrease the speed of the main rotor and the helicopter will descend.
Move the direction control left and right to change the helicopters direction from left to right.
• Verify that there are 6 “AA” batteries inside the infrared remote control unit, and that the helicopter has been fully charged.
• Set the channel selector to your helicopter. Turn the infrared remote control unit’s power switch to the ON position.
• Move helicopter’s power switch to the ON position.
• Place helicopter on open floor away from people and breakable items.
FLIGHT PREPARATION
3 4
Stabilizer
 Loading...