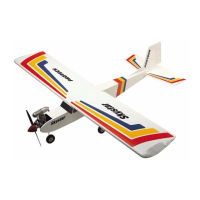
6 - Skystar
Assembling the ailerons / Monteren van de aileron scharnieren /
Montage des ailerons
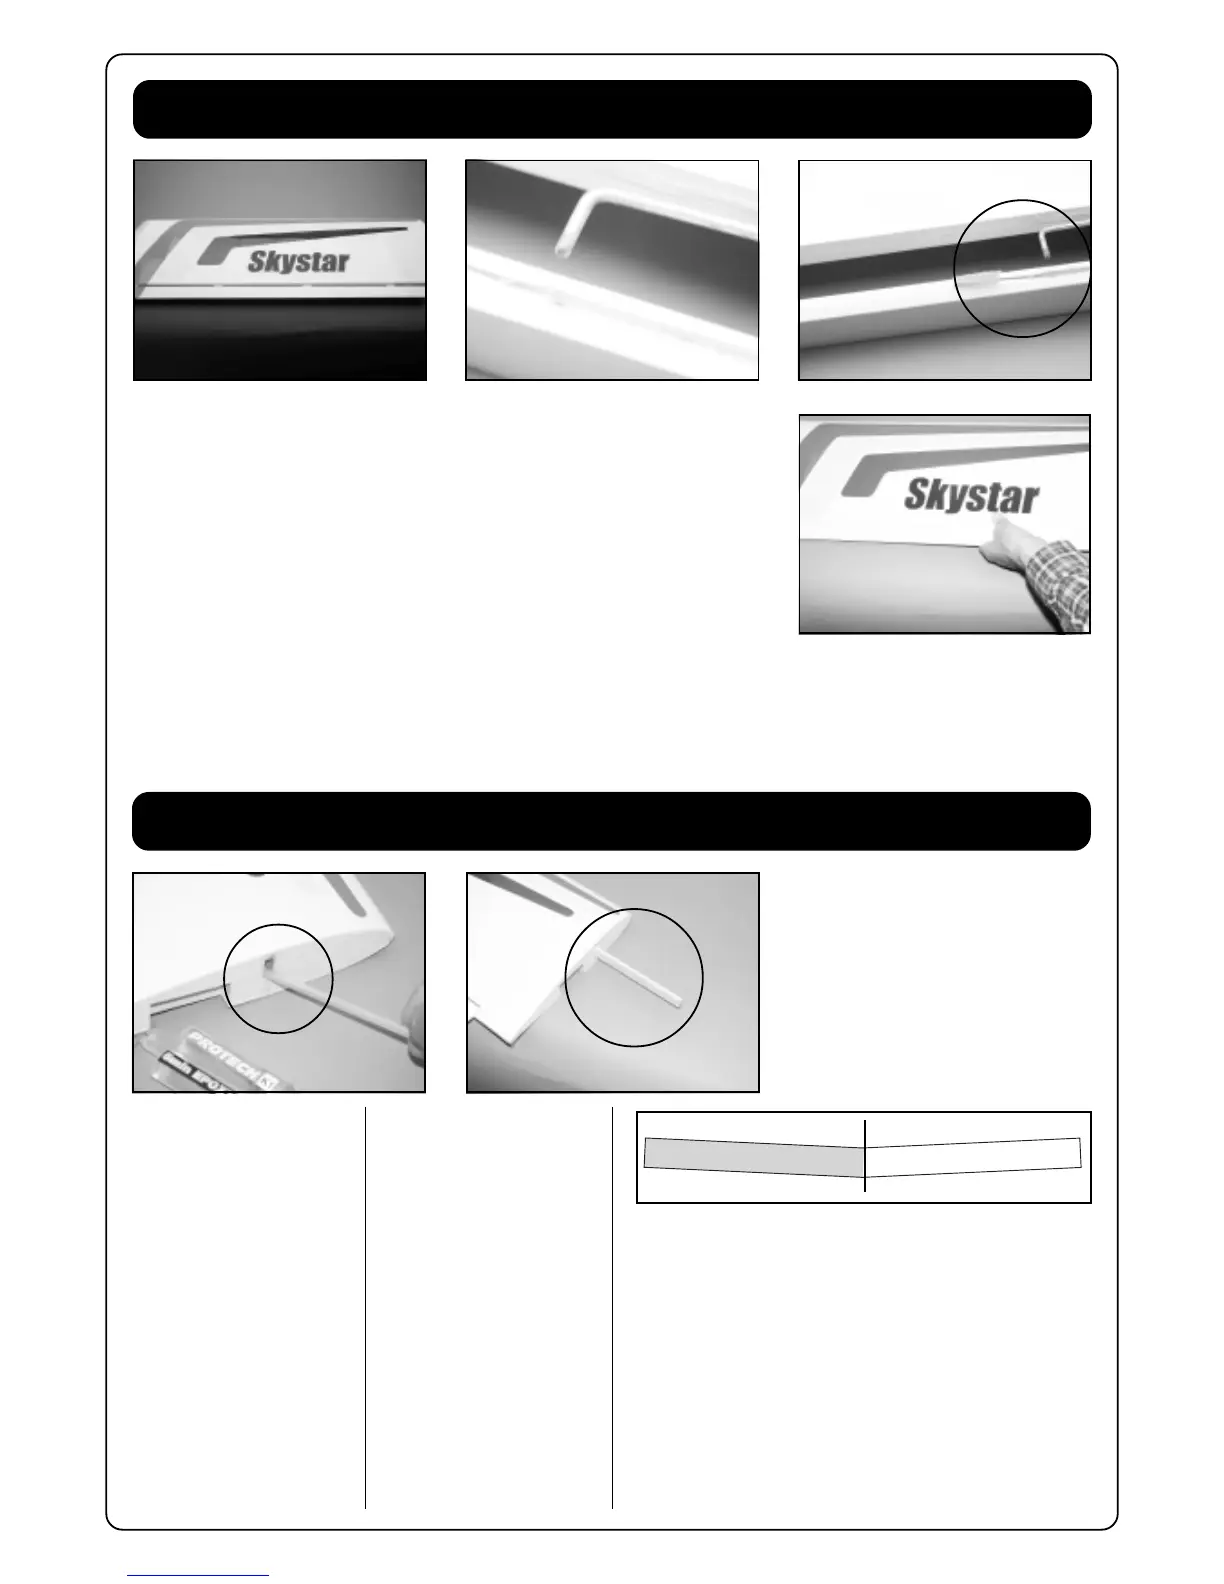
Take one wing panel and remove the aileron (Pic. 1). Check carefully if all hinges are well glued
into the aileron by pulling firmly on the hinges.
Apply epoxy glue on both sides of all hinges and apply also epoxy glue in the slot of the aileron
torque rod (Pic. 2-3).
Place the aileron back into position ensuring that the hinges are fitted correctly into the hinge
slots. Leave a small gap of max. 0.5mm between wing and aileron. Remove immediately all
excess of epoxy glue (Pic. 4) Repeat this sequence also for the other wing panel.
Neem een vleugelhelft en demonteer het rolroer van de vleugel (Pic. 1). Verifieer of de
scharnieren in het rolroer goed verlijmd zijn door stevig aan de scharnieren te trekken.
Breng vervolgens 5 minuten epoxy aan op alle scharnieren aan beide zijden. Breng eveneens
epoxy lijm aan in de uitsparing van de rolroer aansturing (Pic. 2-3).
Monteer het rolroer terug aan de vleugel en laat een spleet van max. 0,5 mm. Verwijder alle
overtollige epoxy lijm onmiddellijk (Pic. 4) Herhaal dit voor de andere vleugelhelft.
Joining the wing halves / Monteren van de 2 vleugelhelften /
Préparation des panneaux d’aile
Apply epoxy glue on both sides
of one half of the wing joiner W18
(Drw. 1).
Apply also epoxy glue inside the
slot for the wing joiner W18
(Pic. 5).
Slide the wing joiner inside the
wing panel and move it several
times in and out to equaly distrib-
ute the glue.
Push the wing joiner into the slot
untill the end (Pic. 6).
Breng epoxy lijm aan op een halve
zijde aan de voor en achterkant
van de vleugelverbinding W18
(Drw. 1).
Breng eveneens epoxy lijm aan in
de sleuf waar de vleugel-
verbinding W18 ingeschoven
wordt (Pic. 5).
Monteer vervolgens de
vleugelverbinding W18 in de sleuf
en beweeg W18 enkele malen op
en neer om de lijm goed te
verdelen.
Druk de vleugelverbinding in de
vleugel tot deze niet meer verder
kan (Pic. 6).
W18
Pic. 1 Pic. 2
Pic. 3
Pic. 4
Pic. 5 Pic. 6
Drw. 1
Prenez un panneau d’aile et retirez l’aileron (Pic.1). Tirez fermement sur les charnières pour vérifier si elles sont bien collées.
Appliquez de la colle époxy de chaque côté des charnières ainsi que dans le logement de la commande d’aileron (Pic.2-3).
Installez l’aileron sur le panneau d’aile, vérifiez que toutes les charnières sont correctement placées dans leur logement, laissez un espace de
0,5mm entre l’aileron et le panneau d’aile. Retirez immédiatement tout excédant de colle (Pic. 4).
Répétez l’opération pour l’autre panneau d’aile.
Appliquez de la colle époxy sur
chaque face d’une moitié de la clé
d’aile W18 (Drw. 1)
Appliquez également de la colle
époxy dans le logement de la clé
d’aile du panneau d’aile (Pic.5)
Introduisez la clé d’aile dans le
panneau et tirez et poussez
quelques fois la clé d’aile afin de
bien répartir la colle.
Poussez la clé d’aile jusqu’au
fond du logement (Pic 6).
 Loading...