Skystar - 7
Joining the wing halves (Part 2) / Monteren van de 2 vleugelhelften (Deel 2) /
Assemblage de l’aile
Apply epoxy glue on both sides
of the other half of the wing joiner.
Apply also epoxy glue inside the
slot for the wing joiner W18.
Apply epoxy glue on both wing
ribs.
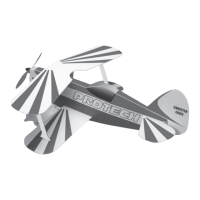
Assemble the 2 wing panels to-
gether and fix them with self ad-
hesive tape. Remove all excess
of epoxy glue immediately(Pic. 7).
Warning: Check carefully the di-
hedral of the wing (Drw 1a).
Breng epoxy lijm aan op de
andere zijde aan de voor en
achterkant van de vleugel-
verbinding W18.
Breng eveneens epoxy lijm aan in
de sleuf waar de vleugel-
verbinding W18 ingeschoven
wordt.
Breng epoxy lijm aan op de beide
vleugelribben.
Monteer vervolgens de 2
vleugelhelften tegen elkaar en
fixeer deze met kleefband.
Verwijder de overtollige epoxy lijm
onmiddellijk (Pic. 7).
Let op: Controleer of de
V-stelling juist is (Drw 1a).
Mounting the aileron servo holder / Monteren van de rolroerservo houder /
Montage du support du servo d’ailerons
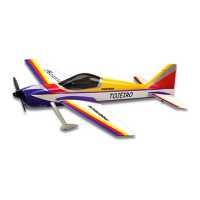
Place the plywood aileron servo
holder over the servo slot in the
wing as shown in Pic 8.
Draw with a pen a line around the
servo holder.
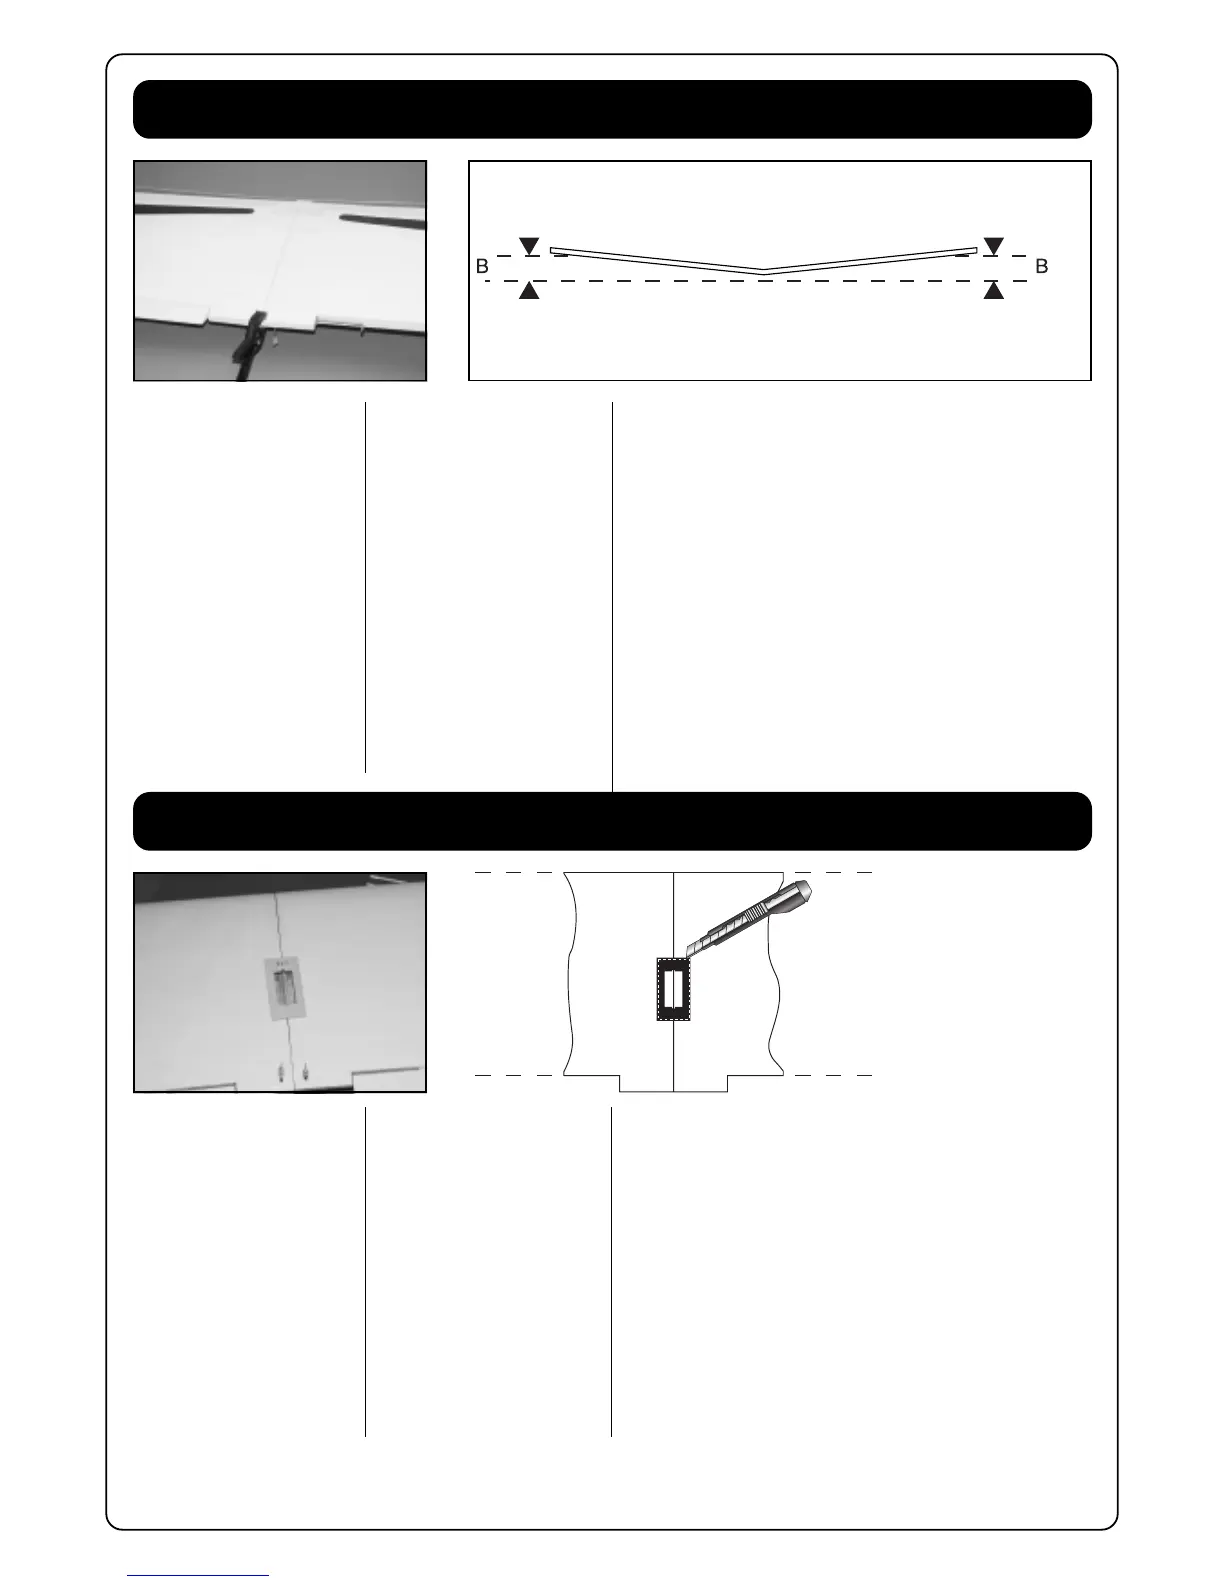
Take the servo holder away and
cut with a sharp hobby knife 2mm
on the inside of the drawn line.
Remove the covering film in this
part. (Drw. 2)
Apply epoxy glue on the servo
holder and fit it back into the po-
sition.
Plaats het plaatje voor de
rolroerservo (W29) op de vleugel
zoals afgebeeld (Pic. 8).
Teken vervolgens met een pen
rond het plaatje om de omtrek van
het plaatje af te tekenen.
Snij vervolgens voorzichtig met
een scherp hobbymes 2 mm aan
de binnenzijde van de
afgetekende lijn.
Verwijder de folie. (Drw. 2)
Breng epoxy lijm aan op het
plaatje en lijm het op zijn plaats.
Pic. 7
Pic. 8
Drw. 2
Appliquez de la colle époxy sur
l’autre moitié de la clé d’aile.
Appliquez également de la colle
époxy dans le logement de la clé
d’aile.
Appliquez de la colle époxy sur
les faces internes des panneaux
d’aile.
Joignez les 2 panneaux et fixez-
lez avec du ruban adhésif.
Enlevez tout excédant de colle
immédiatement.
(Pic. 7)
Attention: Contrôlez
correctement le dièdre de l’aile
(Drw 1a).
Drw. 1a
Placez le support de servo en bois
sur le logement de servo de l’aile,
voir Pic 8.
Tracez à l’aide d’un feutre le con-
tour du support sur l’aile.
Enlevez le support et découpez à
l’aide d’un cutter 2mm à l’intérieur
de votre tracé, et enlevez le film de
recouvrement (Drw 2).
Appliquez de la colle époxy sur le
support servo et collez-le sur l’aile.
 Loading...