EasyManua.ls Logo

PSG Caddy Series - User Manual

PSG Caddy Series
20 pages
Print Icon
To Next Page IconTo Next Page
Loading...
45601A
Printed in Canada 14-02-2019
OPTIONAL OIL UNIT INSTALLATION
(PA03055 or PA03105)
CADDY FURNACE
WARNING: INSTALL THE NOZZLE, ADJUST THE ELECTRODES,
ADJUST PRESSURE ACCORDING TO THE OIL UNIT
MANUFACTURER’S RECOMMENDATIONS.
NOTE: IF A PROBLEM RESULTS FROM IMPROPER INSTALLATION,
NO PRODUCT WARRANTY WILL BE VALID.
Verified and tested for
Canada and the United
States by an accredited
laboratory.
This manual is available for free download on the manufacturer’s
web site. It is a copyrighted document. Resale is strictly prohibited.
The manufacturer may update this manual from time to time and
cannot be responsible for problems, injuries, or damages arising
out of the use of information contained in any manual obtained
from unauthorized sources.
Eco-energy at the hearth
of your home
PSG
250, rue de Copenhague,
St-Augustin-de-Desmaures (Québec)
CANADA G3A 2H3
Question and Answer IconNeed help?

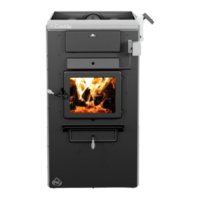
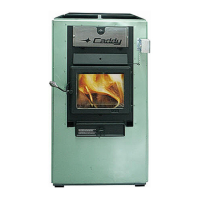
Do you have a question about the PSG Caddy Series and is the answer not in the manual?

Summary

SECTION 1 - INSTALLATION INSTRUCTIONS

Initial Panel Removal

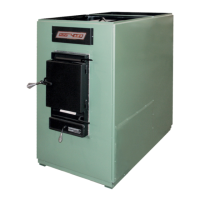
Remove outer furnace and blower box panels for installation access.

Blower Box and Deflector Preparation

Remove blower box panels and internal deflector.

Panel Reinstallation and Oil Unit Deflector Mounting

Reinstall blower box panels and attach the oil unit deflector and bolts.

Oil Unit Insertion and Leveling

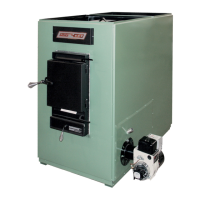
Slide the oil unit into the furnace and level it using adjustment bolts.

Gasket Installation on Furnace Panels

Cut and install gaskets on furnace panels and air jackets.

Air Jacket and Left Furnace Panel Attachment

Install air jacket panels and the left furnace panel.

Combustion Chamber Cover and Right Panel Attachment

Install gasket on the combustion chamber cover and the right furnace panel.

Right Panel Hole Plugging and Burner Mounting

Plug right panel holes and install the Beckett burner.

Riello Burner and Vision Cap Installation

Install the Riello burner and secure the vision cap.

Final Assembly and Preparation

Install certification label and prepare for electrical connections.

SECTION 2 - ELECTRICAL CONNECTIONS

Beckett Burner Wiring Steps

Connect the Beckett burner using the specified cable and terminals.

Beckett Burner Power Board Connection

Connect Beckett burner wires to the primary control and power board.

Riello Burner Preparation and Wiring

Prepare Riello burner by removing knockouts and making connections.

Riello Burner Wiring Diagram

Visual guide for Riello burner electrical connections.

Beckett Burner Wiring Diagram

Detailed diagram for Beckett burner electrical connections.

Riello Burner Wiring Diagram

Detailed diagram for Riello burner electrical connections.

ADDITIONAL STEPS FOR LEFT SIDE INSTALLATION

Left Side Support and Combustion Chamber Cover Adjustment

Secure support K and adjust combustion chamber cover for left side install.

Left Side Deflector and Air Jacket Panel Installation

Install deflector H and air jacket panels for left side installation.

PSG Caddy Series Specifications

General IconGeneral
AFUE80%
IgnitionDirect Spark Ignition
Heat Exchanger MaterialAluminized Steel
Fuel TypeNatural Gas
Vent Diameter4"
DimensionsVaries by model
WeightVaries by model
ConfigurationUpflow/Horizontal
Blower MotorPSC

Related product manuals