WARNING!
To prevent serious injury from accidental operation: Make sure that the trigger
is in the off position and unplug the tool from its electrical outlet before performing any
procedure in this section.
4
5
6
4
1
7
8
2
2
3
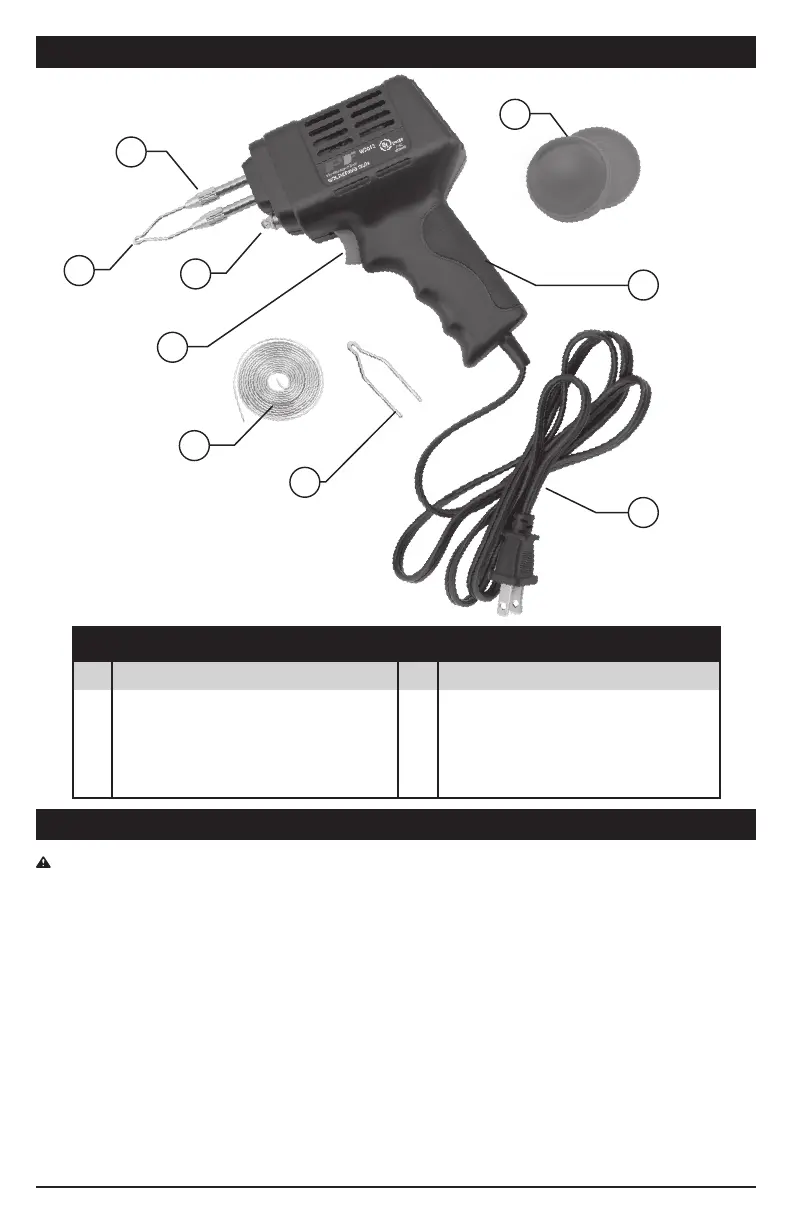
PARTS LIST
No. Description Qty.
1 Soldering Tip Nut ................ 1
2 Soldering Tip ....................... 2
3 Light .................................... 1
4 Trigger ................................. 1
No. Description Qty.
5 Handle ................................. 1
6 Power Cord ......................... 1
7 Soldering Paste ................... 1
8 Extra Soldering Wire ........... 1
PARTS DESCRIPTION
OPERATING INSTRUCTIONS & SET UP
1.
Using wrench, check that the soldering tip
nuts are not loose. Do not overtighten.
2. The soldering gun comes with three
soldering tips for different applications.
Select desired soldering tip and install
following soldering tip replacement
directions outlined in the maintenance
and servicing section on Page 5.
3. Set the soldering gun on the workbench, and
plug the power cord into an electrical outlet.
4. Press on the trigger until the soldering tip
heats up.
5. Apply a sufficient amount of rosin-core
solder to melt over the entire soldering
tip. Wipe the tip with a rag until the tip is
clean and shiny.