11
4. Strip back the outer insulation and shield foil from both of the 18
AWG, 4-conductor, shielded cables (coming from the controller or
previous AI device in line and going out to the next AI device in line),
being careful not to cut the bare shield wire. Strip ¼ inch of insulation
off the end of each of the individual colored conductor wires.
5. Remove the terminal blocks from the keypad circuit board by sliding
them up and off. The terminal blocks may be somewhat difcult to
remove as a tight electrical connection is necessary. If they are tight,
rock them slightly back and forth while lifting away from the board.
6. Insert both red wires (coming in from the controller and going out
to the next AI device) into terminal slot 1 on the rst terminal block
(P1). Ensure that both wires are seated all the way inside the slot.
Use a athead precision screwdriver to tighten down the terminal
screw.
Verify that the terminal slot has tightened down on the copper
wire and not on the rubber insulation. There should be no copper
wire showing outside of the terminal slot. Gently tug the wires to
verify that they are tightly held inside the terminal slot. Repeat this
process with each of the remaining wire connections as shown in
Figure 13. Insert both black wires into terminal slot 3 on P1. Ensure
that both wires are seated all the way inside the slot.
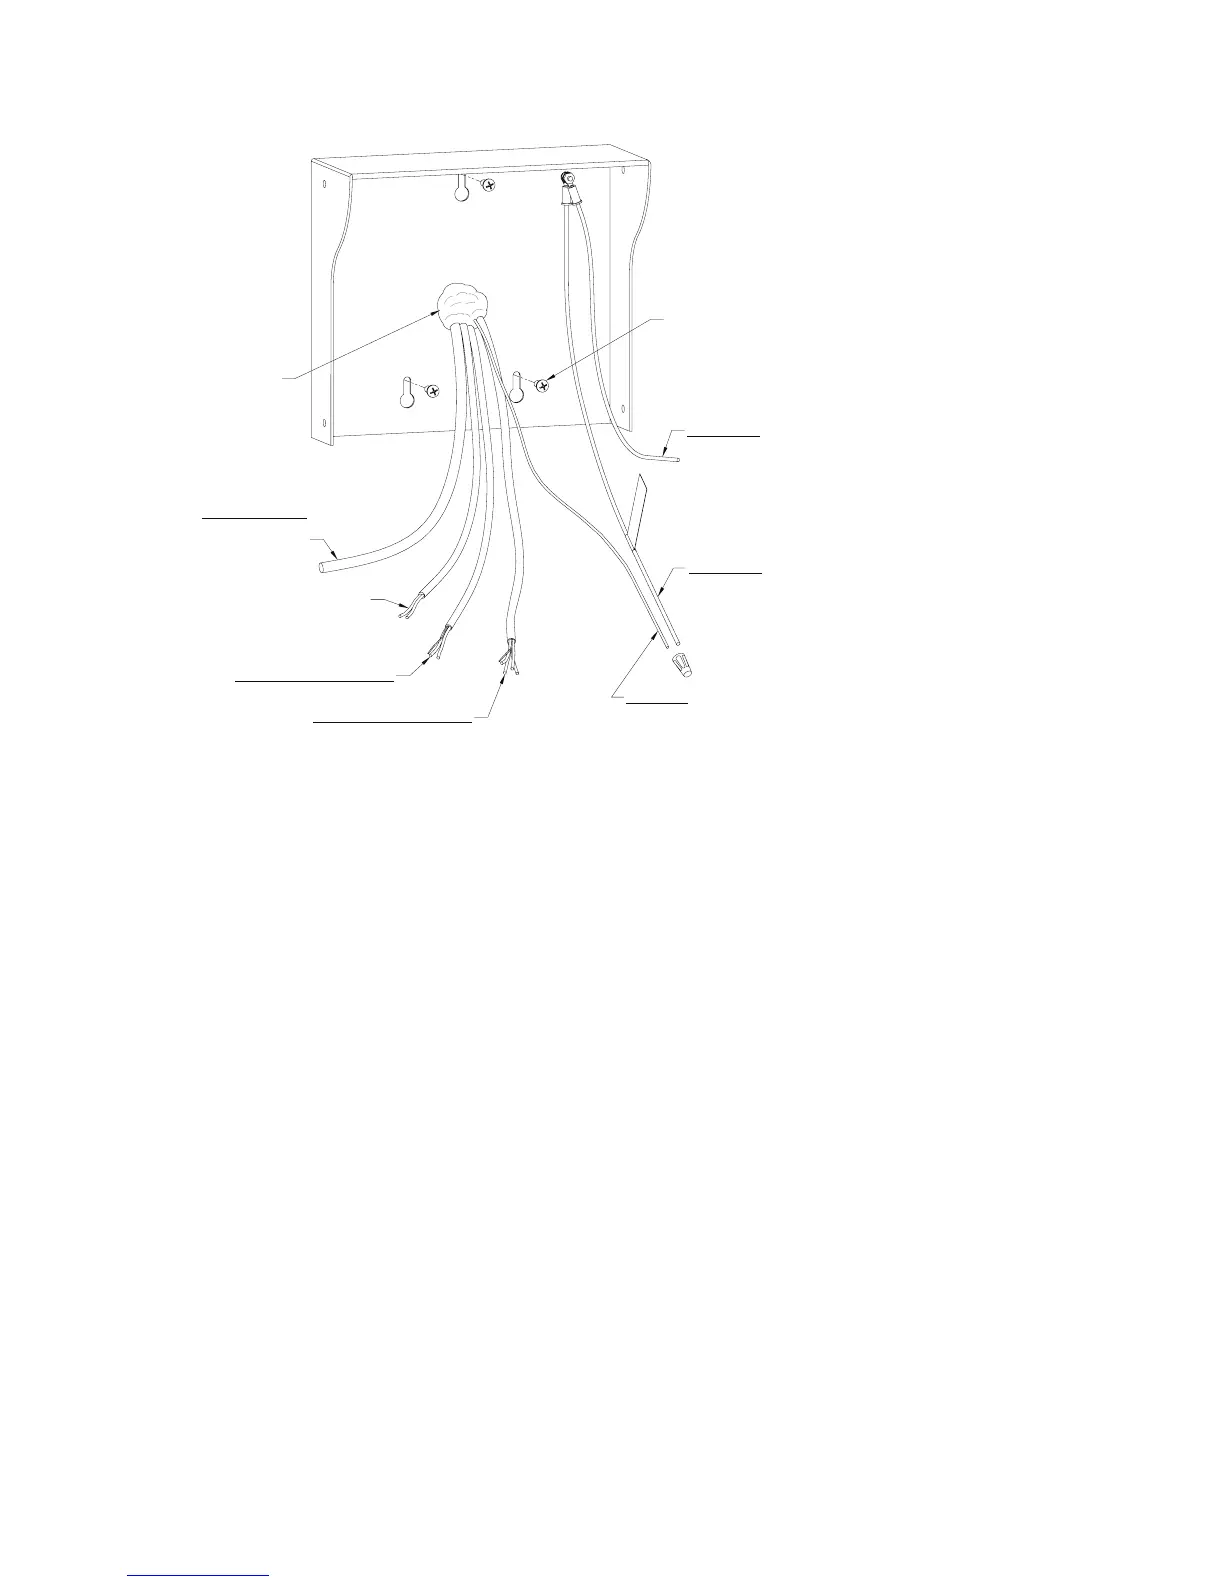
8-32 x 3/8" Screws (qty 3)
Cover hole
with silicone
RG 59U Camera Cable
(If optional camera is part
of this device)
18GA, 2-Conductor Unshielded Cable
(only if relay in this device used to
trigger Gate/Door Strike)
18GA, 2-Conductor Shielded Cable
(for Intercom)
18GA, 4-Conductor Shielded Cable
(RS485, may have more than one
cable to daisy-chain to other Access
Interface devices)
Earth Ground
(connect to Chassis Ground
with wire nut and tape)
Chassis Ground
(connect to Earth Ground
with wire nut and tape)
Chassis Ground
(connected to keypad)
Figure 12