12
DESCALING IMMERSION HEATER(S)
Before removing the immersion heater(s) the unit
must be drained. Ensure the water, electrical
supply, boiler and solar primary circuit are OFF
before draining. Attach a hosepipe to the drain
cock having sufficient length to take water to a
suitable discharge point below the level of the unit.
Open a hot tap close to the unit and open drain cock
to drain unit.
MAINTENANCE
MAINTENANCE REQUIREMENTS
Unvented hot water systems have a continuing
maintenance requirement in order to ensure safe
working and optimum performance. It is essential
that the relief valve(s) are periodically inspected and
manually opened to ensure no blockage has oc-
curred in the valves or discharge pipework. Similarly
cleaning of the strainer element and replacement of
the air in the expansion vessel will help to prevent
possible operational faults.
The maintenance checks described below should be
performed by a competent installer on a regular
basis, e.g. annually to coincide with boiler mainte-
nance.
SAFETY VALVE OPERATION
Manually operate the temperature/pressure relief
valve for a few seconds. Check water is discharged
and that it flows freely through the tundish and
discharge pipework. Check valve reseats correctly
when released. NOTE: Water discharged may be
very hot!
Repeat the above procedure for the expansion valve.
STRAINER
Turn off the cold water supply, boiler and immersion
heaters. The lowest hot water tap should then be
opened to de-pressurise the system. Remove the
pressure reducing valve cartridge to access the
strainer mesh. Wash any particulate matter from the
strainer under clean water. Re-assemble ensuring
the seal is correctly fitted, DO NOT use any other
type of sealant.
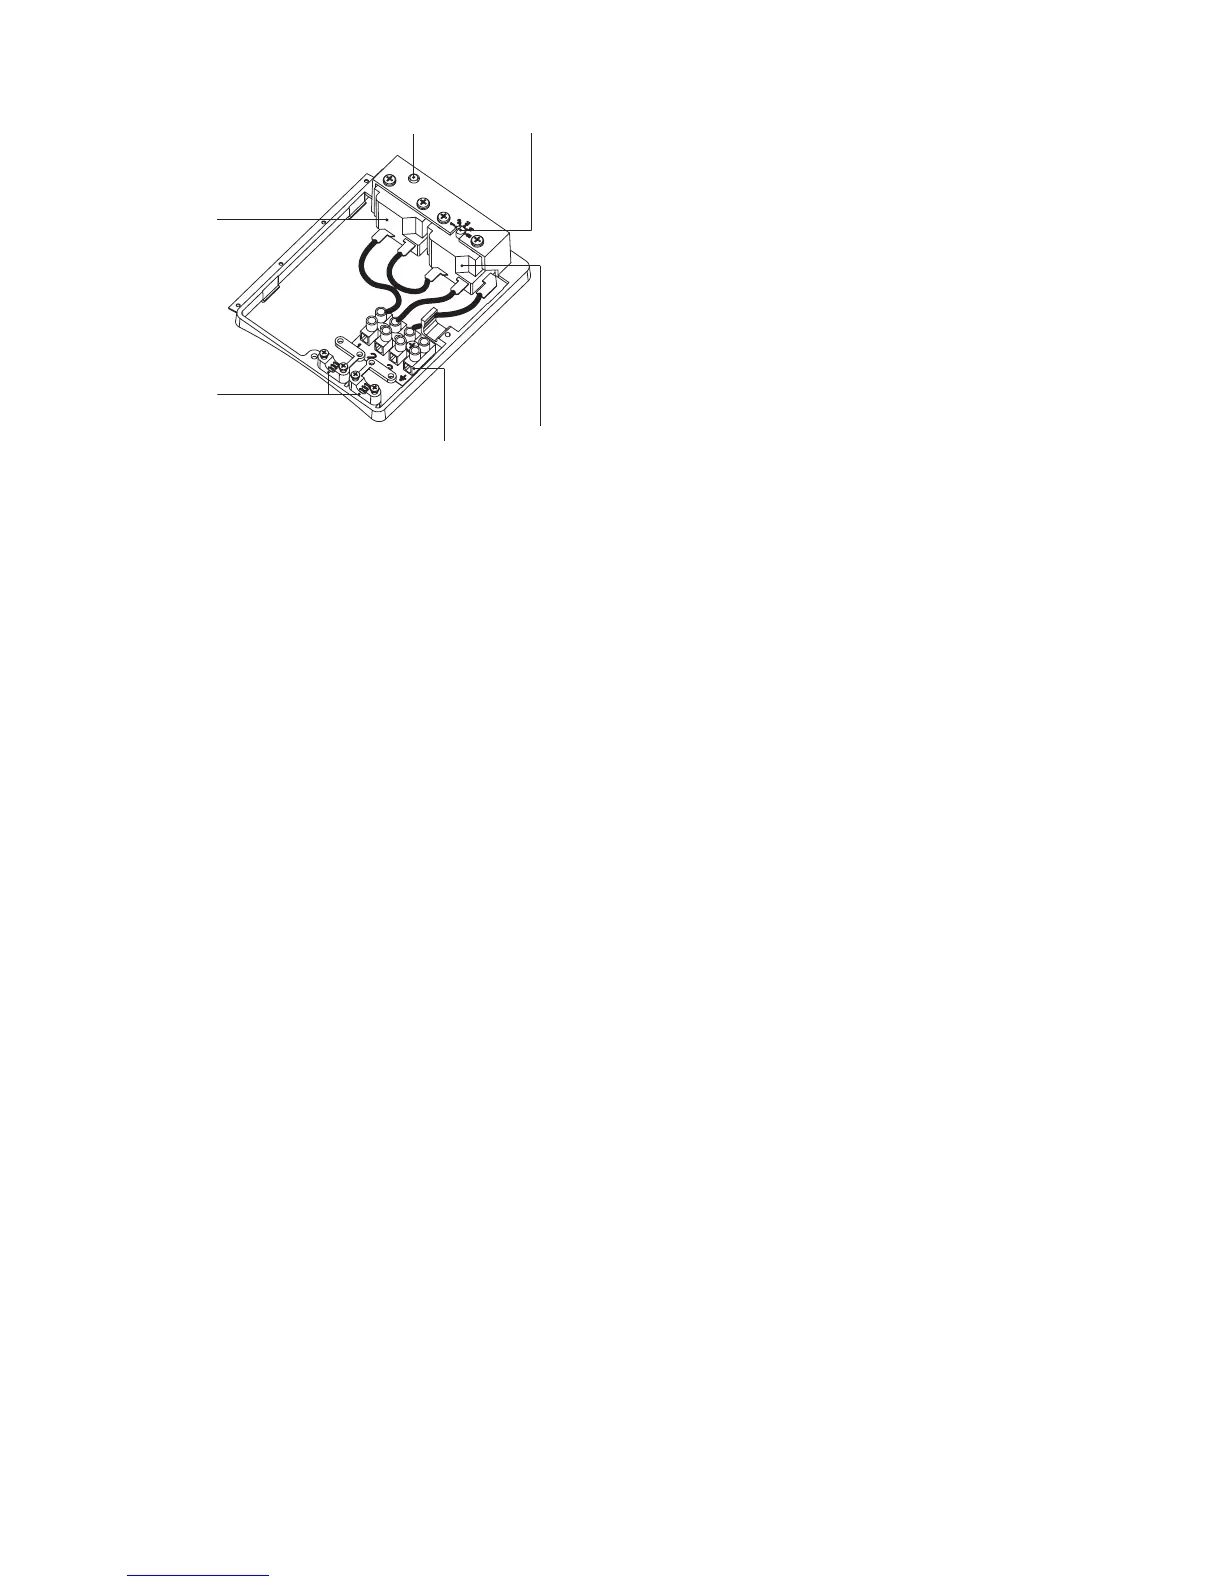
INDIRECT
THERMAL
CUT-OUT
CABLE
CLAMPS
TERMINAL BLOCK
INDIRECT
THERMOSTAT
THERMOSTAT
ADJUSTMENT
INDIRECT THERMAL
CUT-OUT RESET BUTTON
NOTE: THE HOUSING COVER AND
ELEMENT ASSEMBLY HAVE BEEN REMOVED
FROM THIS VIEW FOR CLARITY
Fig. 10: Indirect thermostat and thermal cut-out
DIRECT MODELS:
Open the cover(s) to the immersion heater
housing(s) and disconnect wiring from the
thermostat mounted on top of the immersion
heater(s). Remove the thermostat by carefully
pulling outwards from the immersion heater.
Unscrew immersion heater backnut(s) and
remove immersion heater from the unit. A key
spanner is supplied with the Pullin Evolution
Solar unit for easy removal/tightening of the
immersion heater(s). Over time the immersion
heater gasket may become stuck to the mating
surface. To break the seal insert a round bladed
screwdriver into one of the pockets on the
immersion heater and gently lever up and down.
INDIRECT MODELS:
Open the cover(s) to the immersion heater
housing(s) and disconnect wiring from immer-
sion heater(s). Remove the thermostat by
carefully pulling outwards from the immersion
heater. Remove thermostat capillary sensors
from the pockets on the immersion heater.
Unscrew immersion heater backnut(s) and
remove immersion heater from the unit. A key
spanner is supplied with the Pullin Evolution
Solar unit for easy removal/tightening of the
immersion heater(s). Over time the immersion
heater gasket may become stuck to the mating
surface. To break the seal insert a round bladed
screwdriver into one of the pockets on the
immersion heater and gently lever up and down.
Carefully remove any scale from the surface of
the element(s). DO NOT use a sharp implement
as damage to the element surface could be
caused. Ensure sealing surfaces are clean and
seals are undamaged, if in doubt fit a new
gasket.
Replace immersion heater(s) ensuring the lower
(right angled) element hangs vertically down-
wards towards the base of the unit. It may be
helpful to support the immersion heater using a
round bladed screwdriver inserted into one of
the thermostat pockets whilst the backnut is
tightened. Replace thermostat capillaries into
pocket (indirect models). Replace the immersion
heater thermostat by carefully plugging the two
male spade terminations on the underside of the
thermostat head into the corresponding termina-
tions on the element. Rewire, check, close and
secure immersion heater housing cover(s).
 Loading...