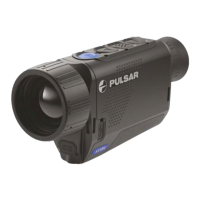
3. Menu button
4. Up/Zoom button
5. On/Calibration ON button
2. Down button
6. Lens focus ring
1. Eyepiece dioptre adjustment ring
8. MicroUSB connector
LED Indicator Operating Mode
elastic eyeshade.
LED indicator displaying current status of the device
For a better viewing experience, we recommend
7. Lens cap
Device on / battery charge <10%
Device is powered on
9. Battery release button
that glass wearers fold back the edge of the
USING THE RECHARGEABLE BATTERY
џ Two batteries can be charged at the same time – a
second slot is provided for this.
џ Insert the rechargeable battery (10) supplied with
your device, or purchased separately, fully along the
guide rail into the APS charger slot (аvailable
separately) (11).
Option 1 (Fig.2) :
џ Install the battery (10) into its slot on the instrument
case (14) by aligning the icons to form a 'dot' on the
device and the battery. (see Fig. 4).
џ Connect the other end of the USB cable (15) to the
mains charger (16) or to a USB socket connected to
another power source with rated output of 5V or less.
џ Attach a USB cable (15) to the microUSB connector
(8) on the device.
џ Point A on the battery and Point B on the charger
should be aligned.
џ Attach the USB plug on the USB cable (15) to the USB
connector on the mains device (16). Plug the
deviceinto a 100–240 V power outlet (17).
џ The LED indicator (13) will light up battery charge
status (see table).
Charging the battery
џ Connect the mains charger (16) to the mains power
supply.
Note: The PB8I Power Bank may be used as a charger
(see Item 7).
Option 2 (Fig.3) :
џ Attach the second plug of the microUSB cable to the
socket (12) of the mains charger (11).
AXION KEY thermal imagers are supplied with a
rechargeable APS3 Lithium-ion Battery Pack. The
battery should be charged before first use.
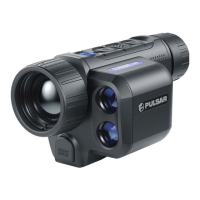
COMPONENTS AND CONTROLS
BUTTON OPERATION
123456
7 9 8
LED indicator
Fig.
1
2
Control
mechanism
Condition / Operating
Mode
1 short press Next short press Long press
ON button Device is powered off Power on the device Device calibration Power on the device
Display off Turn on display Device calibration Power off the device
Device turned on, quick
menu, main menu
Device calibration Display off / device
powered off
Up/Zoom
button
Device is powered on
Change magnification (Zoom)
PiP on/off
Quick menu Increase parameter Increase parameter
Main menu Navigation up, right Navigation up, right
Menu button Device is powered on Open quick menu Open main menu
Quick menu Navigation up Exit quick menu
Main menu Confirm value, enter menu options Exit menu options, exit
main menu
Down button Device is powered on Operating modes Color palettes
Quick menu Reduce parameter Reduce parameter
Main menu Navigation down, left Navigation down, left

 Loading...