7
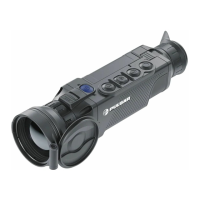
THERMAL IMAGING SCOPE HELION 2 XP50 PRO
Calibration
Mode
Selection of calibration mode.
There are three calibration modes: Manual, Semi-Automatic and Automatic.
To select the calibration mode:
•
Press and hold the M (9) button to enter the main menu.
•
Select the Calibration icon with the UP (10) / DOWN (8) buttons.
•
Enter the submenu with a short press of the М (9) button.
•
Select one of the calibration modes below with the UP (10) / DOWN (8) buttons.
•
Conrm your selection with a short press of the M (9) button.
In the automatic mode the need for calibration is based on the software
algorithm. Calibration starts automatically.
In the semi-automatic mode the user determines the need for calibration
(based on the actual image status).
In the manual (silent) calibration mode the user determines the need for calibration.
The lens cover must be closed during calibration.
Microphone
•
Press and hold the M (9) button to enter the main menu.
•
Select the submenu Microphone with the UP (10) / DOWN (8) buttons.
•
Enter the option with a short press of the M (9) button.
•
Turn the microphone on / off with a short press of the M (9) button.
•
With the microphone on you will have audio track in your video.
The microphone is off by default.
Icon
Brightness
•
Press and hold the M (9) button to enter the main menu.
•
Select the submenu with the UP (10) / DOWN (8) buttons.
•
Enter the Icon brightness option with a short press of the M (9) button.
•
Set the desired graphics brightness (menu and status bar icons) from 1 to 10 with the UP
(10) / DOWN (8) buttons.
•
Conrm your selection with a short press of the M (9) button.
General Settings
The following settings are available:
Language
Language selection:
•
Enter the submenu Language with a short press of the M (9) button.
•
Select one of the available interface languages with a short press of the UP (10) / DOWN (8)
buttons: English, French, German, Spanish, Russian.
•
Save selection and exit the submenu with a long press of the M (9) button.
Date
Date setup:
•
Enter the submenu Date with a short press of the M (9) button. The date format is displayed
as: YYYY/MM/DD (year/month/day).
•
Select the correct values for the year, month and date with a short press of the UP (10) /
DOWN (8) buttons.
•
Switch between digits with a short press of the M (9) button.
•
Save the selected date and exit the submenu with a long press of the M (9) button.
Time
Time setup:
•
Enter the submenu Time with a short press of the М (9) button.
•
Select the desired time format with a short press of the UP (10) / DOWN (8) buttons: 24 or
PM/AM.
•
Switch to hour setup with a short press of the M (9) button.
•
Select hour value with a short press of the UP (10) / DOWN (8) buttons.
•
Switch to minute setup with a short press of the M (9) button.
•
Select minute value with a short press of the UP (10) / DOWN (8) buttons.
•
Save the selected time and exit the submenu with a long press of the M (9) button.
Units
of Measure
Selection of units of measure:
•
Enter the submenu "M/Y" with a short press of the M (9) button.
•
Select the desired units of measurement with a short press of the UP (10) / DOWN (8)
buttons: Meters or Yards.
•
Save the selection with a short press of the M (9) button.
•
Menu exit will take place automatically.
Lens selection
Lens selection is used when replacing objective lenses.
Selection of the lens type is important for the correct display of the optical magnication and
adequate operation of the Stadiametric rangender.
•
Replace the objective lens: to do this, move the latch (12) backwards, turn the lens counter-
clockwise all the way and remove the lens.
•
Install a new lens, move the latch backwards and move clockwise until the latch snaps.
•
Enter the submenu with a short press of the M (9) button.
•
With a short press of the UP (10) / DOWN (8) buttons select the desired lens: 28; 38 or 50.
•
Conrm selection with a long press of the M (9) button.
Default Settings
This menu option allows you to return the settings to their defaults.
•
Enter the Default settings submenu with a short press of the M (9) button.
•
With a short press of the UP (10) / DOWN (8) buttons select Yes to restore default settings
or No to abort.
•
Conrm selection with a short press of the М (9) button.
•
If Yes is selected the display will show Return default settings? and Yes and No options.
•
Select Yes to restore default settings.
If No is selected the action is aborted and you return to the submenu.
The following settings will be returned to their defaults:
Operating mode of video recorder - video
Observation mode - Forest
Calibration mode - Automatic
Language - English
Microphone - Off
Wi-Fi - Off (default password)
Magnication - Off (no digital zoom)
PiP - Off
Colour mode - White Hot
Units of measure - Meters
Warning: the date and time settings and default pixel map are not restored.
Format
This menu option allows you to format the device's memory card. All les will be deleted.
•
Enter the Format submenu with a short press of the M (9) button.
•
With a short press of the UP (10) / DOWN (8) buttons select Yes to format the memory card
or No to return to the submenu.
•
Conrm selection with a short press of the M (9) button.
•
If Yes is selected the display will show Do you want to format memory card? and Yes and
No options. Select Yes to format the memory card.
•
The message Memory card formatting means that formatting is in progress and when
completed the message Formatting completed is shown.
•
If No is selected the formatting is aborted and you return to the submenu.
Wi-Fi
•
Press and hold the M (9) button to enter the main menu.
•
Use the UP (10) / DOWN (8) buttons to select the Wi-Fi menu option.
•
Turn Wi-Fi on with a short press of the M (9) button.
•
Turn Wi-Fi off with a short press of the M (9) button.
 Loading...
