8. Power on the Array
Connecting the Power Supplies
1. Power on DirectFlash shelves or expansion shelves (if installed), start-
ing with the lowest ID number and proceeding to the highest, as
described in the DirectFlash Shelf Quick Installation Guide, Expansion
Shelf Quick Installation Guide, or Add-on Shelf Quick Installation Guide.
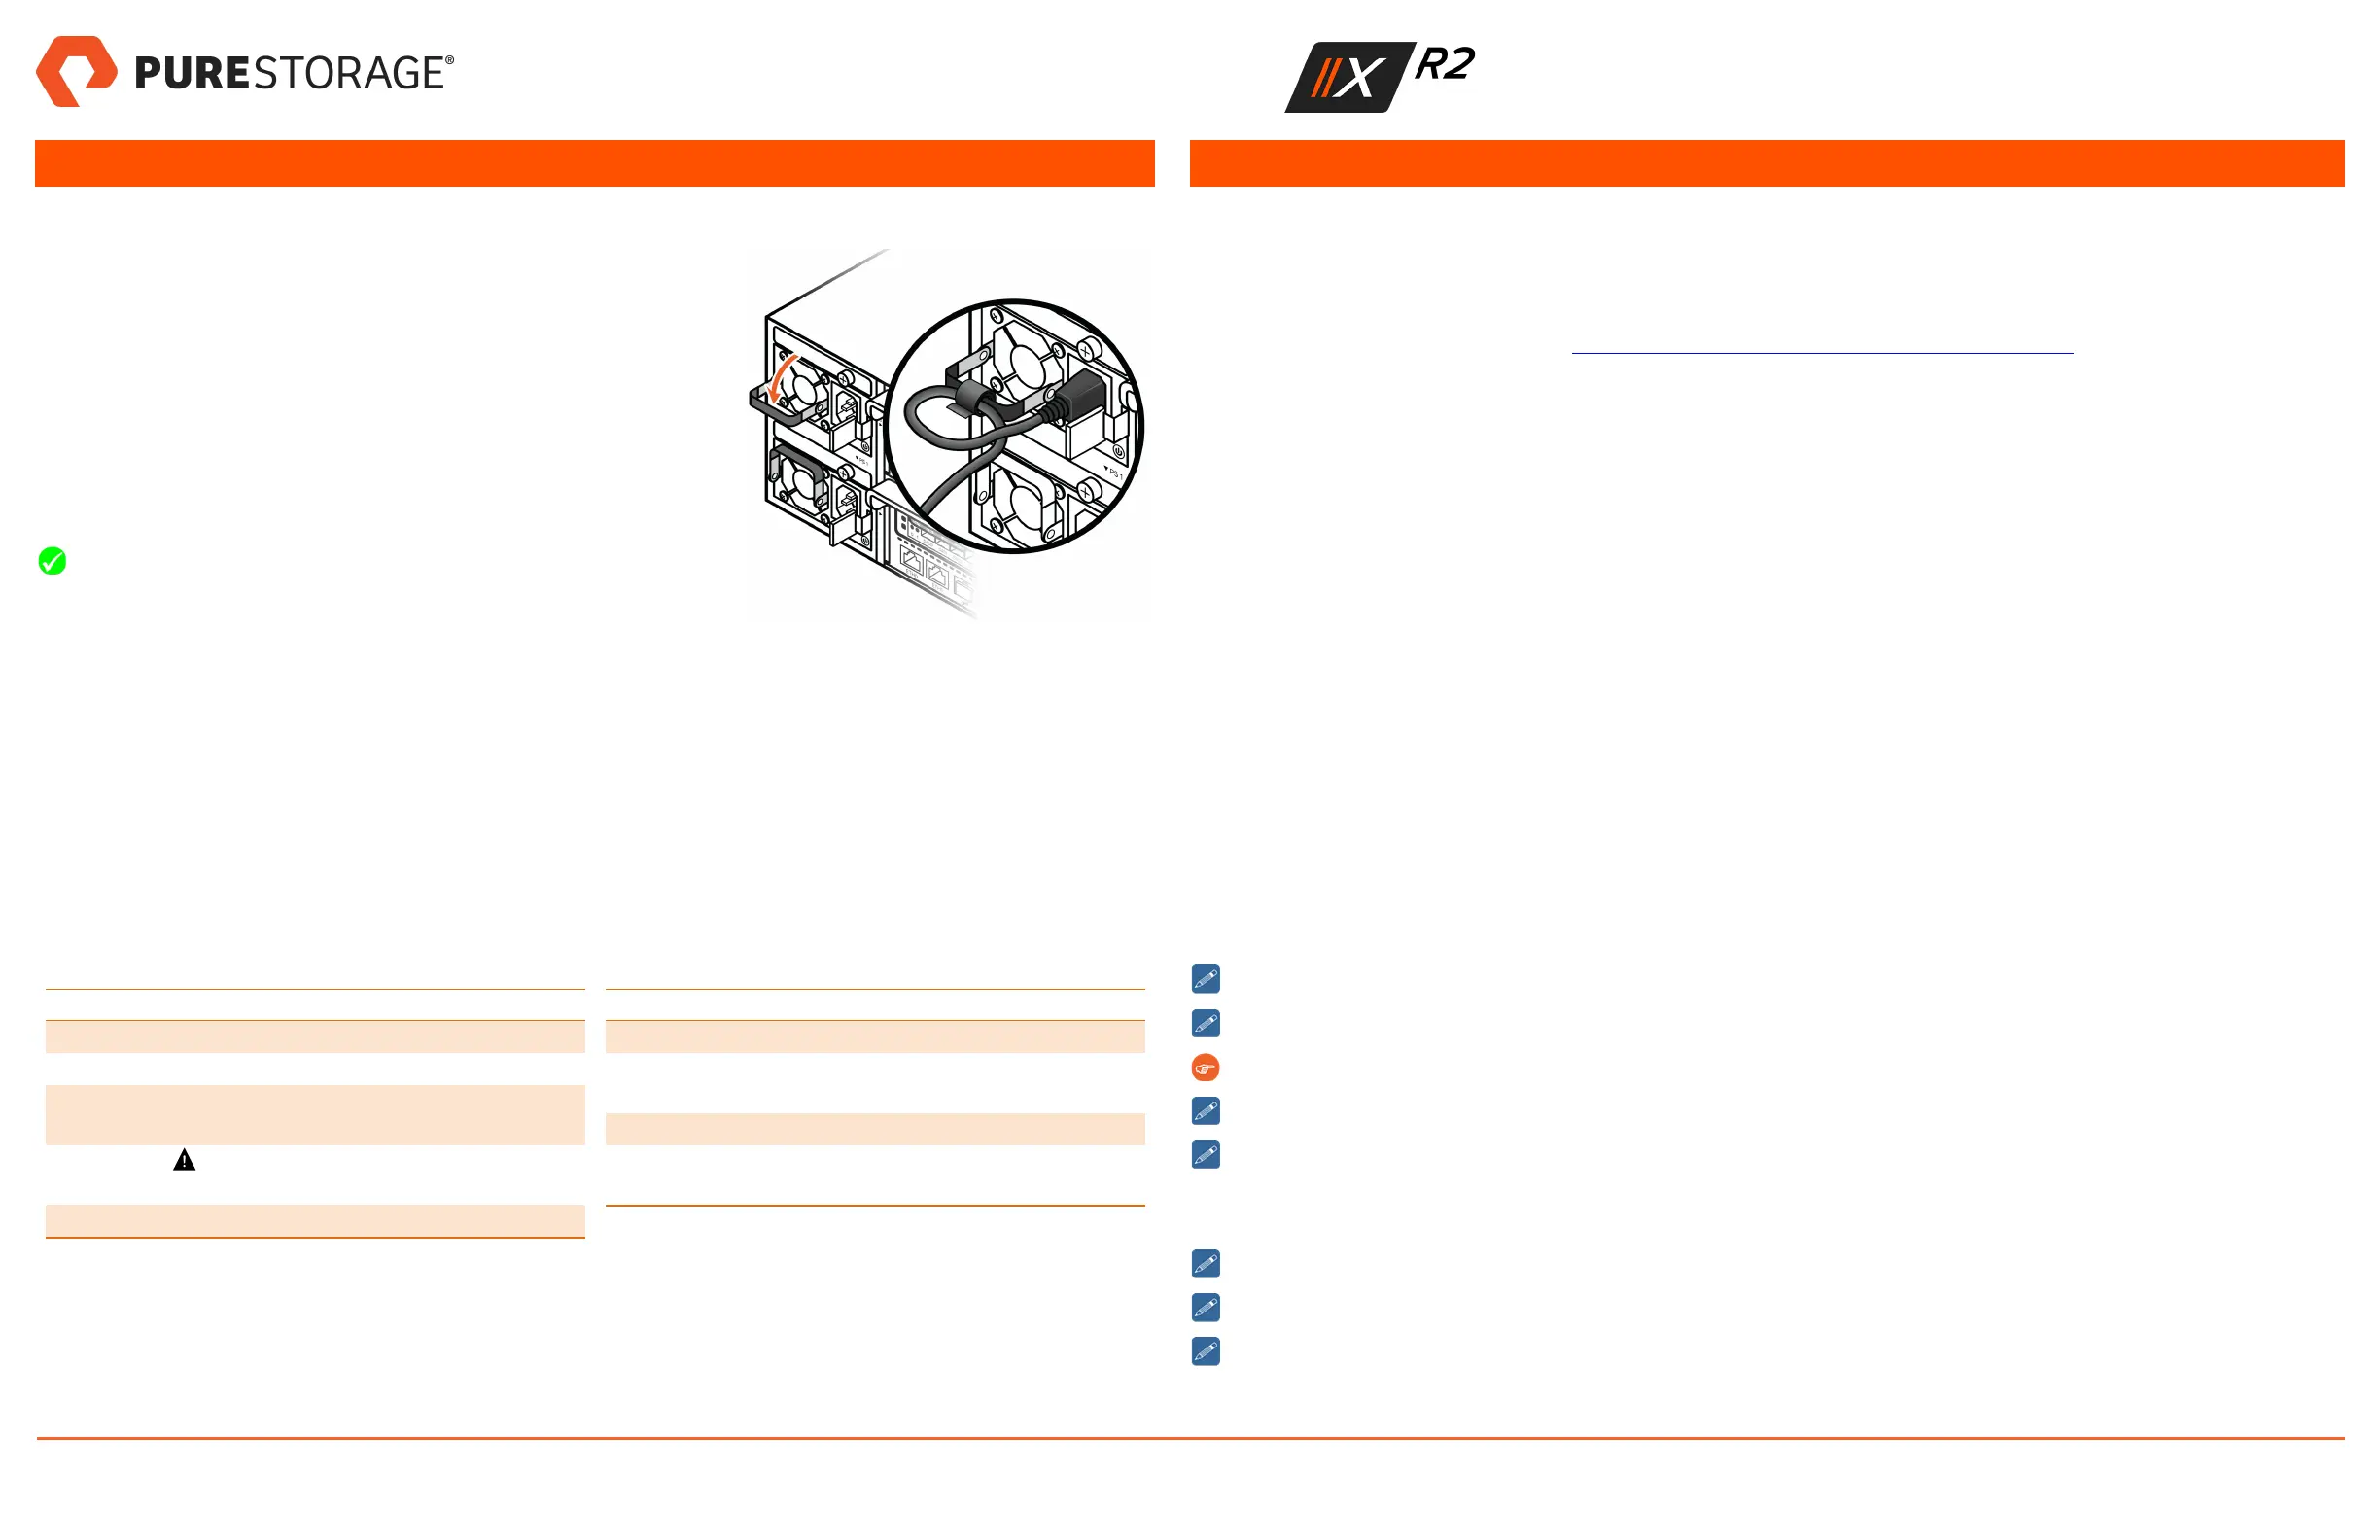
2. Power on FlashArray PS0 and PS1 as follows (Figure 11 shows PS0):
l Lower the power supply handle, make a loop in the power cord near
the plug, and wrap the captive strap around the loop, securing the cord
to the handle.
l Insert the power plug in the power supply socket.
Securing the captive strap helps prevent accidental power dis-
connections.
3. Connect the PS0 power cord to the AC power distribution unit. After you
connect the power, the controller LEDs illuminate and the controller fans
start.
4. Connect the PS1 power cord to a separate AC power distribution unit to
ensure redundancy.
Figure 11. Securing the Power Cord
After Powering On
As each power supply comes online, the system fans run high for a moment, and then run more quietly. Once the system is
powered on, the LEDs illuminate. See Table 1 for front-panel LED descriptions and Table 2 for rear-panel LED descrip-
tions.
Table 1. Front-Panel LEDs
LED Description
Power Supply Unit (PS) Green if OK. Amber if faulty.
Controllers (CT) Green if OK.
System OK Green if OK. Off if any system
components are faulty.
System Fault
Off if OK. Amber if any system
components are faulty.
System ID Off.
Table 2. Rear-Panel LEDs
LED Description
OK Green if OK. Amber if faulty.
PWR Green if OK. Amber if power fault
occurs.
ID Off.
Port LEDs Shows link state when controller is
active.
9. Sign into FlashArray and Configure Controllers
Prerequisites
l A completed Pre-Installation Checklist from the customer. The checklist contains important configuration details.
l A USB Flash drive with the correct version of Purity for the customer.
l Root or puresetup credentials. See Array Install: Changing Purity Version on a Fresh Array for more information.
Log into the FlashArray
Use the KVM cable from the Accessory Kit to connect the CT0 KVM port (see Figure 9 for the port location) to a local console.
The KVM cable has one serial, one VGA, and two USB ports. Use a VGA monitor and USB keyboard or a computer (e.g., a
laptop) equipped with a serial-to-USB converter and terminal emulation software as a local console. The terminal settings for
the serial port are 8-N-1 (8 data bits, no parity, 1 stop bit), Xon/Xoff flow control, 115,200 baud. After connecting the KVM cable,
press any key to start the console.
Configure the Controllers
1. Log into CT0 as root or puresetup and enter the pureversion command to determine the Purity version.
2. If you need to upgrade Purity, do the following:
l Enter the ls /dev/sd* -lrt command to get the partition number of the USB Flash drive with the Purity ppkg.
Mount to FlashArray by entering mount /dev/sd# /mnt where # is the USB drive partition number.
l Copy the ppkg and sha1 to the FlashArray (e.g., enter cp /mnt/purity* /home/puresetup).
l Go to the installation directory (cd /home/puresetup) and run the installation command
(pureinstall purity-*.ppkg), and then follow the on-screen instructions.
3. Connect the KVM cable to CT1, log in as root or puresetup, and repeat steps 1–2.
4. Connect the KVM cable to CT0, log in as root or puresetup, and enter the puresetup newarray command to set up
the array.
If network connectivity is unavailable, unplug the Ethernet cable. Otherwise tests might take 15 minutes to time out.
Use the completed Pre-Installation Checklist to enter the customer environment variables.
The FlashArray tests Remote Assist, phone home, and time syncs with NTP.
If any tests fail, check for typos, and make any necessary changes to the networking and firewall configuration.
Change the time zone, if necessary. Reboot if prompted to do so.
5. Connect the KVM cable to CT1 and enter the puresetup secondary command, using the information from the Pre-
Installation Checklist.
If network connectivity is unavailable, unplug the Ethernet cable. Otherwise tests might take 15 minutes to time out.
If any tests fail, check for typos, and make any necessary changes to the networking and firewall configuration.
Change the time zone, if necessary. Reboot if prompted to do so.
FlashArray Quick Installation Guide
40-0154-01 Page 5 of 6 October 12, 2018