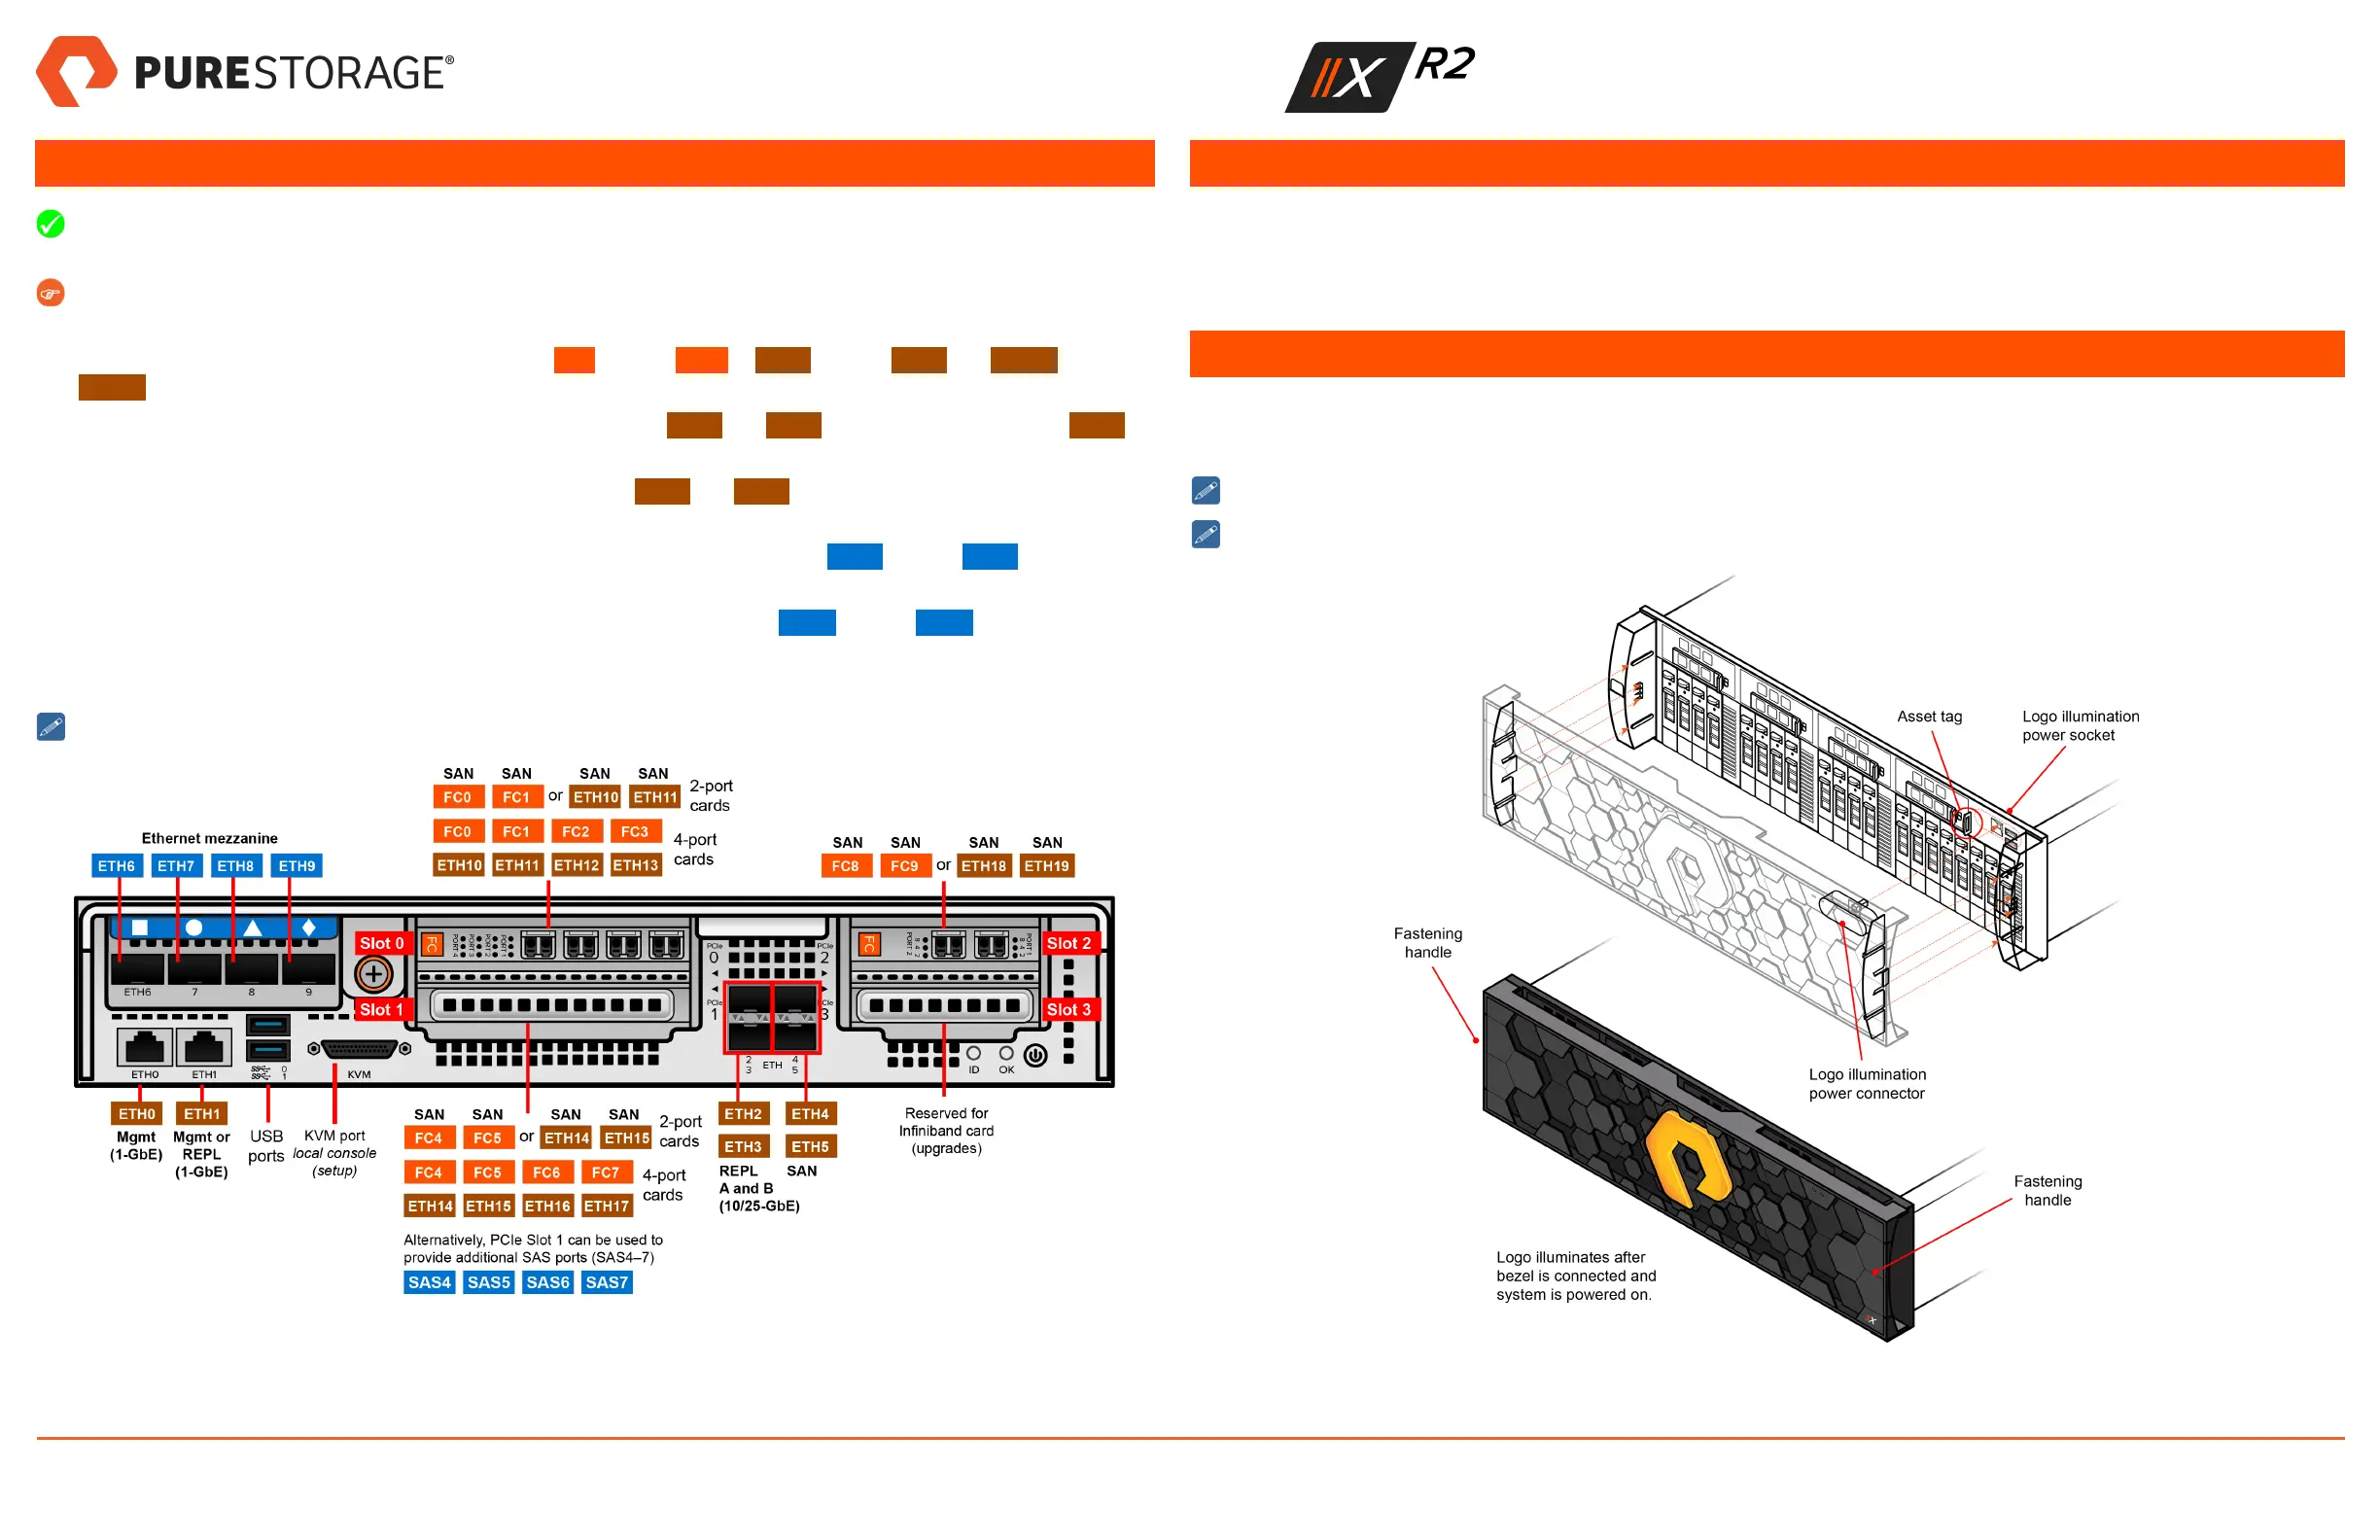
5. Connect Host, Replication, and Management Cables
Connect each controller (CT0 and CT1) to a separate storage area network (SAN) and replication fabrics (A and B in
Figure 9) to ensure redundancy.
Depending on the customer order, the quad-port mezzanine can be equipped with either an Ethernet or SAS card,
and the PCIe slots can be equipped with Fibre-Channel or Ethernet cards.
1. Use customer-supplied cables to connect host ports FC0 through FC13 or ETH4 through ETH5 and ETH10 through
ETH17 (labeled SAN in Figure 9) to SANs as directed by the customer. Leave unused ports unpopulated.
2. Connect customer-supplied 1-GbE cables to management ports ETH0 and ETH1. Alternatively, you can use ETH1 for
1-GbE replication.
3. Connect customer-supplied 10- or 25-GbE cables from ports ETH2 and ETH3 (labeled REPL A and REPL B in Fig-
ure 9) to replication network switch ports.
4. If the controller has an Ethernet card in the quad-port mezzanine, you can connect ETH6 through ETH9 to DirectFlash
shelves. See the DirectFlash Shelf Quick Installation Guide for more information.
If the controller has a SAS card in the quad-port mezzanine, you can connect SAS0 through SAS3 to expansion
shelves. See the Expansion Shelf Quick Installation Guide for more information.
5. After connecting, pull gently on the cables until you feel resistance to ensure they are secure.
Repeat steps 1–5 for the second controller.
Figure 9. FlashArray Controller Ports (QP ETH and FC PCIe Cards Shown)
6. Unpack and Install Shelves
Unpack and install any DirectFlash shelves or expansion shelves. Refer to the DirectFlash Shelf Quick Installation Guide (for
DirectFlash shelves) or Expansion Shelf Quick Installation Guide (for 12G shelves) for unpacking, installation, and cabling
instructions. After installing DirectFlash shelves or expansion shelves, resume the installation procedure starting with "Install
the Bezel" below.
7. Install the Bezel
1. Remove the protective film on the front surface of the bezel.
2. Install the bezel, aligning the power connector with the logo illumination socket on the front panel. See Figure 10.
Make sure the asset tag is fully inserted into the slot or you will be unable to install the bezel.
To remove the bezel, press the two fastening handles to disengage it from the front panel.
Figure 10. Installing the Bezel
FlashArray Quick Installation Guide
40-0154-01 Page 4 of 6 October 12, 2018