www.PyleUSA.com www.PyleUSA.com
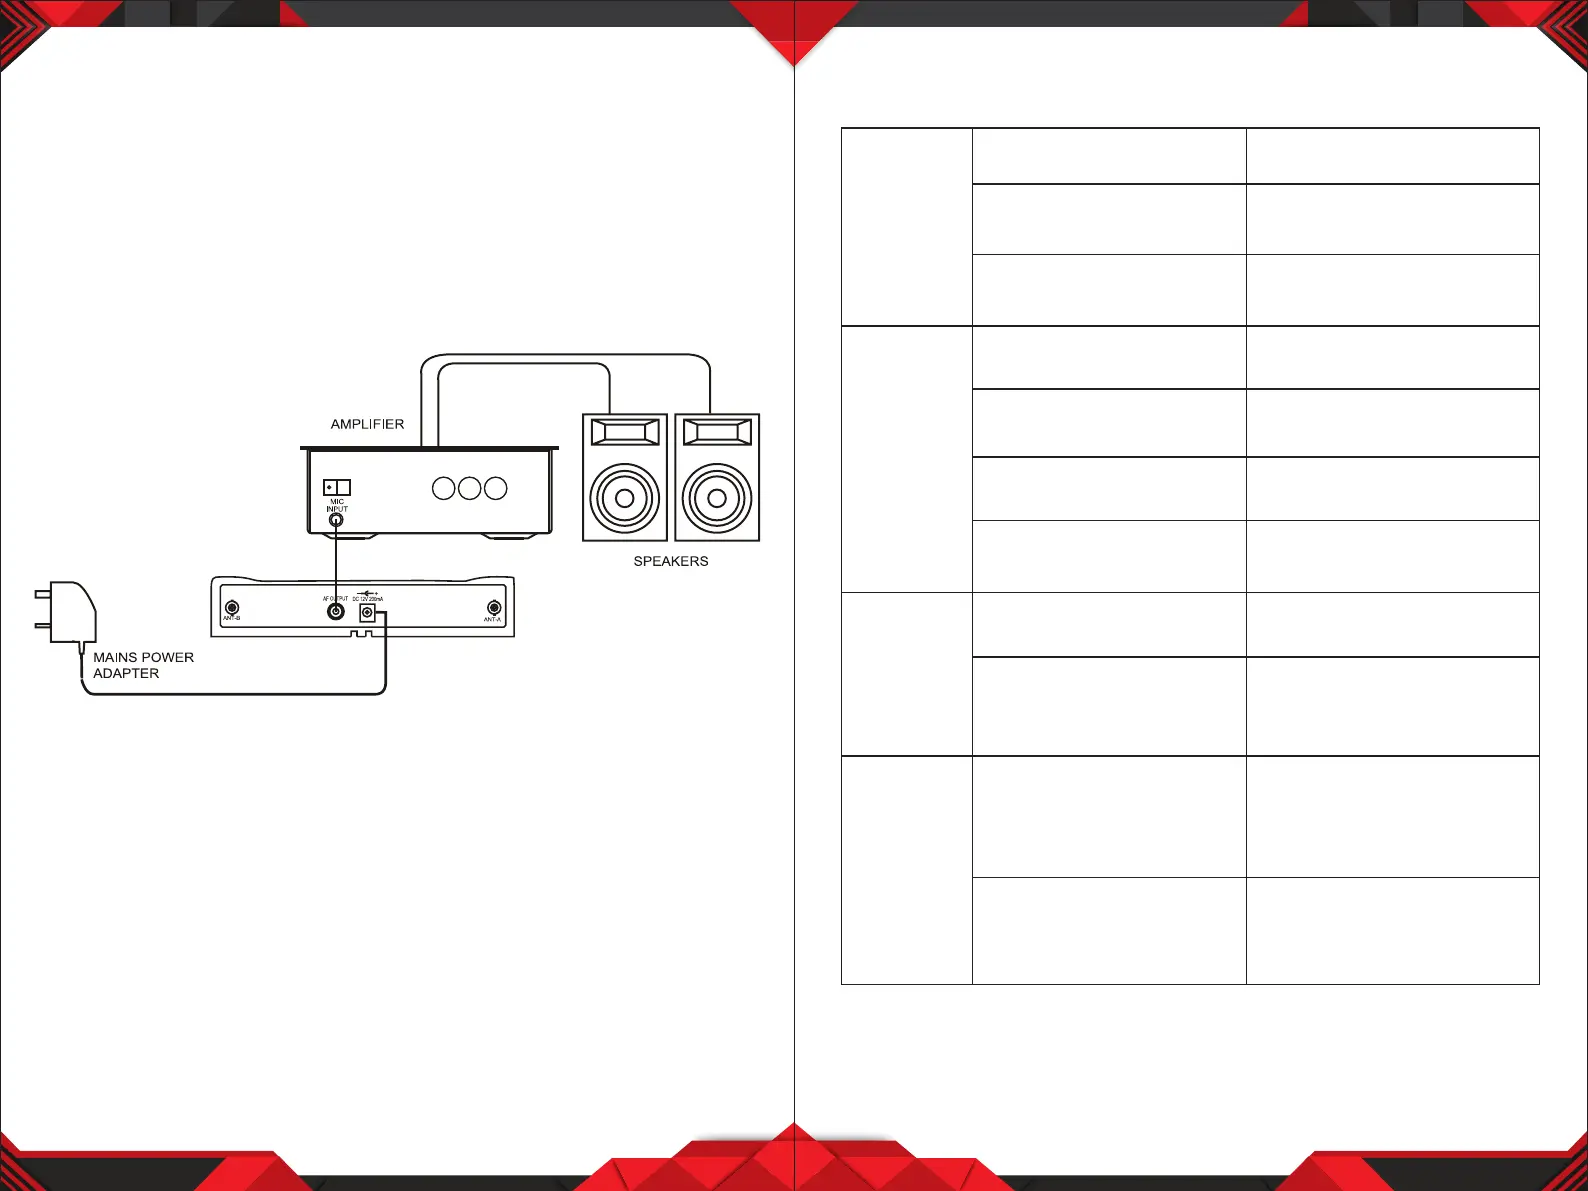
INSTALLATION
Using the supplied audio cable, connect from the AF Output jack socket to the
"MIC IN" / "LINE IN" socket on amplier. Connect the mains power adaptor
from "DC 12V" jack to a suitable mains power socket.
Installation Location:
At least 3 ft. above ground level
At Least 3 ft. away from wall
5 6
TROUBLESHOOTING
The on air
indicator
does not
light up
No sound
The sound
is distorted
A howling
noise heard
from the
speakers
The wireless microphone
is not turned on.
The microphone receiver
is not turned on
The microphone receiver is
not connected properly.
The battery in the wireless
microphone is weak.
The microphone receiver
is not turned on
The connected audio
equipment is not turned on.
The speakers/headphones are
not connected to the audio
equipment.
The battery in the wireless
microphone is weak.
The AUDIO OUT on the
receiver is not set correctly.
The distance between the
wireless microphone and
speakers are too close.
The battery in the wireless
microphone is weak
Turn ON the wireless
microphone
Turn ON the microphone
receiver and the connected
audio equipment
Turn on the microphone
receiver and the connected
audio equipment
Replace the battery
Turn on the microphone
receiver and the connected
audio equipment.
Turn on the audio equipment
Connect the speakers/
headphones
Replace the battery.
Adjust the volume controls
Move the wireless microphone
away from the speakers or
change the direction of the
microphone.
Replace the battery.