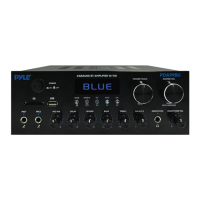
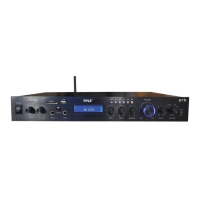
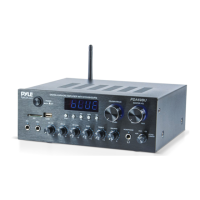
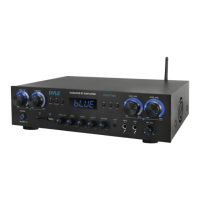
1. SD Card Reader/USB Port: For using external media on this device, just plug your
SD/USB into these ports.
2. LED Screen: All information regarding external media or this device will be
displayed from this screen.
3. Folder and track selection
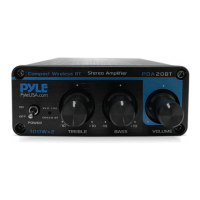
4. Master Volume Knob: Adjust the master volume.
5. Power Switch: Press this Switch to turn the unit on and o.
6. MICROPHONE INPUTS: For connecting KARAOKE or EXTERNAL MIC.
7. Microphone Volume Control Knob: Turn this knob to adjust the microphone
volume level.
8. Microphone Delay time Control Knob: Turn this knob to adjust the microphone
delay time.
9. Microphone Reverb Depth Control Knob: Turn this knob to adjust the microphone
Reverb Depth.
10. Bass Control: Turn this knob to adjust the low frequencies of L CH and R CH.
11. Treble Control: Turn this knob to adjust the high frequencies of L CH and R CH.
12. Balance: Control the volume balance from left Chanel to right Chanel.
13. Headphone Output Jack: Connect the Headphone.
14. Input Selector: Turn this button to choose the favorable input.
15. AUX Input: IPOD/MP3 JACK-IPOD/MP3 connects to this jack.
16. AUDIO INPUT: Connect the audio output jacks of DVD/CD to these jacks.
17. LINE OUTPUT: Connect the RECORD input jacks to these jacks.
18. Optical Input: Connect the Optical Output Jack frorn TV, DVD etc.
19. Coaxial Input: Connect the Coaxial Output Jack from TV, DVD etc.
20. HD 1 Input: Connect the HD Output Jack from TV, DVD etc.
21. HD 2 Input: Connect the HD Output Jack from TV, DVD etc.
22. HD Output: Connect the HD Input Jack to TV, Monitor etc.
23. SPEAKER OUTPUT: Connect your speaker system to these terminals.
24. FM ANTENNA CONNECTOR: Connect for FM antennas.
25. BlUETOOTH ANTENNA: Pull the antenna out when using Bluetooth input
26. POWER SUPPLY: Connect to AC 115V/60Hz and 230V/50Hz outlet.
27. POWER VOLTAGE SELECTOR: 115V/230V.
ww w.PyleUSA.com
6