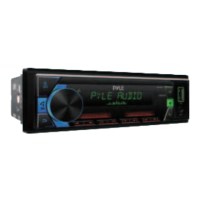
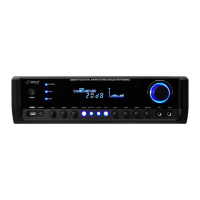
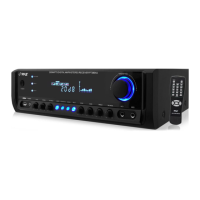
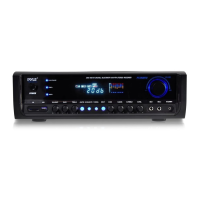
The Pyle PLML50FB is a single DIN stereo receiver power amplifier designed for car audio systems, offering a range of audio and connectivity features.
Function Description:
This stereo receiver provides AM/FM radio tuning, MP3 playback, and connectivity via USB and AUX inputs. It also features Wireless BT for hands-free calling and audio streaming. The unit includes a power amplifier to drive speakers and offers extensive audio control options.
Important Technical Specifications:
- Power Output: MAX. Power: 4x75W (300 Watts)
- Tuner: PLL Electronic Tuning Radio Tuner, AM/FM, 30 Preset Memory Stations, Switchable USA/Europe Tuner Frequencies by Software
- Display: LCD Display
- Connectivity: USB port (Max. USB Support: 64GB), AUX IN (3.5mm auxiliary input), Integrated Microphone (MIC input), ISO with 4 Pin/8 Pin Wire Connector
- Audio Control: 25EQ/Fader/Balance, No Treble & Bass, Preset EQ (Flat/Pop/Rock/Class/Off), Bass Boost, Loudness, Subwoofer Set (ON/OFF), X'Over (Tweeter/Front HPF/Rear HPF/Subwoofer LPF), Q Factor (1/1.5/2.5/3.5 different Q factor value), DTA Setting (Position/Distance/Gain/Data Reset/Delay Unit), Car Type (Small/Medium/Large)
- Illumination: Night illumination: RGB, Color Select (Spectrum/ID3 tag/Version/Dimmer)
- Power: DC 12V, Current Consumption: 10A
- Battery (Remote Control): Requires (1) Coin-Type Battery, Battery Type: 3V Lithium Bat. 240mAh Capacity
- Dimensions: Product Dimension: 4.5" x 7.1″ x 1.97" - inches
- Voice Control: SIRI or GOOGLE voice access via Wireless BT (phone must support SIRI or GOOGLE voice)
- App Control: DSP Smart Android/iOS App Control
Usage Features:
- Installation: Requires a preparation kit for mounting. The unit involves separating the chassis from the housing, installing a mounting knob, and securing it into the dash. Proper wiring according to the diagram is crucial, connecting to a 12 Volt power source with adequate ground.
- General Operation:
- Power ON/OFF: Press the (Power)/Mode button on the front panel or the power button on the remote control.
- Volume Control: Rotate the VOL knob on the front panel or use VOL+ ▲/VOL-▼ buttons on the remote control.
- Mode Selection: Press the (Power)/Mode button to switch between RADIO, BT (Wireless BT), USB, and AUX-IN modes.
- Clock Setting: Press and hold the CLK button to set the time and minutes using the ◄◄ or ►►I buttons.
- Loudness: Press the LOUD button on the remote control to boost bass output frequency.
- Equalizer: Press the EQ button on the front panel or remote control to switch between EQ, OFF, CLASS, ROCK, POP, FLAT.
- Radio Operation:
- Band Selection: Press the BAND button to switch between FM1, FM2, FM3 bands. Each band stores up to six preset stations.
- Manual Tuning: Press and hold the ◄◄ or ►►I button to enter manual tuning mode, then press briefly to adjust frequency.
- Auto Seek Tuning: Quickly press the ◄◄ or ►►I button to move to the next/previous available station automatically.
- Storing Presets: Tune to a desired station, then press and hold a preset button (1-6) for over 2 seconds.
- Recalling Presets: Briefly press a preset button (1-6).
- Automatic Store (AMS): Press and hold the AMS button for over 2 seconds to store six strong stations in the current band. Briefly press AMS to recall presets.
- LOCAL/DX: Use the LOC button on the remote control to switch between local (strong signals) and distant (weaker signals) reception modes.
- STEREO/MONO: Use the ST button on the remote control to switch between FM STEREO and MONO audio effects for improved reception with weak signals.
- USB Operation:
- Playback: Insert a USB device into the USB port; songs will play automatically.
- Eject: Press the ►II button to stop playback, then remove the USB device.
- Play/Pause: Press the ►II button.
- Track Navigation: Press ►►I for next track, ◄◄ for previous track.
- Fast Forward/Backward: Press and hold ►►I for fast forward, ◄◄ for fast backward.
- Introduction Scan (INT): Press the INT button to play the first 10 seconds of each track.
- Repeat (RPT): Press the RPT button to repeat the current track.
- Random (RDM): Press the RDM button to play tracks in random order.
- Track/Folder Navigation: Use 5/-10 and 6/+10 buttons to navigate 10 tracks backward/forward or previous/next folders.
- Direct Track Selection: Press and hold AMS, then use volume control and ◄◄ button to input track number.
- Auxiliary Input Operation: Plug an MP3 player into the 3.5mm AUX IN jack and switch to AUX input mode using the MODE button.
- Wireless BT Streaming Operation:
- Pairing: Enable BT mode on your mobile phone, search for "PYLEAUDIO," and select it to pair. The BT logo will stop flashing once connected.
- Hands-Free Calling:
- Make a Call: Dial directly from the phone or press the button on the control panel to access dial mode, then use remote control buttons (0-9, *, #) to input the number. Press to make the call.
- Redial: Press and hold the button on the control panel.
- Answer/Reject/End Call: Press the button on the control panel.
- Switch Audio: During a call, rotate the VOL knob to switch audio between car audio and mobile phone.
- Adjust Talk Volume: Use VOL knob or VOL+▲/VOL-▼ buttons.
- Audio Streaming (A2DP): Enter BT mode, music from a paired device will play automatically. Use ◄◄ or ►►I for next/previous track, ►II for pause/resume.
- Control Panel Buttons: Detailed descriptions for each button including Power/Mode, SEL/VOL, Back, Display Clock/Illumination, Folder Up/Down, RPT, RDM, Play/Pause, INT, Band/SIRI/Phone Call, Tune Back/Forward, IR sensor, LCD screen, AS, USB port, AUX IN, MIC input, MUTE, RESET.
- Remote Control: Comprehensive list of buttons and their functions, including Power, Volume, Band, Tune/Track, SEL, Mute/Delete, Clock/End Call, Play/Pause, INT, RPT, RDM, -10/+10 tracks, ST, LOUD, AMS, MODE, EQ, LOC/DX.
Maintenance Features:
- Remote Control Battery Replacement: Instructions for removing the insulating sheet and replacing the lithium cell battery (CR2025). Ensure correct polarity (+ facing upward).
- Troubleshooting:
- No Power: Check vehicle's engine switch (ACC or ON), cable connections, and fuse.
- No Sound/Distorted Sound: Check volume/mute settings, installation angle (should be less than 30°), and cable connections.
- Operation Keys Not Working: Press the RESET button (located behind the front panel, accessible after releasing it) to restore the micro-computer program.
- Radio Noise/Poor Reception: Select stronger stations, ensure antenna cable is firmly connected.
- Preset Station Reset: Check battery cable connection; it should be connected to a constant live terminal.
- Reset System: The RESET button is used to restore all factory settings, useful if the LCD screen malfunctions, sound is distorted, or controls are disabled. It requires removing the front panel and pressing the button with a thin object for over 6 seconds.
California Prop 65 Warning: This product contains Nickel carbonate, known to the state of California to cause cancer birth defects and other reproductive harm. Do not ingest. For more information, refer to www.P65warnings.ca.gov.