12
LIGHTCAMERA USER GUIDE
ADVANCED SETTINGS CONFIGURATION
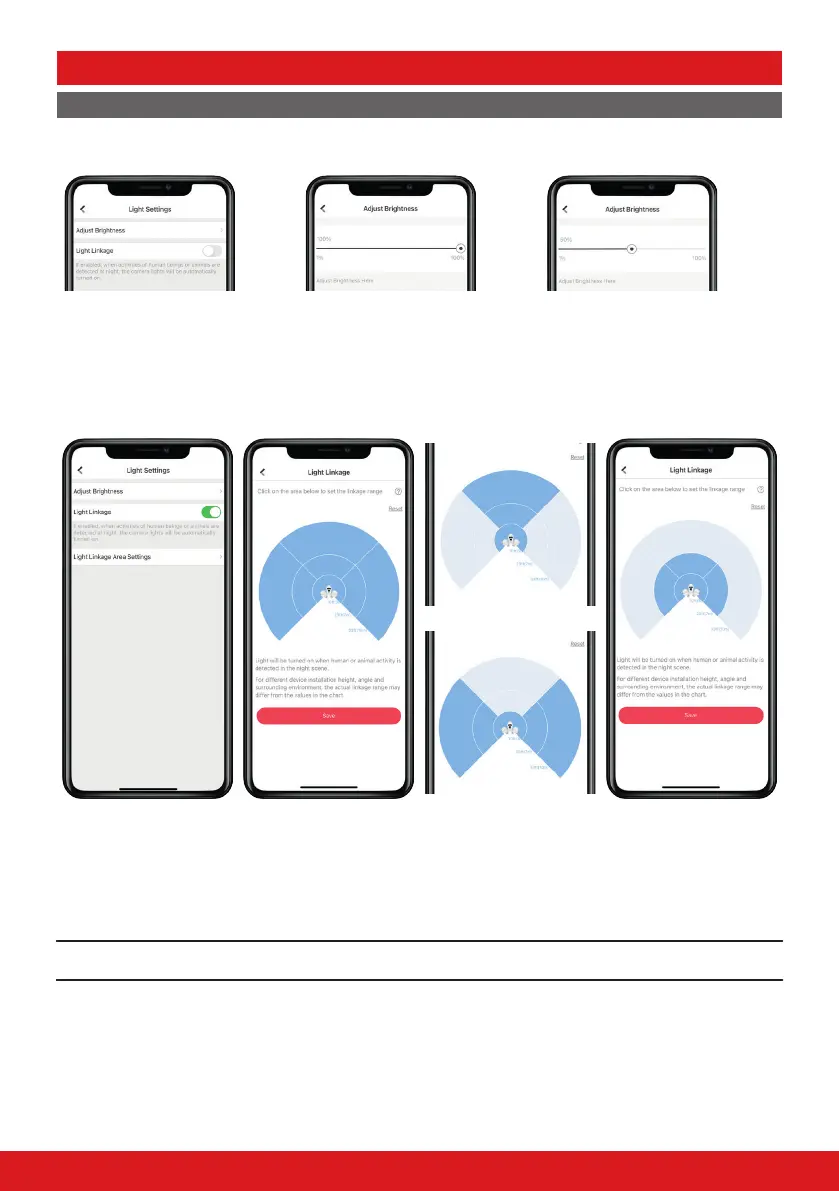
LIGHT SETTINGS
ADJUST BRIGHTNESS
Step 1
Select ‘Adjust Brightness’.
Step 2
Use the slider to adjust how bright
the ood lights are when activated.
Step 3
Select the ‹ icon in the top left
corner to return to the previous
menu.
LIGHT LINKAGE
Step 1
If the light linkage slider
is disabled, enable it by
tapping the slider then
tap the ‘Light Linkage
Area Settings’.
Step 2
This screen shows the
current detection zone
which will trigger the
ood lights to illuminate.
Step 3
The detection area can
be edited by tapping the
zones. Blue areas are still
active.
Step 4
Once the detection area
is nalised, click ‘save’.
Please note: This section denes the area that causes the PIR sensor to trigger the ood lights.