16
LIGHTCAMERA USER GUIDE
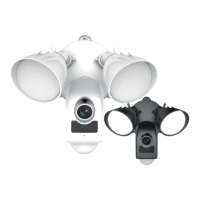
LIGHTCAMERA SOUND MODE
Sound volume
Choose between the three volume levels of:
• Intensive
• Soft
• Mute
Light
Tap the slider to toggle whether the device’s ood light comes
on when the LightCamera is triggered.
Please note: Enabling the ‘Light’ option links the ood
light activation to the cameras motion. If the camera is
triggered at night and the device illuminates, this may
attract insects such as moths which in turn may trigger the
camera further.
NETWORK SIGNAL
Excellent Good
Fair Weak
> -50dBm -50 to -60 dBm -61 to -70 dBm < -71dBm
The signal strength between the LightCamera and the router is displayed in dBm (decibel-milliwatts). As it is
displayed in negative numbers, bear in mind that -30dBm is a stronger signal than -60dBm.
Please note: Typically, the LightCamera will work in the ‘Fair’ category, however we recommend that the
LightCamera is only installed in either ‘Excellent’ or ‘Good’ locations.
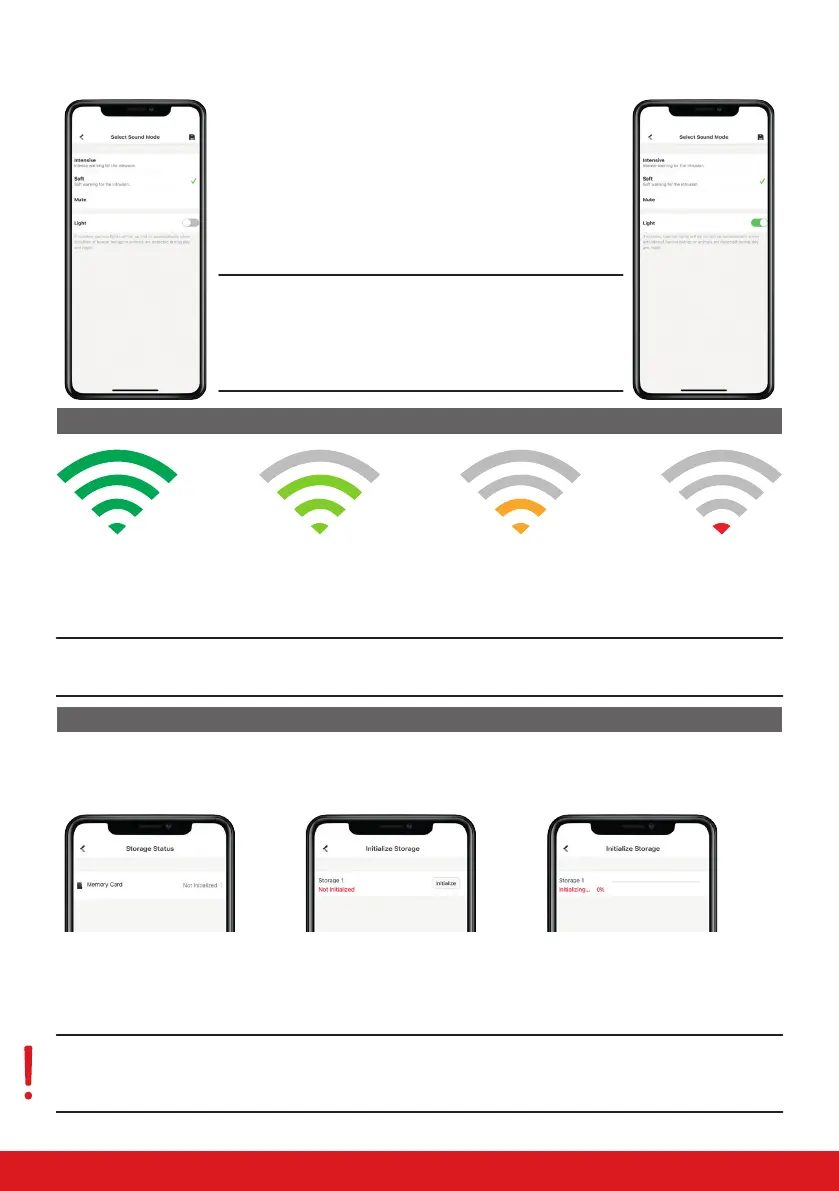
STORAGE STATUS
INITIALISING MEMORY CARD
Before the MicroSD card can be used, it needs to be initialised.
Step 1
Select ‘Memory Card’.
Step 2
Tap ‘Initialise’.
Step 3
Wait for the camera to format
the card. When it reaches 100%,
initialisation is complete.
Please note: In order to record video on the devices, they must be tted with a Class 10, U1 MicroSDHC
card. This is important for the camera to be able to record correctly at HD to full HD.
The maximum size for an SDHC card is 128GB.